Webhooks Section
Esta página aún no se encuentra traducida al español.

Overview
Configure webhooks to set triggers that automatically send event data to another server in real time. This feature allows data collected by Cotalker to be sent and used in other systems. For example, a user can submit a form powered by Cotalker, and the data is immediately sent to an external server for further use. Things like purchase orders, maintenance notifications, and much more can be easily shared with other systems. Webhooks expand Cotalker's capabilities, making it the all-in-one solution your company needs.
Webhooks can be set for various types of triggers: users, tasks, surveys, and elements. The webhook sends the event's data to the specified server whenever the selected type is created, modified, or removed. User logout can also be set as a webhook trigger.
- Sequential webhook triggers are always sent and received in the corresponding order in case of a server failure. Let's say an event type is set off more than once, the events will be sent in linear order. This means that following events will be sent only after the previous event is received by the server. For example, let's say three tasks have been created, the first task event is sent automatically, the second is sent after the server receives the first one, and the third after the second.
- If a webhook fails, after 30 seconds it will try –up to two more times– to send the triggered event data to the server.
External servers must be configured by their corresponding admins to receive the webhook data.
Accessing Webhooks
To access the Webhooks sections:
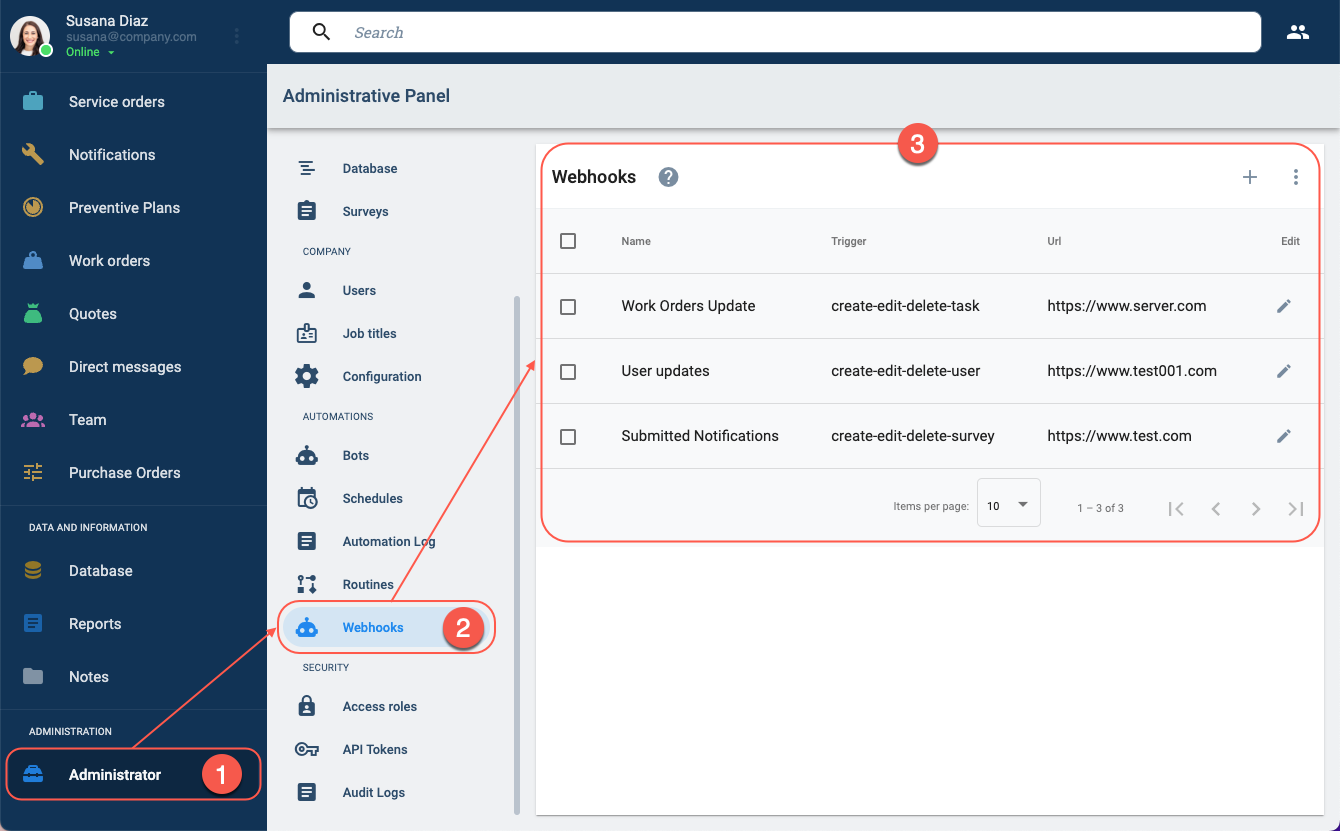
- Press Administrator on the Main Menu Bar.
- In the Administrative Panel, select Webhooks.
- The Webhooks Panel opens up.
Webhooks Panel Layout
From this panel, you can create, edit, and disable webhooks.
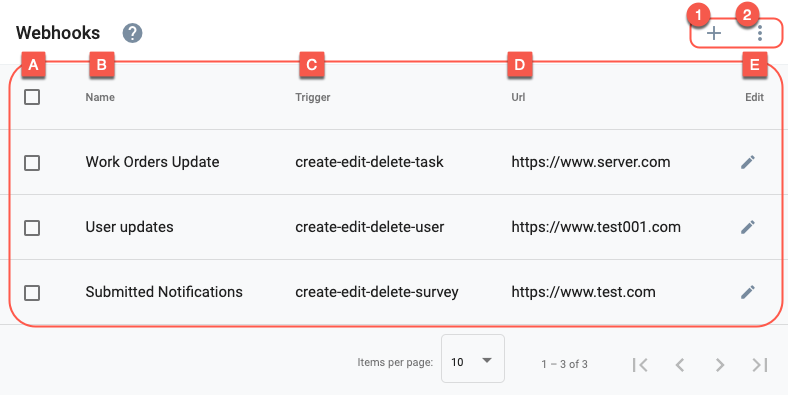
Actions:
- 1. Create Webhook: Allows you to create a webhook.
- 2. More options: Allows displaying disabled webhooks.
Table and Options:
- A. Checkbox: Permits selecting one or more webhooks for deactivation.
- B. Name: The Webhook's name. Descriptive names are recommended.
- C. Trigger: Indicates the type of event that triggers the webhook.
- D. Url: Indicates the server URL to which the webhook sends the data.
- E. Edit: Allows you to edit a webhook.
Create Webhook
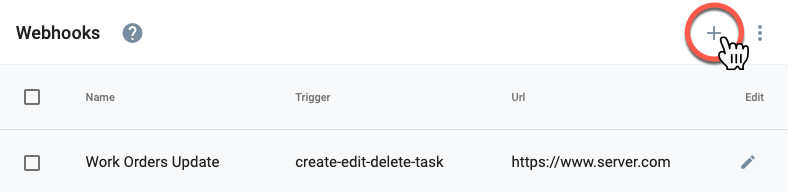
To create a webhook, press the + icon in the upper right corner. The Settings Panel opens up.
Edit Webhook
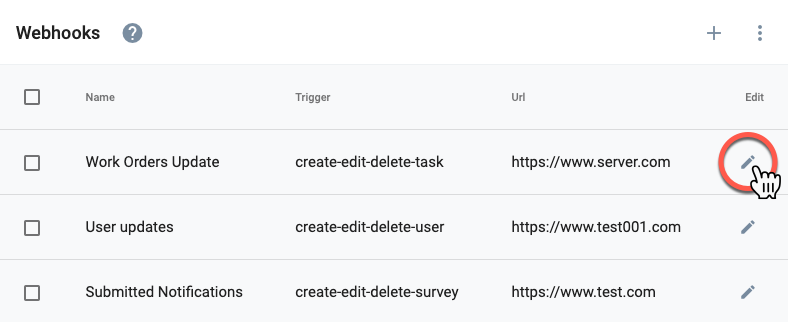
To edit an existing webhook, press the pen icon on the corresponding row. The Settings Panel opens up.
Settings Panel
The webhooks settings panel is described below:

Actions:
- 1. Activate/Deactivate: Permits activating disabled webhooks and vice versa.
- 2. Save: Saves the current configuration.
Configuration:
- A. General information: Basic webhook settings.
- B. Logs: Registers each time an event triggers the webhook.
A. General information
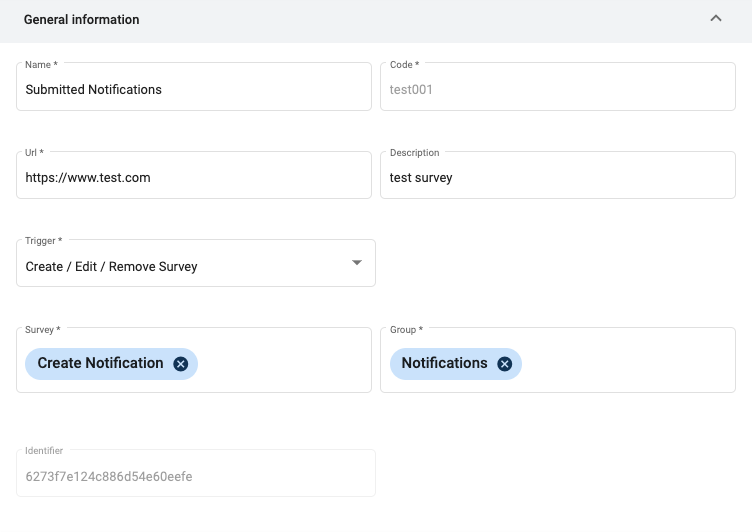
This is the webhook's unique identification. Only lowercase letters, numbers, and underscores are allowed. After filling out the Name field, the system automatically generates a suggestion for the Code.
Indicates the type of event that triggers the webhook.
Events are classified into three groups:
- Create/Edit/Remove User
- Create/Edit/Remove Task
- Create/Edit/Remove Survey
- Create/Edit/Remove Element
- Edit Note
- User Logout
Upon any change, i.e., creation, modification, or deletion of the indicated event, the webhook is automatically triggered and sends the event data to the server.
When task events are chosen, the Workflow field appears to indicate the workflows to be monitored.
When survey events are chosen, the Survey and Group fields appear to indicate the groups and surveys to monitor.
Go to COTEvent for details about event trigger data models.
B. Logs
Check the COTWebhookLog for the log data model details.
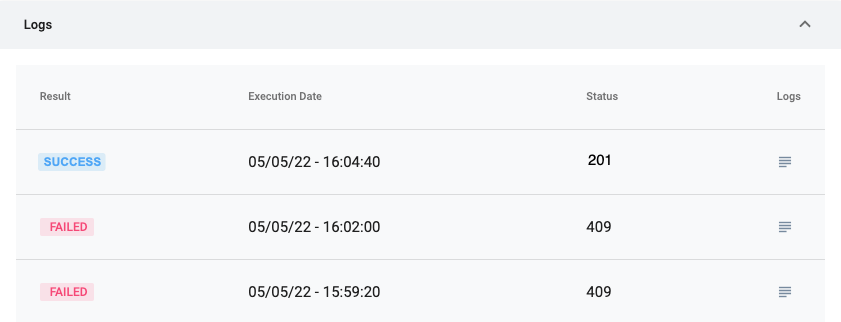
Status codes ranging from 200-209 are interpreted as a SUCCESS.
Returned status codes in the range of 300's, 400's, 500's are considered as FAILED.
Opens a panel with event data that was sent and the response from the server. Event data is sent in JSON format and follow the COTTask, COTUser, and COTSurveyExecution data model structures, respectively.
Log data can be easily copied to your clipboard for further use.
Below are some log examples taken from user and task triggers.
Log sample of user event trigger:

In this case, a user's name and avatar were changed. Only the edited COTUser fields are sent.
Task event log:
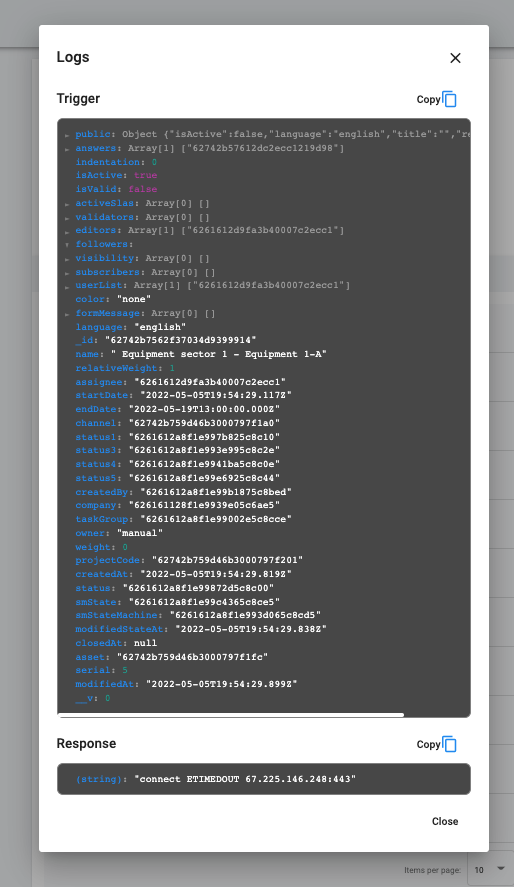
This log contains a COTTask data model and was triggered by the creation of a task within the specific workflow.
Related Topics
- Webhooks API Documentation: API tools for configuring webhooks and obtaining the data they send.
- COTWebhook: Data model in which a webhook's configuration is stored.
- COTEvent: Trigger event data models. COTEvent data can be viewed in webhook logs or as an object within COTWebhookLog.event.
- COTWebhookLog: COTWebhookLog objects contain all of an event's webhook log data.
- COTSurveyExecution: COTSurveyExecution is found within COTEvent objects and contains submitted survey data in the form of COTMessage objects.