Create Survey-Triggered Parametrized Bot
Esta página aún no se encuentra traducida al español.
Tutorial on how to activate a bot after submitting a survey.
Time: 25 minutes
Company Requirements
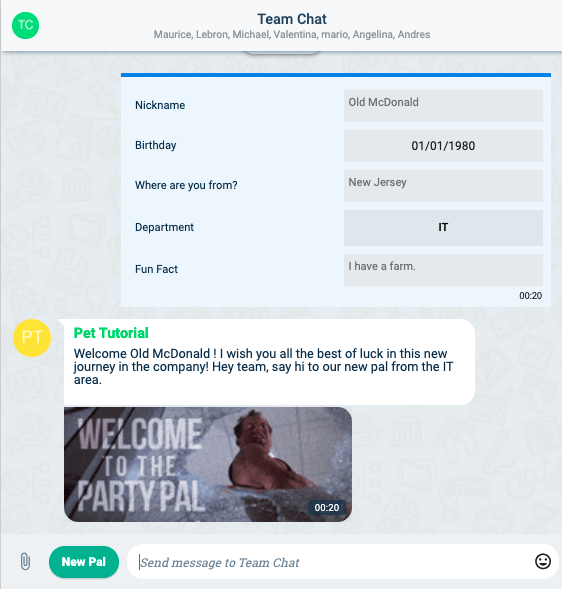
We want to improve HR's idea exposed in the Create Survey Tutorial for welcoming new employees. To help break the ice, we propose that every time an in-coming employee answers the "New Pal" survey, a bot representing the company mascot or some fictional character welcomes them with a message and an animated gif.
The welcoming message would go something like this:
Welcome {nickname}! I wish you all the best of luck in this new journey in the company! Hey team, say hi to our new pal from the {department} area!
Pre-Requisites
Access Role
- User with the
admin-groups-write,admin-properties-writeandadmin-bots-writepermissions to create and modify groups, databases and bots. - Or the
admin-*-writewhich allows all of the above. - User with the
read adminaccess role .
Survey
- Having completed the Create Survey Tutorial
User
- Having completed the Create User Tutorial
- A fictional character or company mascot created as a user. We will need to use their email address later on in the tutorial.note
In this example,
pet@cotalker.comis the email of the created pet/fictional user.
Steps
I. Create the Bot
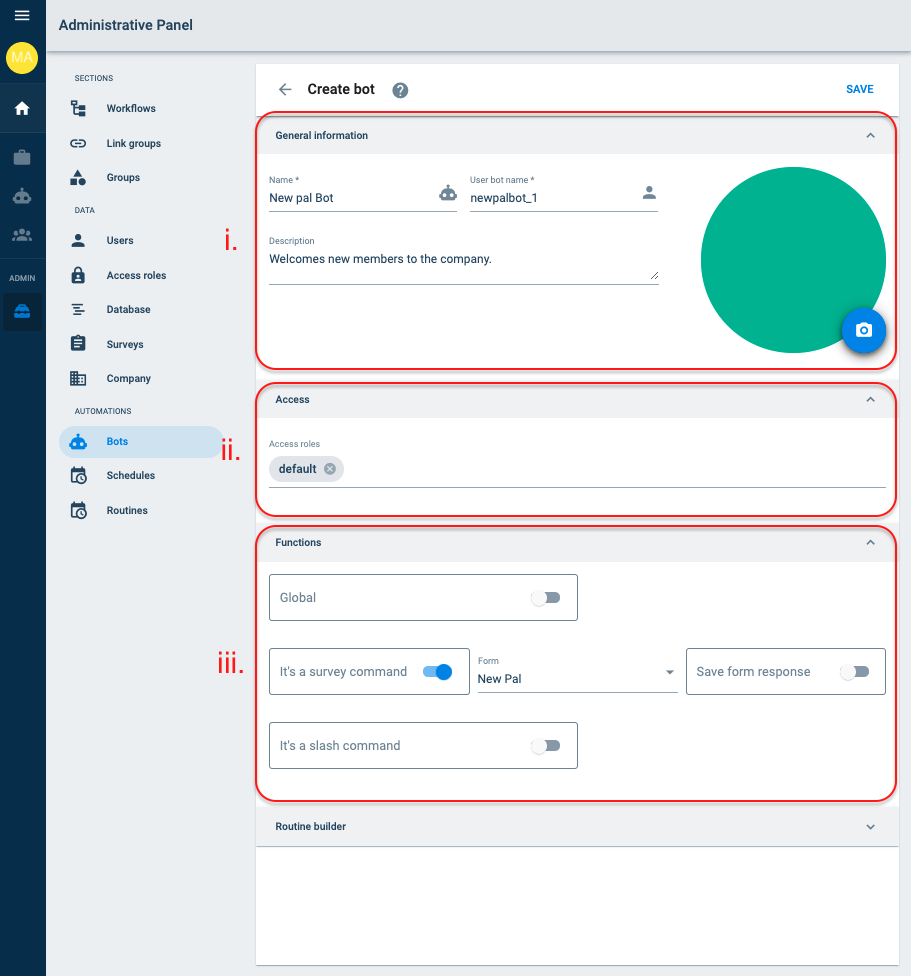
- Access the Administrator and open Bots.
- Press + icon to create a new bot.
Set up the following:
In the General information section, set:
- Name:
New pal bot - Code:
newpalbot_1 - Description:
Welcomes new members to the company.
- Name:
In the Access section, set:
- Access Roles:
default
- Access Roles:
In the Functions section, set:
- It's a survey command: activate option
- Form:
New pal
So far, your screen should look something like this:
Build the routine:
- In the Routine builder section:
- Press the + Add Routine button.
- New settings will appear.
You should see something like this:
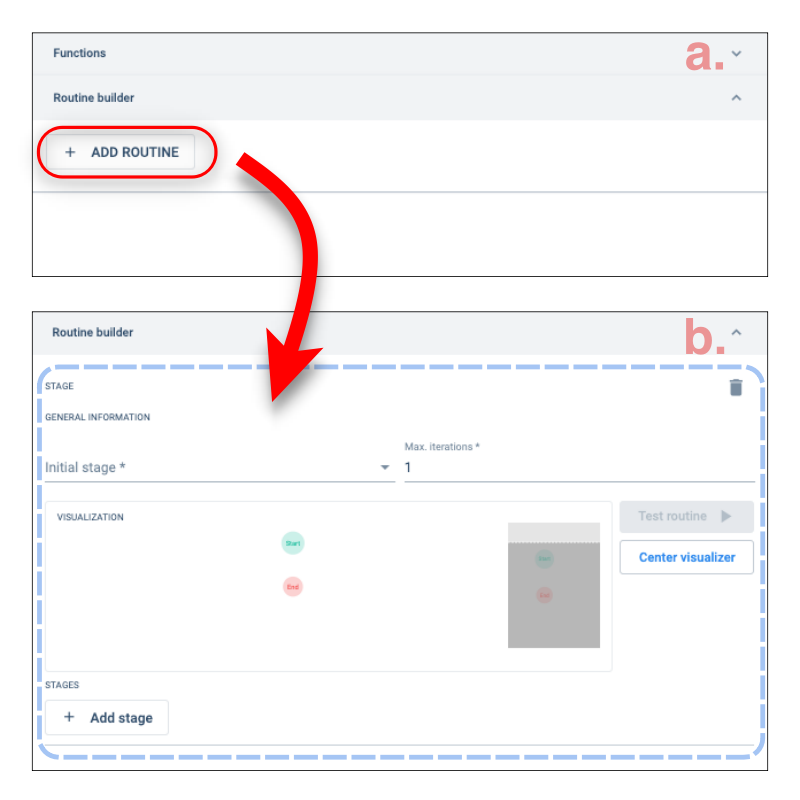
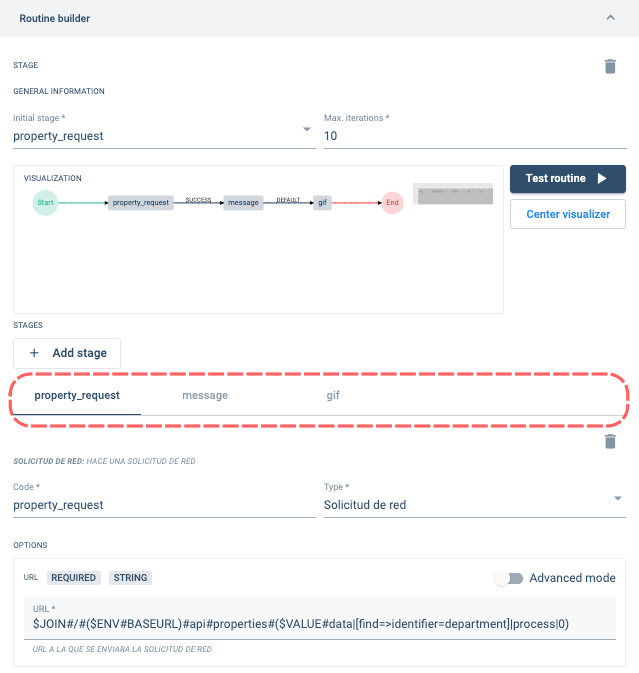
- Add the first stage by pressing the + Add stage button, and set the following:
- Code:
property_request - Type:
Network Request - URL :
$JOIN#/#($ENV#BASEURL)#api#properties#($VALUE#data|[find=>identifier=department]|process|0)noteThe Cotlang string in the URL field gets the department's URL address.
- Method: GET
- Default authentication: activate option
- Code:
- Scroll back up the Routine builder section to add the second stage by pressing the + Add Stage button again. Set the following:
- Code:
message - Type:
Send Message - Content:
$JOIN# #Welcome#($VALUE#data|[find=>identifier=nickname]|process|0)#! I wish you all the best of luck in this new journey in the company! Hey team, say hi to our new pal from the#($OUTPUT#property_request#data|name|display)#area. - Content type:
text/plain - User:
($CODE#user#email#pet@cotalker.com)|_idnoteThis [Cotlang] string will return the COTuser that matches the email pet@cotalker.com and then obtain its id.
- Channel:
$VALUE#channelnoteThe context being accessed is COTanswer.
- Code:
- Scroll back up and press + Add Stage to add the third stage. Set the following:
- Code:
gif - Type:
Enviar Gif - In Búsqueda, press the + Add item, and set:
- Item:
Welcome Pal
- Item:
- Channel:
$VALUE#channel - User:
($CODE#user#email#pet@cotalker.com)|_id
- Code:
- Scroll back up again and set:
- Max. Iterations:
10 - Initial Stage:
property_request
- Max. Iterations:
- Select the property_request stage. Then, scroll to the bottom of the section and configure the following:
- Under Outputs, in the Succeed field:
message
- Under Outputs, in the Succeed field:
The stages can be selected from this menu bar:
- Select the message stage. Scroll to the bottom of the section and configure the following:
- Under Outputs, in the Default field:
gif
- Under Outputs, in the Default field:
- In the Routine builder section:
- Press Save.
II. Configure the Channel
- Access the Administrator and open Groups.
- Press the group that has the channel with the whole team.note
The team channel was created in the Create Survey Tutorial.
- Press the channel where the whole team is found.
- Configure the Participants section:
- Bots:
New pal bot
- Bots:
Your screen should look something like this:
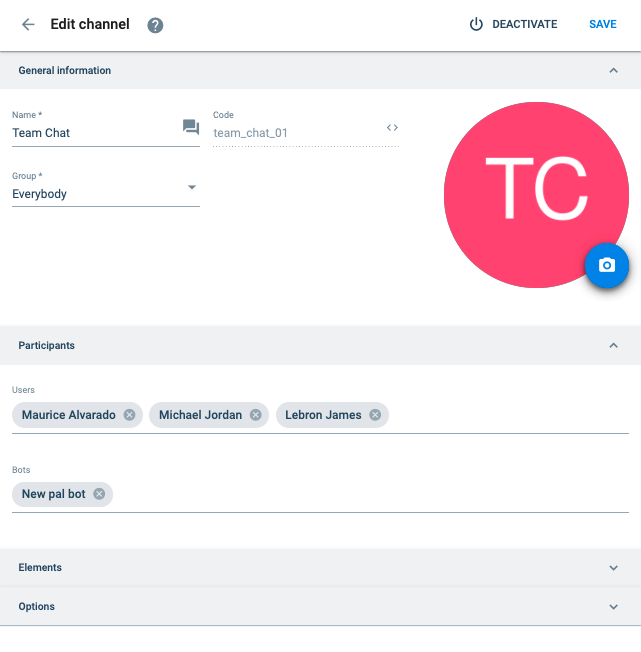
- Press Save.
Congratulations!
Now that you finished, go to the team channel and try to send the New Pal survey.
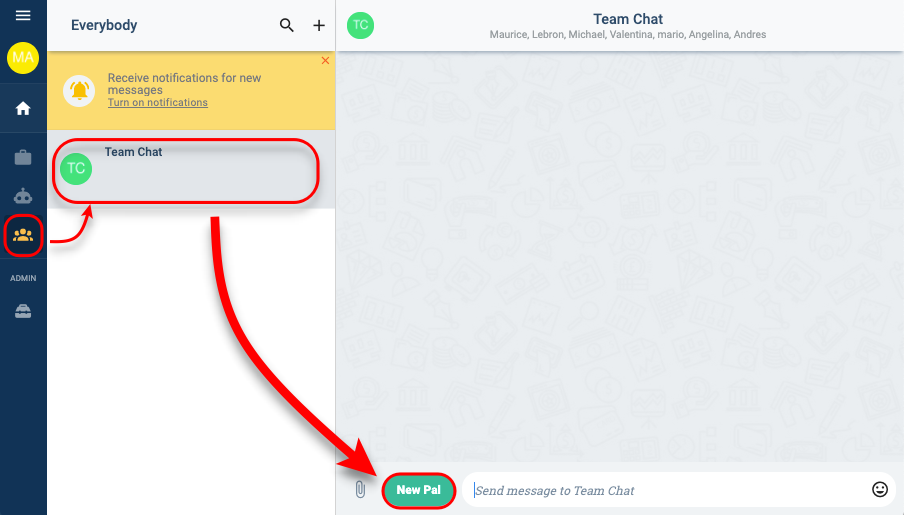
Result
After submitting the survey, you should see a message like the following in the channel chat window :