Create a Workflow
Esta página aún no se encuentra traducida al español.
Tutorial on how to create a workflow that can process tasks through five different states.
Time: 30 minutes
- Tasks can represent anything that has to be done. They exist within workflows.
- A workflow is the process through which tasks go through.
- Each step of a workflow process is called a state. Users can be given access to see and modify the current state of a task in a workflow.
- Workflows are part of workflow groups. A workflow group can have various workflows which can be interrelated.
- Each task has its own channel for messaging and sharing files. They can also include notes or even be programmed with SLAs.
Company Requirements
The company requests a task manager. For now, they only want to see a demo. Therefore, we will create in this tutorial a simple task manager. If they were to like the demo and sign up for this service, configuring the actual workflows and expanding to all departments will be more complicated. You'll get a complete walkthrough on creating complex workflows in the advanced tutorial section.
For this demo, you will create a task manager with the following characteristics:
- Workflows must include five available task states:
- Backlog
- Doing
- Waiting
- Ready
- Not implemented
- Tasks must be able to be categorized by task importance:
- High
- Normal
- Low
- Tasks must be able to be assigned to Departments.
These characteristics will be represented through collections and their respective elements.
Tutorial Objectives
- A. Create a workflow group.
- B. Create a workflow.
- C. Configure workflow states.
- D. Complete workflow group configuration
Pre-Requisites
Access Role
- Due to the scope of interactions needed to create a workflow, it is best if your user profile's access role counts with the
admin-*-writepermission that grants access to the entire Administrative Panel. - You will later need to set the permissions users must have to view and edit workflow tasks. In this tutorial, we will suggest using the
admin-accesspermission for both reading and writing in the workflow group. We recommend you add this permission to your access role, as well, in order to test your workflow.
Database
- If you completed the Create Collection Tutorial, then you already have the collection that represents company departments. If not, we suggest completing the tutorial.
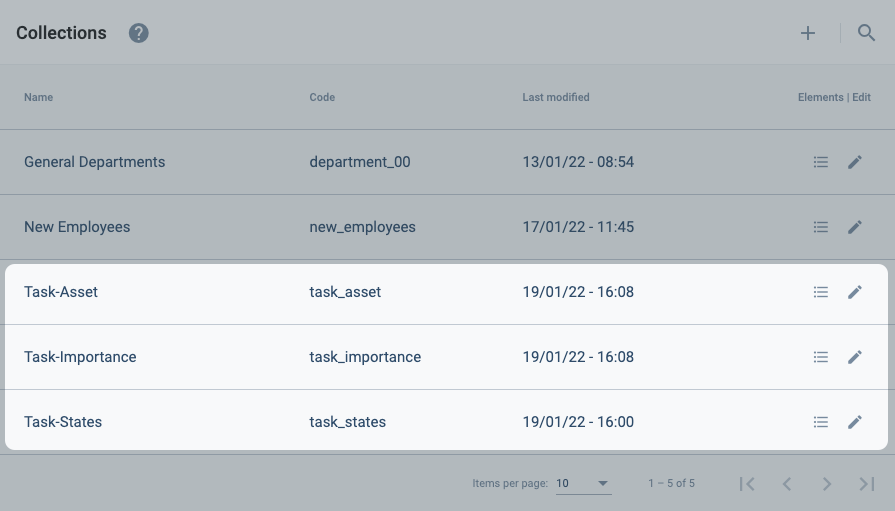
- You will also need to have previously created the collections, and their respective elements, that will represent the task states, task importance, and tasks as assets. Below, in the Tutorial Tip, is an example of how the collections should look like.
The three collections that need to be created: Task-Asset, Task-Importance, and Task-States.
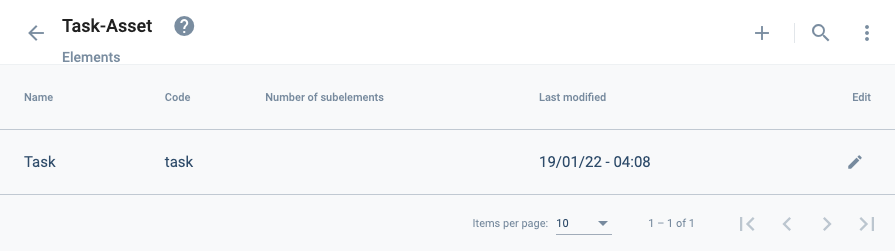
- Task-Asset collection elements:
- Task
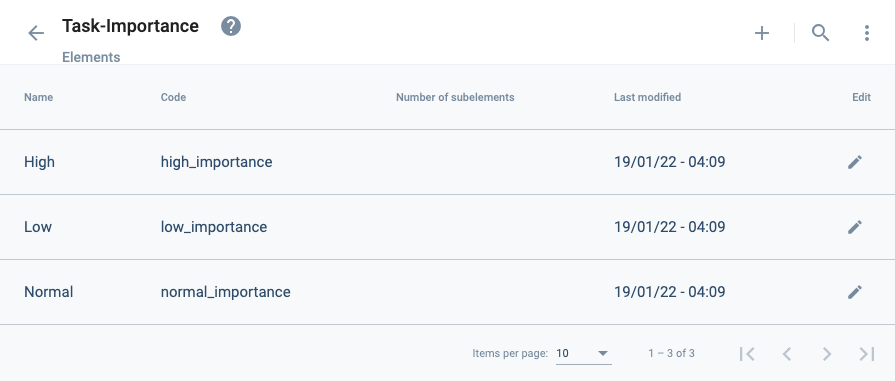
- Task-Importance collection elements:
- High
- Normal
- Low
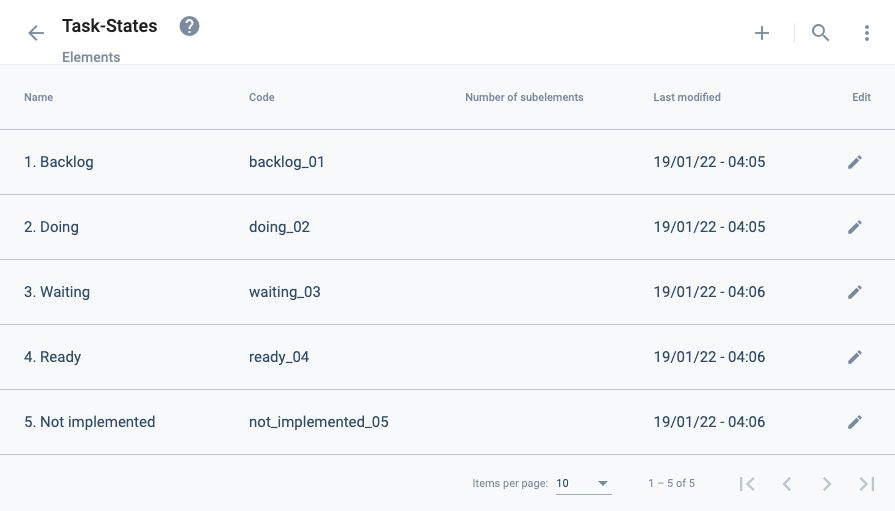
- Task-States collection elements:
- 1. Backlog
- 2. Doing
- 3. Waiting
- 4. Ready
- 5. Not implemented
Note: The code for each collection and element will be up to you.
Steps
A. Create a Workflow Group
I. Go to the Workflow section.
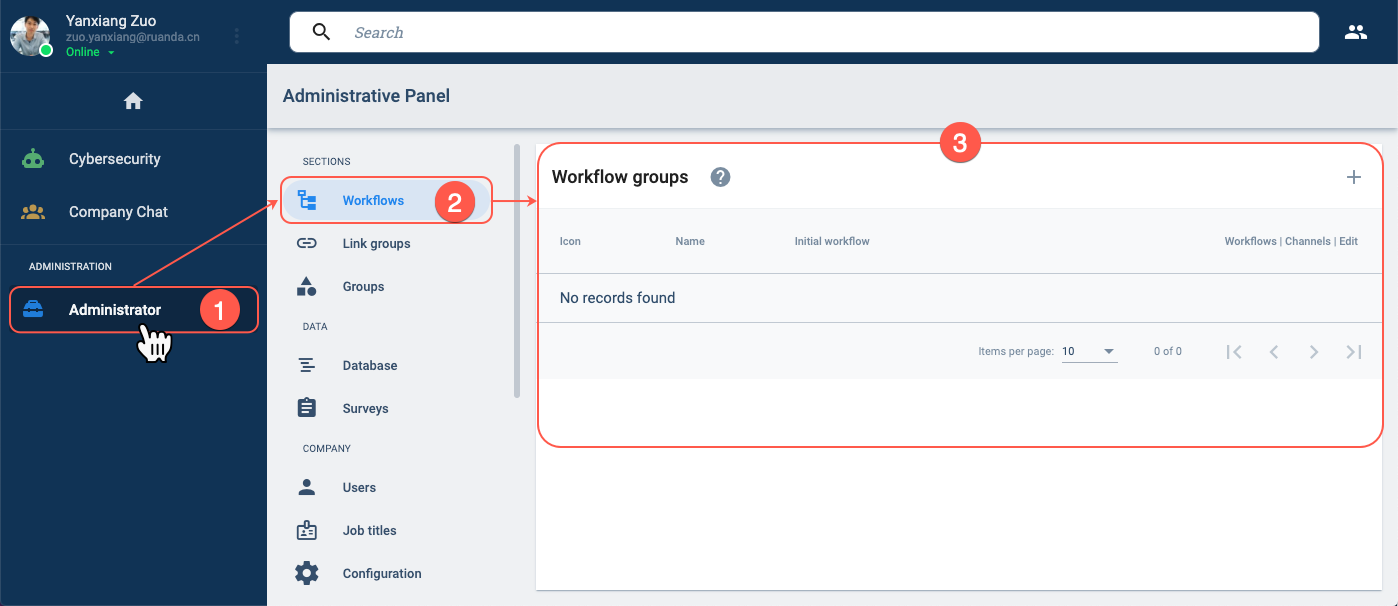
- From the Main Menu Bar, press the Administrator button.
- In the Administrative Panel, select Workflows.
- The Workflow groups section opens up.
II. Open the Create Workflow Group settings panel.
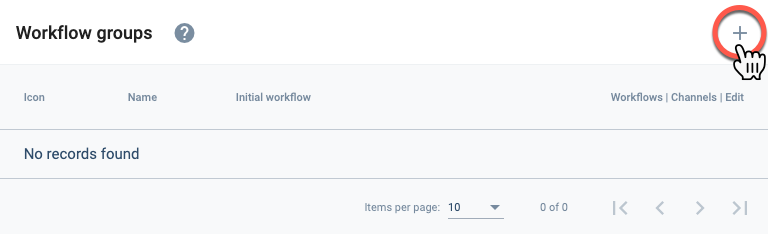
- Press the + icon in the upper right-hand corner to open the Create workflow group settings panel.
III. Configure basic workflow group settings.
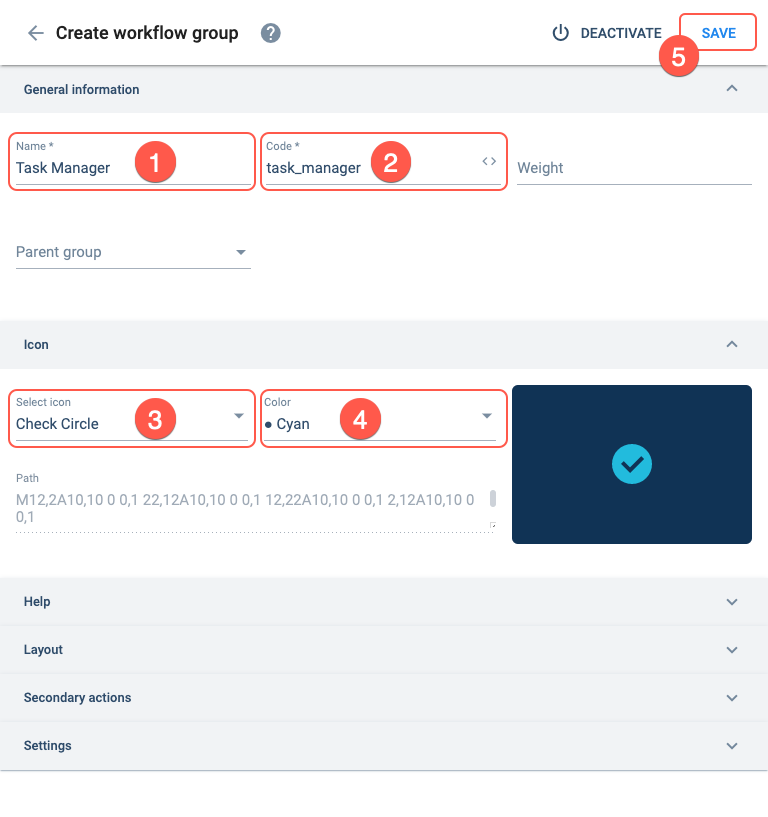
- Name: Task Manager
- Code: task_manager
- Select icon: Check circle
- Color: Cyan
- Press Save. The Create workflow settings panel will open up.
B. Create a Workflow
I. Set up basic workflow settings.
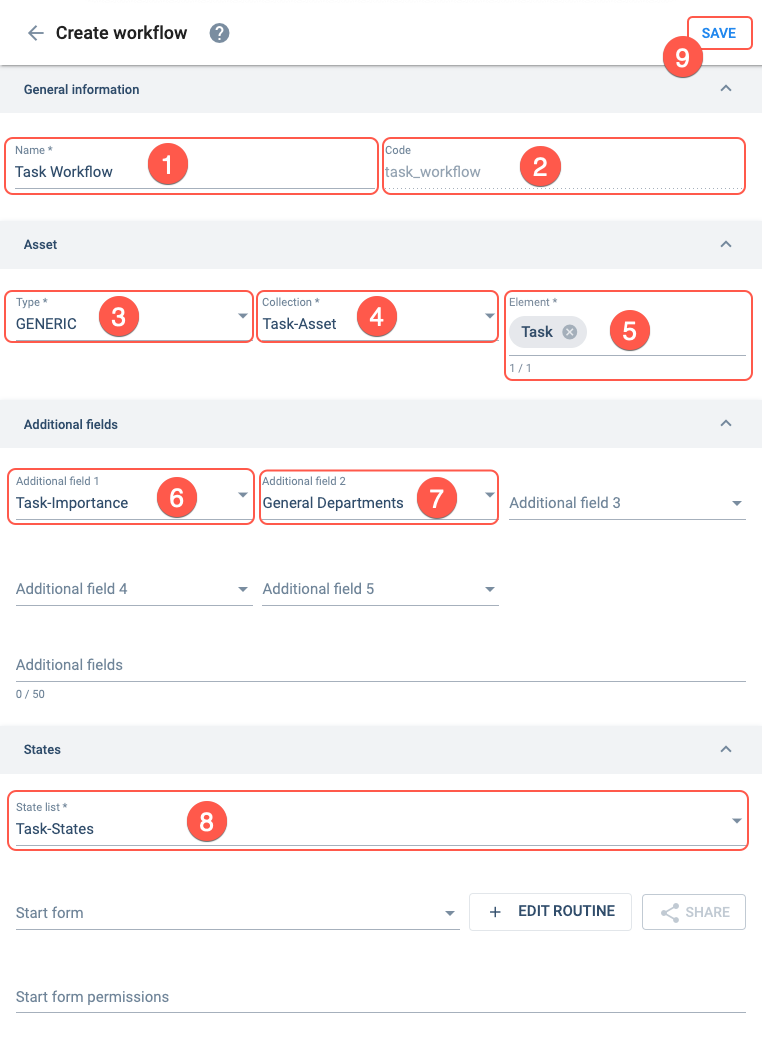
- Name: Task Workflow
- Code: task_workflow
- Type: Generic
- Collection: Task-Asset
- Element: Task
- Additional Field 1: Task-Importance
- Additional Field 2: General Departments
- States List: Task-States
- Press Save. The State creation settings panel will pop up.
C. Configure Workflow States
I. Set up basic state settings.
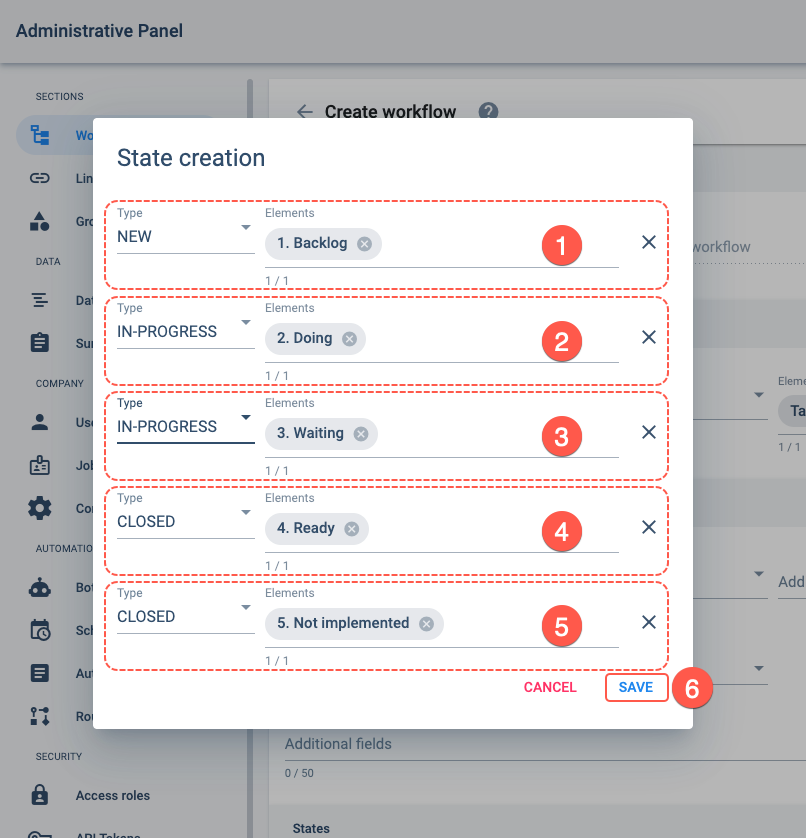
An automatically-generated list of task states appears in the pop-up settings panel. Make sure the state type is correct for each corresponding element.
- Backlog: NEW
- Doing: IN-PROGRESS
- Waiting: IN-PROGRESS
- Ready: CLOSED
- Not implemented: CLOSED
- Press Save. You will be taken back to the Create workflow settings panel.
Be careful to indicate the correct state types for each element representing a state because they cannot be changed afterward.
II. Confirm initial state.
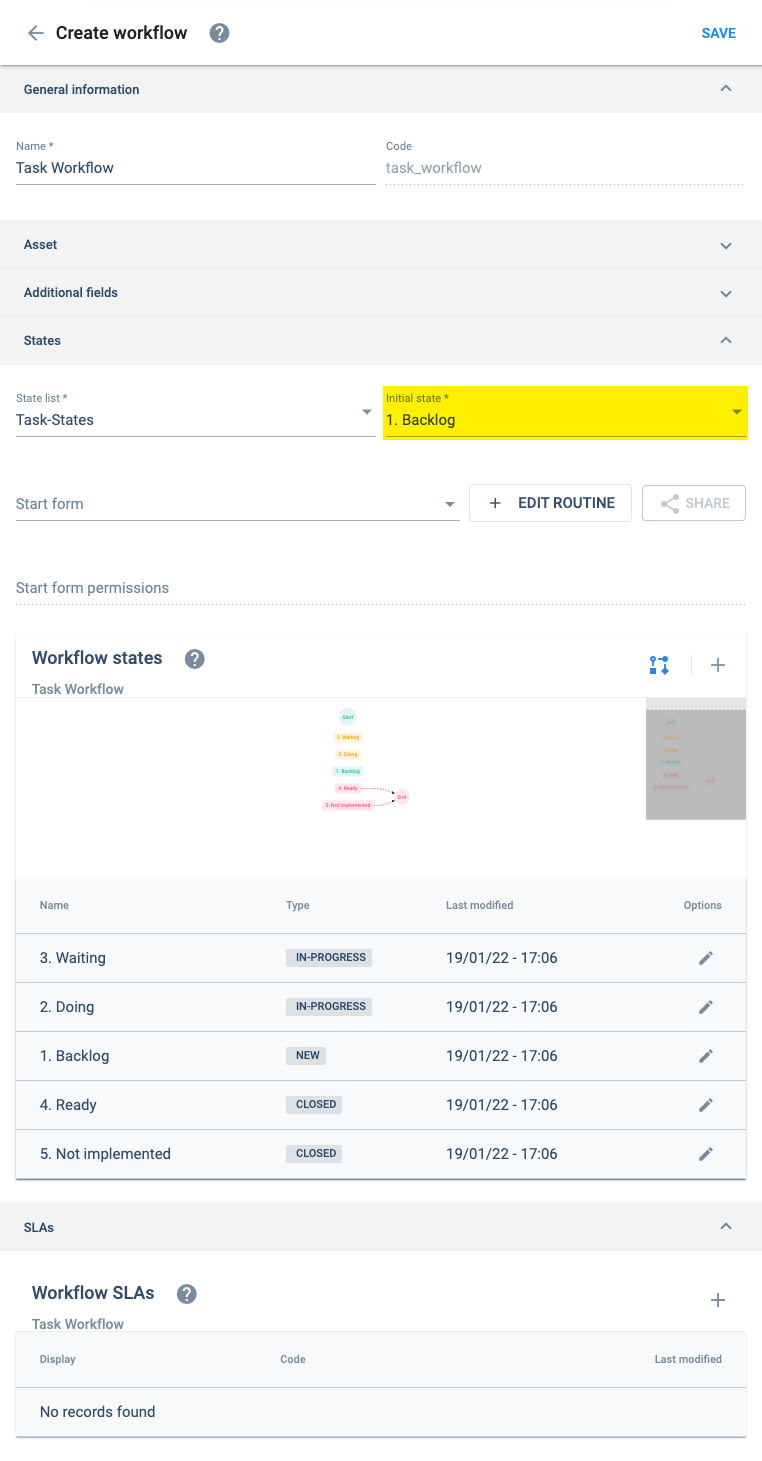
In the Create workflow settings panel, confirm that 1. Backlog is set as Initial state.
III. Configure state order.
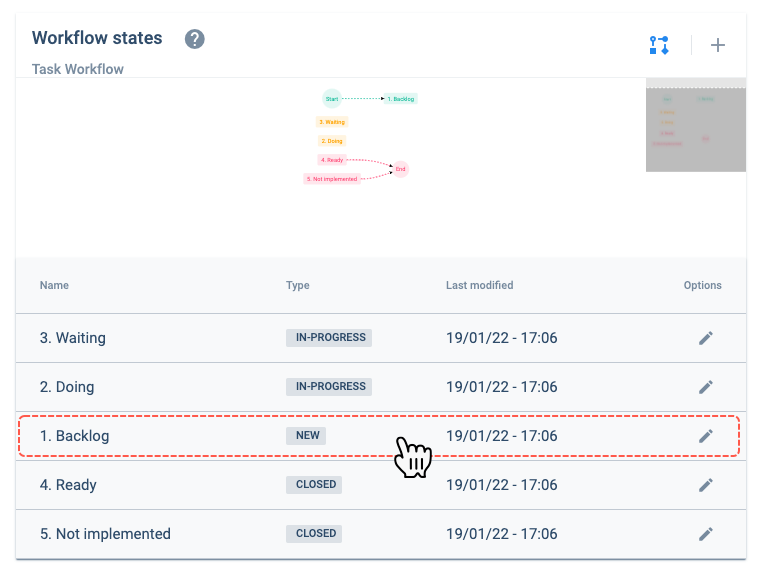
From the Create workflow settings panel, go to the Workflow states section and click on 1. Backlog. The Create state settings panel opens up.
IV. Set the state changes that will be available for the initial state.
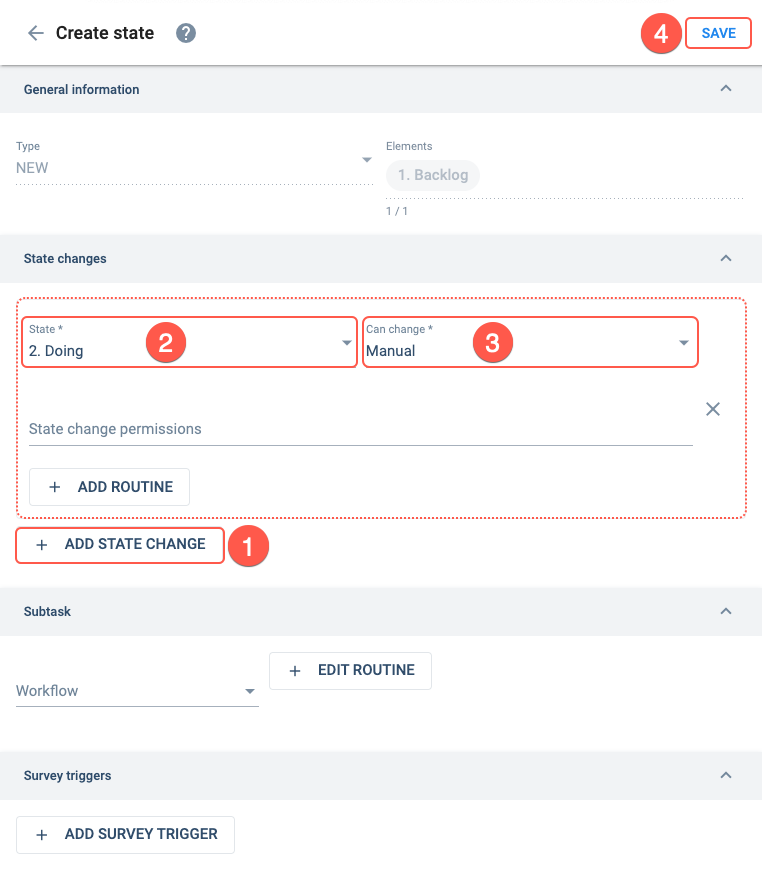
- Press + Add State Change. More fields open up to indicate what state tasks can go to next.
- State: 2. Doing
- Can change: Manual
- Press Save. You are taken back to the Create workflow settings panel.
V. Complete state changes for the remaining states.
Repeat the last two steps for other four remaining states.
You will need to add more than one state change in most of the remaining states. Feel free to make changes between states more complex or simple.
Here is a suggestion for state changes:
- 1. Backlog => 2. Doing (Previous step)
- 2. Doing => 3. Waiting
- 2. Doing => 4. Ready
- 2. Doing => 5. Not implemented
- 3. Waiting => 2. Doing
- 3. Waiting => 4. Ready
- 3. Waiting => 5. Not implemented
- 4. Ready: no changes added
- 5. Not implemented => 1. Backlog
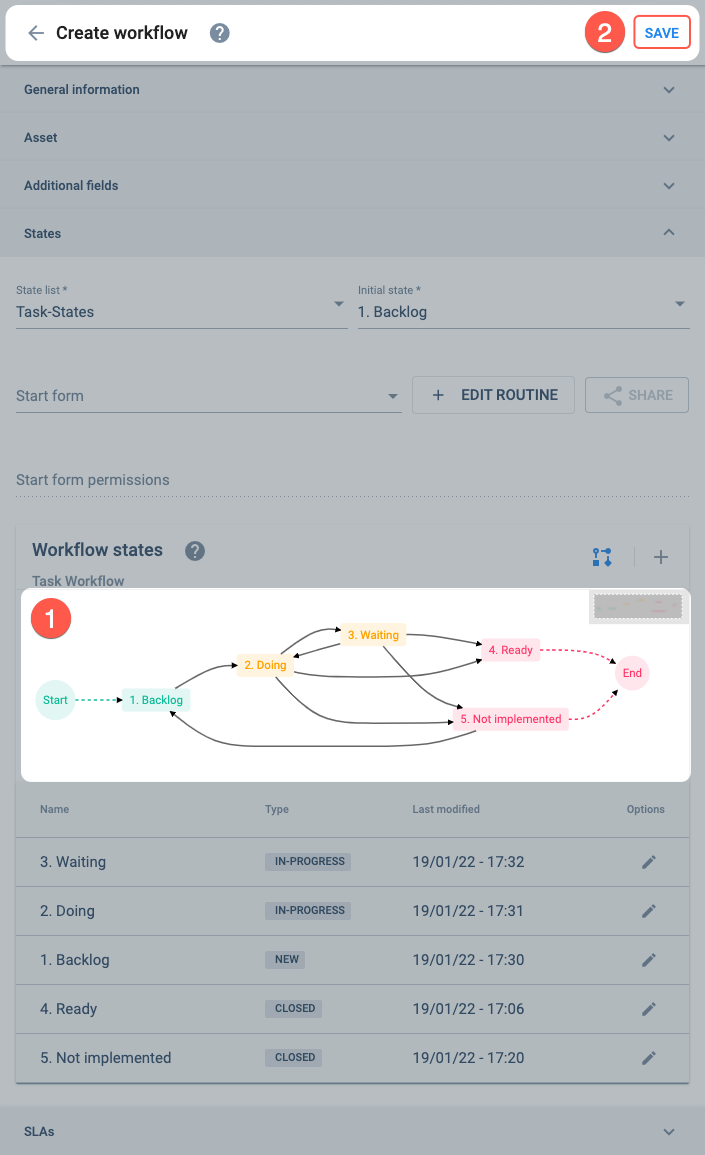
- Once you have finished setting all state changes in all states, confirm that state changes displayed in the diagram reflect the workflow process you desire.
- Press Save. You are sent back to the Workflows settings panel, where workflows belonging to a workflow group are displayed.
D. Complete Workflow Group Configuration
I. Set workflow group configuration tab.
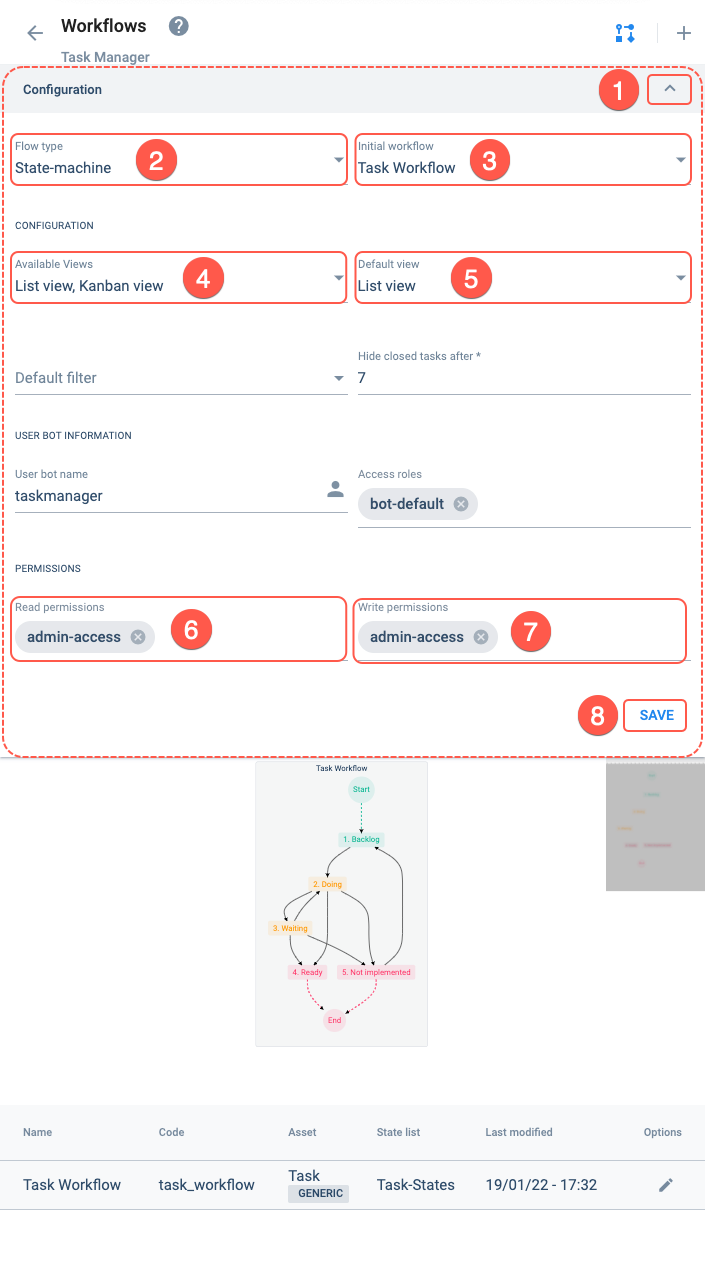
- Press the arrow icon in the Configuration tab to expand the settings panel.
- Flow type: State-machine
- Initial workflow: Task Workflow
- Available views: List view, Kanban view
- Default view: List view
- Read permissions: admin-access
- Write permissions: admin-access
- Press Save.
- Make sure you and the desired users have the specified permissions (6 & 7) in your access roles. Only those with the indicated permissions will be able to see and edit the tasks respectively.
- Go to the Create Access Role tutorial on how to add permissions to an access role.
- Go to the Create User tutorial to see how to add an access role to a user.
Congratulations! You have a Task Manager!
Expected Result
Access the Task Manager:
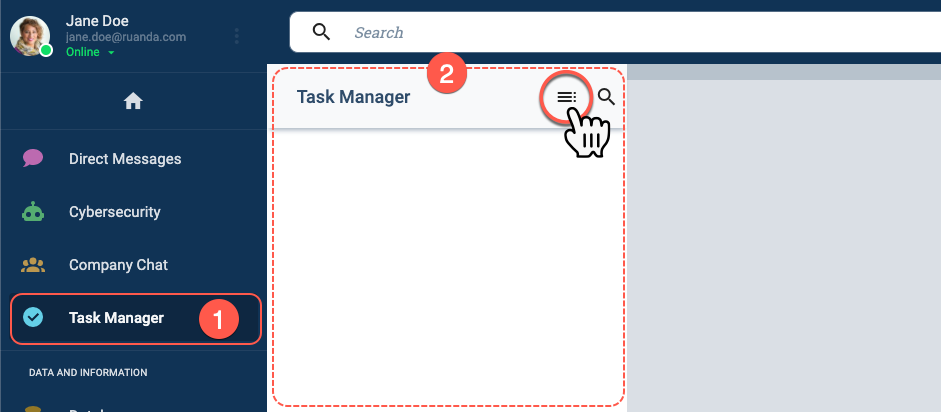
- From the Main Menu Bar, press the Task Manager button.
- From the Task Manager group panel, click the list icon on the upper right-hand corner. The task view will open up.
Create a task:
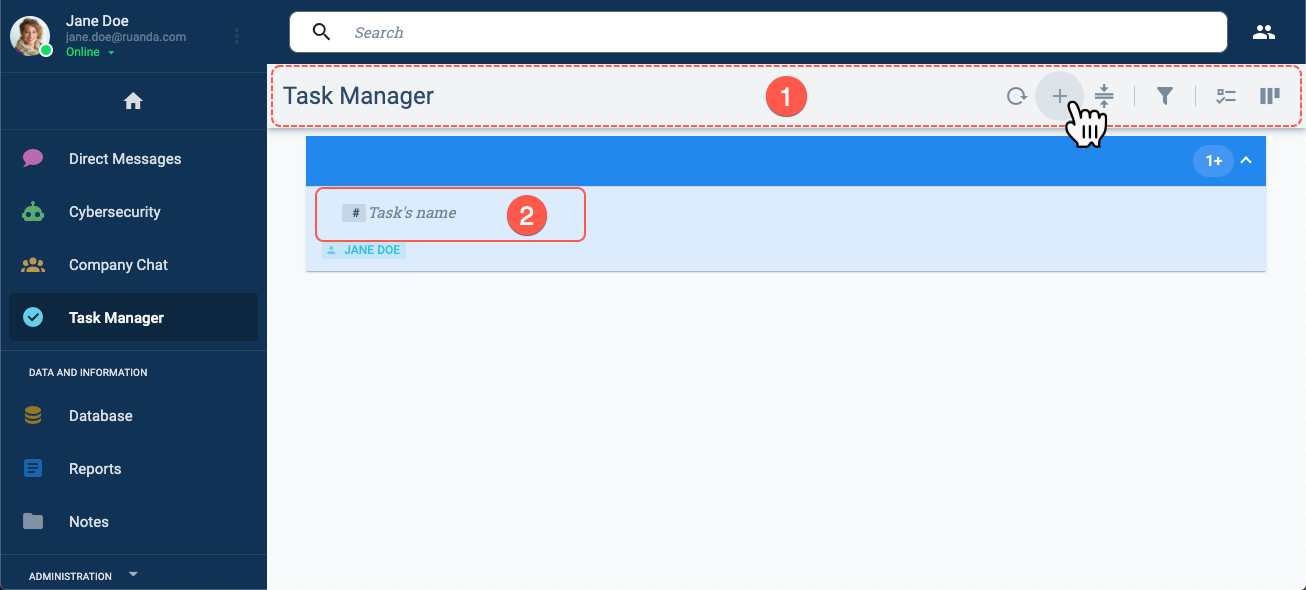
- Press the + to open a new task box.
- Type a name for the new task and press Enter ⮐ on your keyboard.
In the task view, you will see your newly created task with its corresponding workspace.
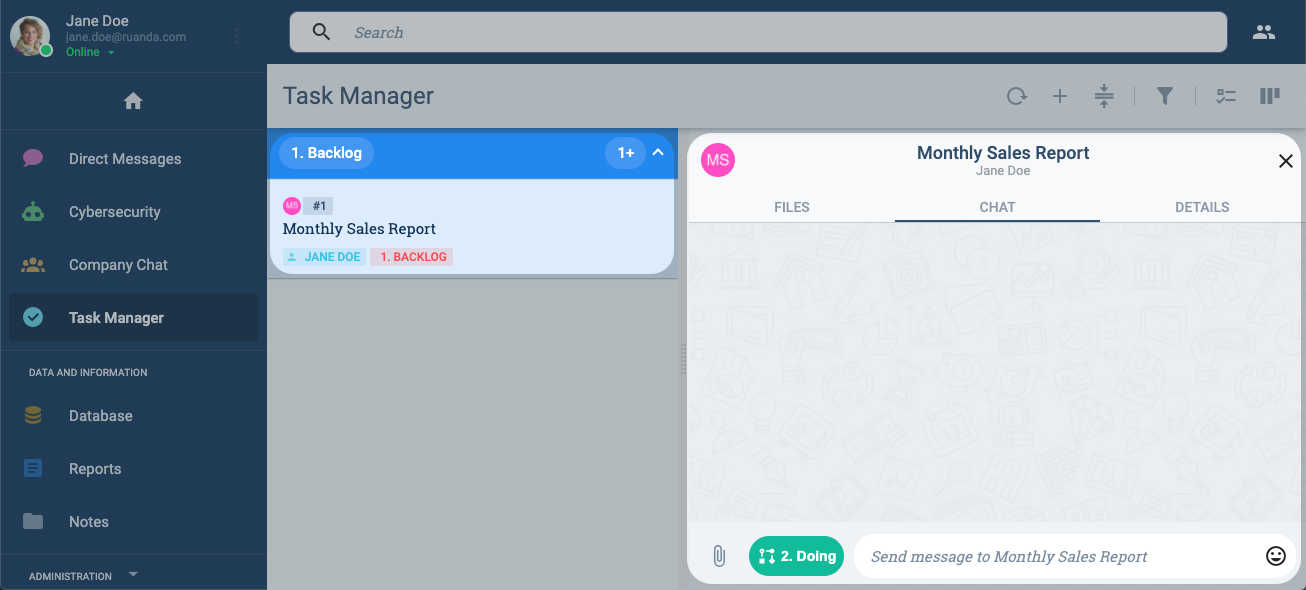
- In our next tutorial, we'll see how to view and arrange tasks.
- For now, feel free to create more tasks and to change their states by pressing the actions button in the channel workspace.
Related Topics
- Workflows Settings Panel Guide: Administrative Panel documentation
- COTTaskGroup: Task Group data model
- COTTask: Task data model
- COTSMStateMachine: State Machince data model
- COTSMState: State data model
- Tasks API: REST API documentation
- State Machines API: REST API documentation