Channel Workspace
Esta página aún no se encuentra traducida al español.
Introduction
Channel Workspaces allow quick and transparent communication between people working on a task or project. At first, a channel looks primarily like a chatroom, but they are much more than that:
- Chat channels exist within regular and workflow groups.
- If the chat channel is found within a workflow group and is associated with a task, you can configure the task, change its state, and interact with those involved.
- All channel workspaces can contain surveys that users can fill out and send.
- Depending on access roles, users can include other users in the channel workspace.
- In standard groups, new chat channels can be created using the group panel's actions button.
- In workflow (task) groups, new chat channels are automatically created along with tasks.
Accessing the Channel Workspace
From Workflow Groups
To access a channel workspace from the task group:
- Go to the Main Menu Bar and select the desired task group.
- Select the task to be viewed.
- The channel workspace opens up.
From Standard Groups
To access a channel from the group view:
- Go the Main Menu Bar, select the standard group the channel is found in to open the group panel.
- From the group panel, select a channel from the list.
- The channel's workspace will then open up. The layout is explained below.
Channel Workspace Layout
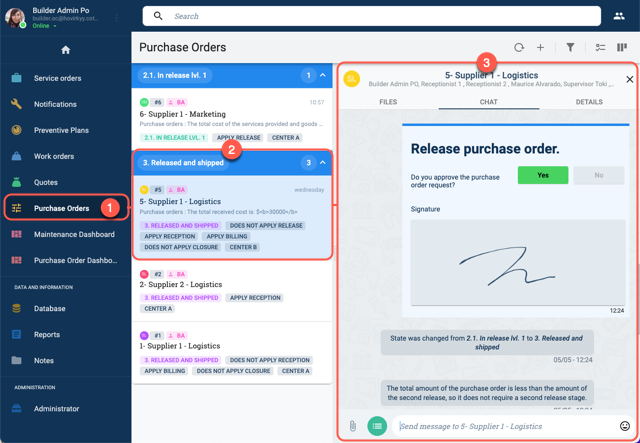
In Workflow Groups
- Title Bar: Displays the task's name and users associated with it.
- Files: Access notes associated with the task.
- Chat: Access the task's channel workspace.
- Details: Open the task's settings panel.
- Chat Area: Displays messages, files, images, emojis, system messages, bot interactions, and more. Click here for more details.
- Attachment Icon: Press to add files you wish to share. Or you can simply drag and drop files in the chat area.
- Actions Button: Direct access to allowed task actions. Actions can include filling out a survey or changing a task's state. Click here for more details.
- Text Input Area: Send text messages to chat; emojis can be added. HTML code can also be used to format text. Some channels can be configured to accept slash commands, e.g.,
/commandcan be programmed to summon a bot that will carry out a preconfigured automated routine.
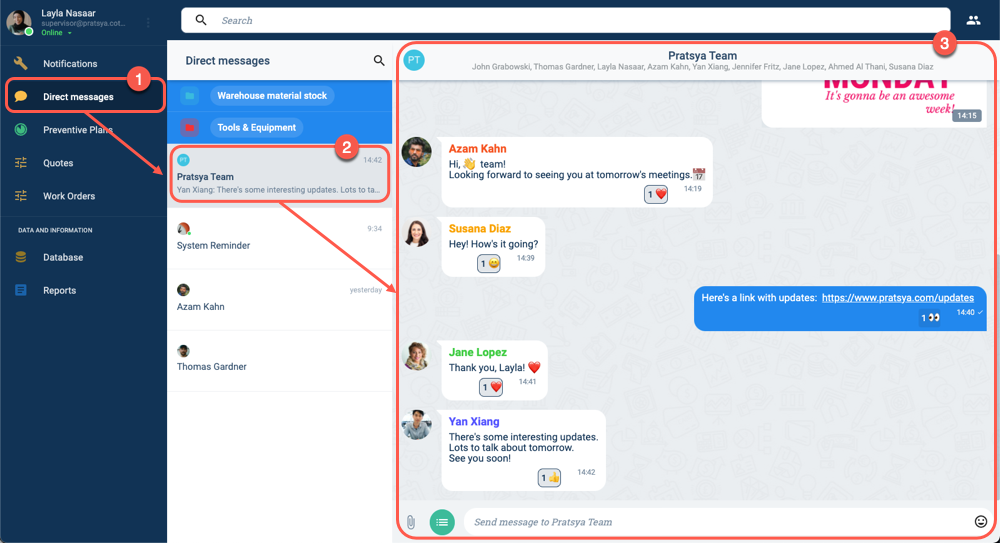
In Standard Groups
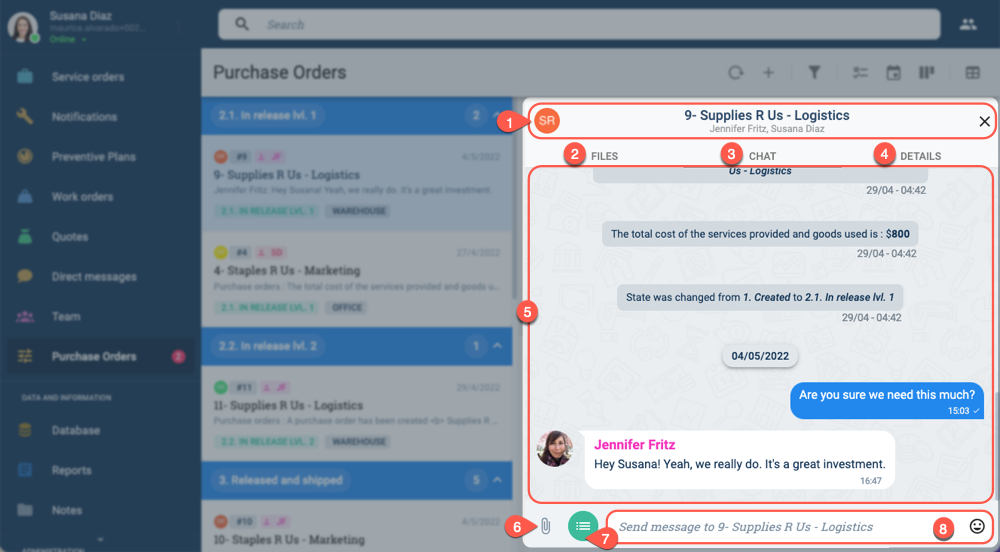
- Title Bar: Displays channel name and users. Press the title bar to slide open the settings panel.
- Chat Area: Displays messages, files, images, emojis, system messages, bot interactions, and more. Click here for more details.
- Attachment Icon: Press to add files you wish to share. Or you can simply drag and drop files in the chat area.
- Actions Button: Direct access to actions allowed in the channel. Actions can include filling out a survey or changing a task's state. Click here for more details.
- Text Input Area: Send text messages to chat; emojis can be added. HTML code can also be used to format text. Some channels can be configured to accept slash commands, e.g.,
/commandcan be programmed to summon a bot that will carry out a preconfigured automated routine. - General information: Appears on the settings panel. Lists users on the channel and permits changing the workspace's avatar. The settings panel is accessed by clicking the workspace's title bar.
- Images, Videos, Files: Access files, images, and videos shared on the channel.
Channel Workspace Details
Further details about options available in the channel workspace.
Chat Message Options
Right-click (or long-press on mobile devices) chat message bubbles in the channel to open up a menu with the following options:
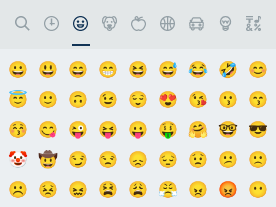
- React: Add an emoji reaction to a message. Click on emojis given by other users to add your reaction to the counter. To retract from a reaction, find the emoji you sent on the message bubble and click on it. There is also an emoji search option and a recently used section. 👍 👎 😄 🎉 😕 ❤️ 🚀 👀
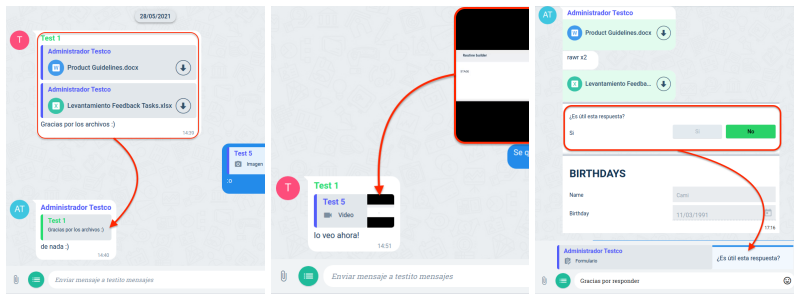
- Reply: Send a message with the original message and author embedded. Only the first three lines of the original message will be displayed. You can reply to more than one message at a time. You can respond to anything sent through the chat, i.e., files, media, surveys, etc.
- Copy: Copy text messages to your clipboard.
- Delete: Delete a message you have sent. This option is available only up to 24 hours after you have sent the message.
Examples of replies to text, video, and surveys, respectively:
Examples of emoji reactions:

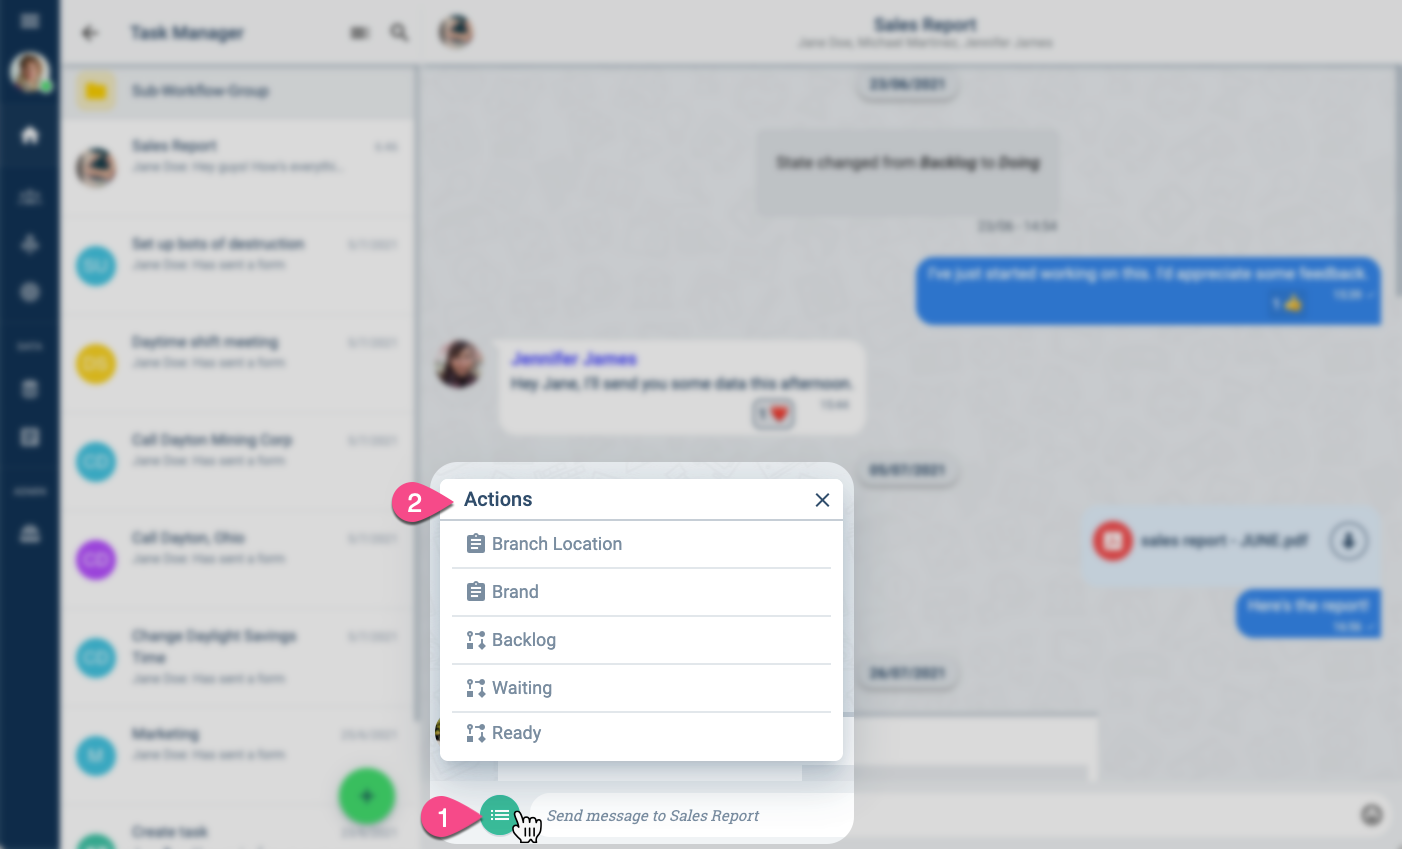
Actions Button
In channels associated with a task, you can change a task's state from the channel's actions button. If configured, you can also answer any survey associated with the channel by pressing the actions button.
The actions button is found near the bottom of the channel workspace:
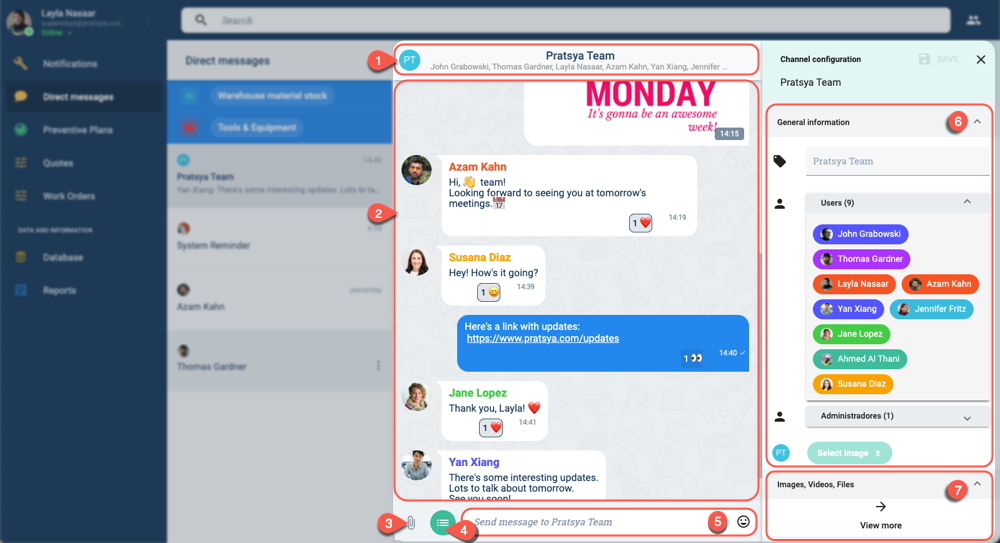
Settings Side Panel
Click anywhere on the title bar found on the top of the channel workspace to slide open the settings panel.
The following image shows how to open the side panel:
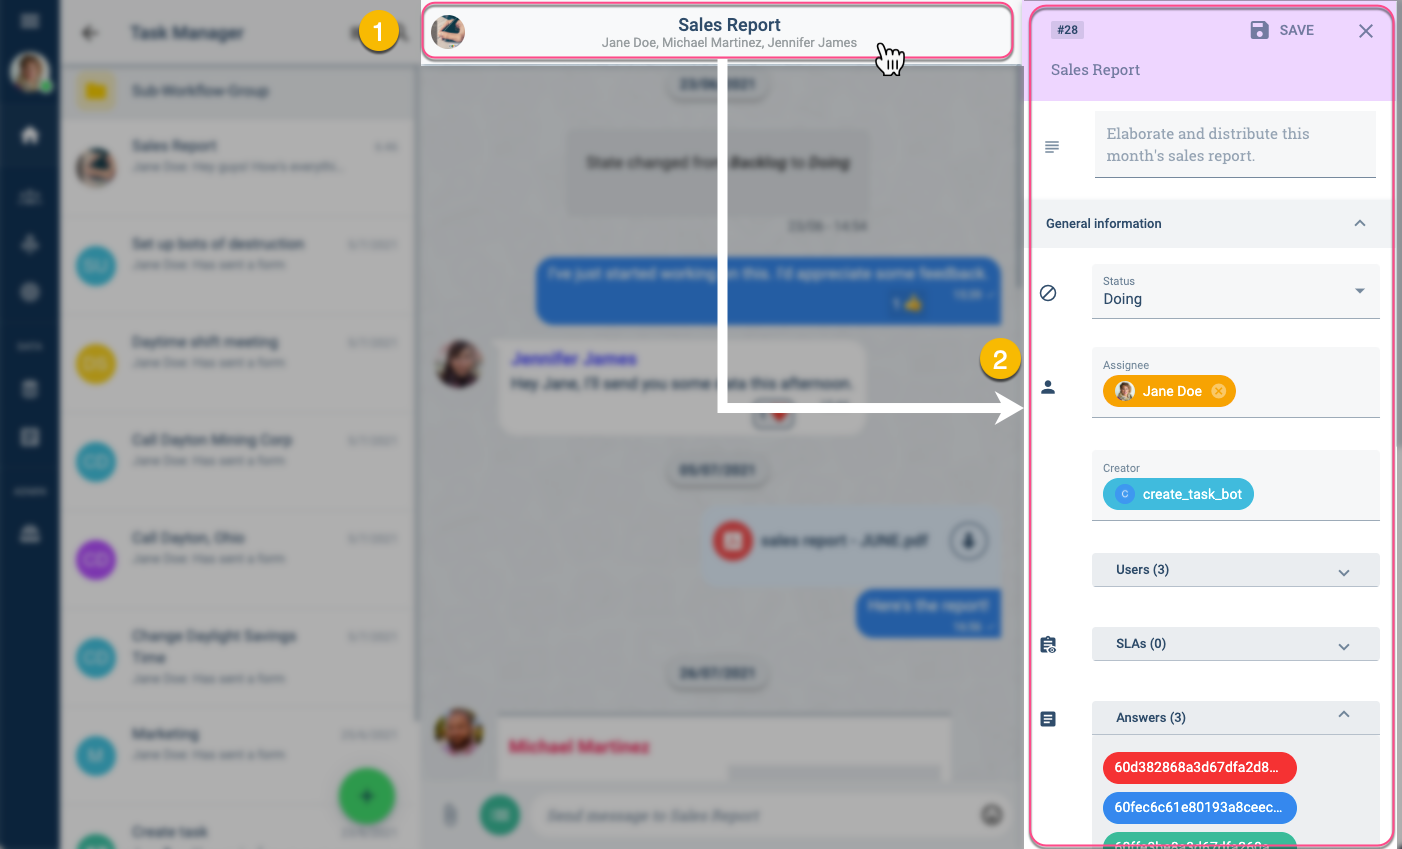
From the settings panel:
- View and edit task and channel settings.
- View shared media and files.
Changing task states or configurations requires appropriate access roles. Ask your admin for more details in case you need access to these options.
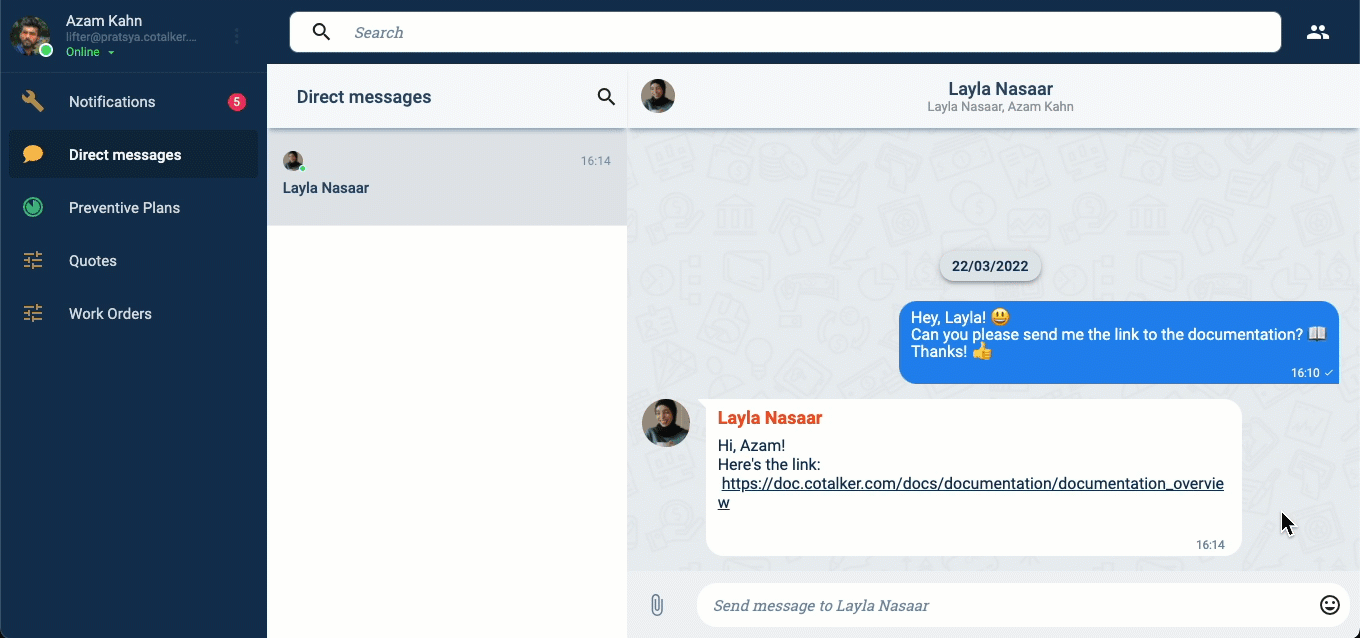
Enriched Messages
Enriched messages contain extra information that pops over certain words when the mouse cursor hovers over them, i.e., links, keywords, contacts, and tasks.
When users send a URL link (with the http:// or https:// prefix included) in a message, it is automatically converted to the enriched format. See example below:
The following enriched message types can be viewed in any channel but can only be sent by posting an API request to the message endpoint.
Example of an enriched message sent by a system bot:
Enriched Task Message Type
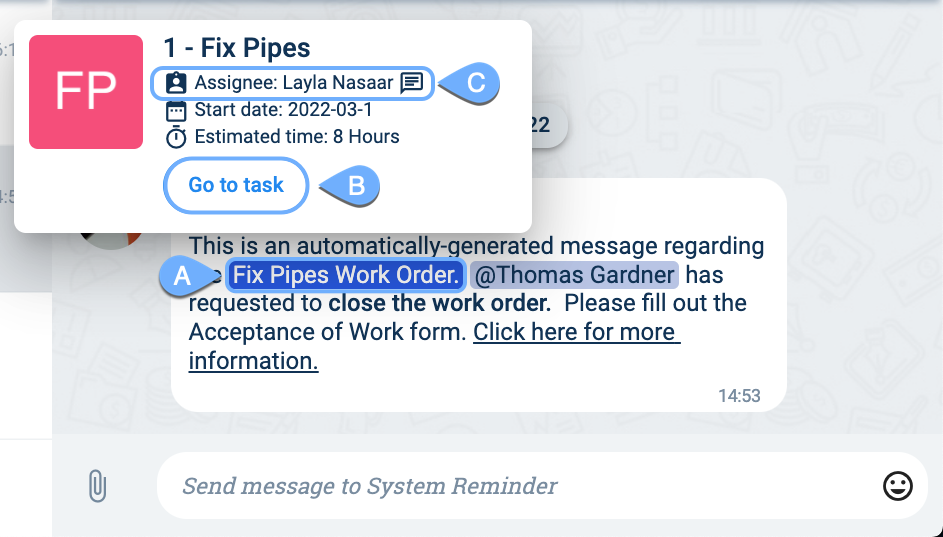
- A. Highlighted text: Task information pops up when hovering over the text. Click on the text to go to the task workspace.
- B. Go to task: Press this button to go to the task's workspace.
- C. Chat icon: Press the icon to send a direct message to the task assignee.
Enriched Contact Message Type
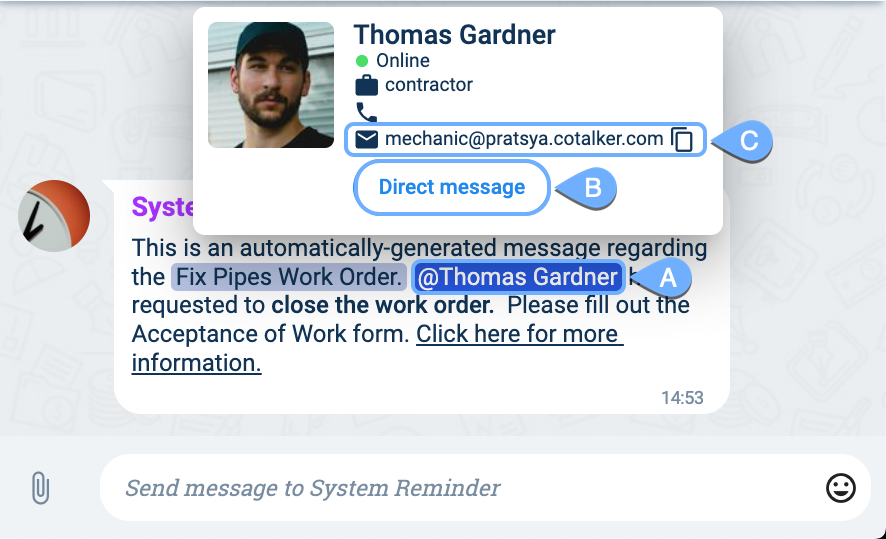
- A. Highlighted text: Contact information pops up when hovering over the text. Click the text to send a direct message to the contact.
- B. Direct message: Press this button to send a message to the contact.
- C. Copy icon: Press the icon to copy the contact's email to the clipboard.
Enriched Hover Message Type
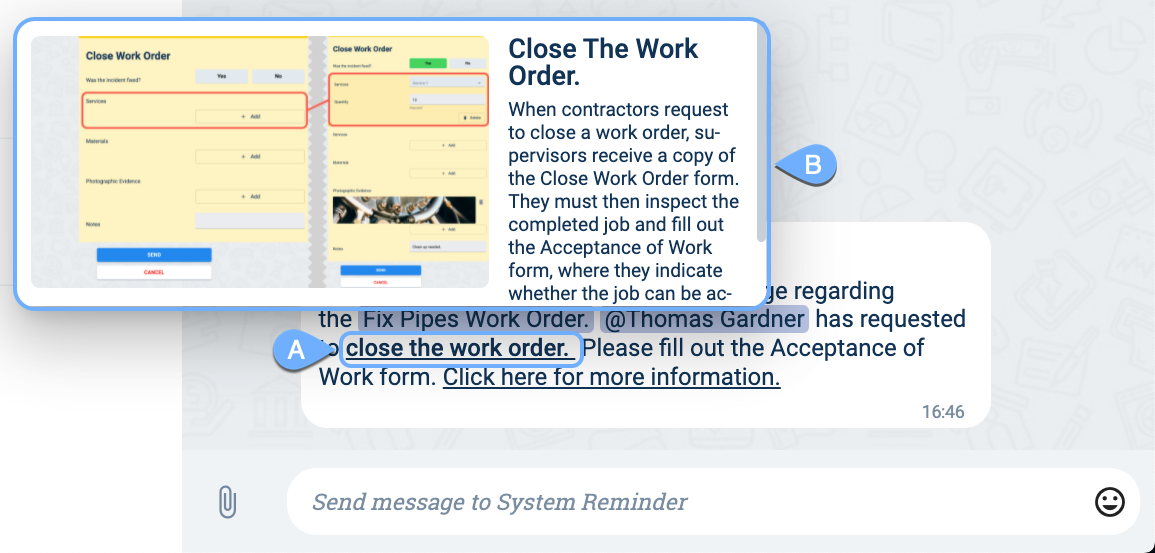
- A. Highlighted text: Special information concerning the highlighted word pops up when hovering over the text.
- B. Card: The card contains images and text. A scroll bar is included for longer texts.
Enriched Link Message Type
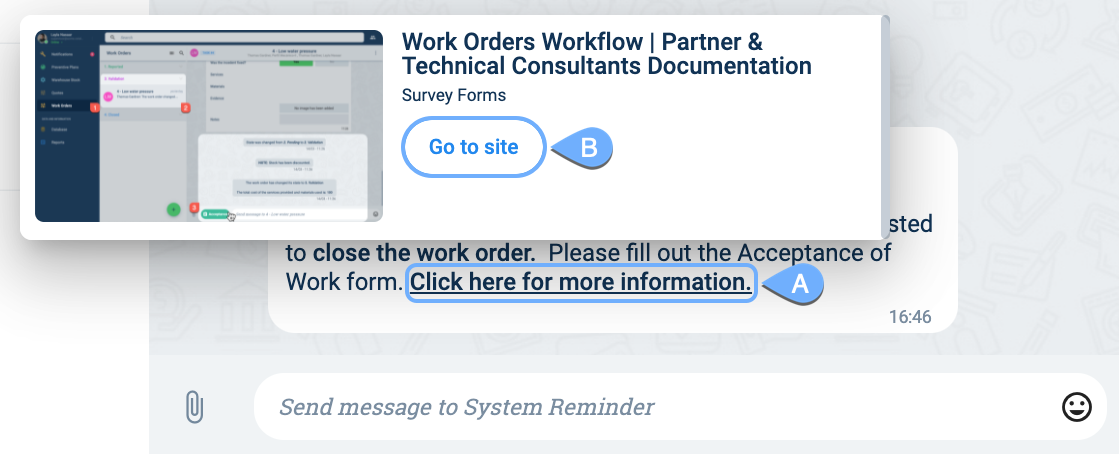
- A. Highlighted text: Web page information appears when hovering over the text. Click the text to open the link.
- B. Go to site: Press the button to open the link in a new tab.