Using the Notes Tool
Esta página aún no se encuentra traducida al español.

Overview
Easily create notes to share and edit in real time among other users within the Cotalker environment. Thanks to our powerful search tool, task notes can be made accessible to all users, thus creating a dynamic knowledge base for your company that all users can help build. Plus, you can save notes as PDF documents.
The Notes tool uses markdown syntax to help you focus on writing the text and forget about formatting.
Notes can be shared and accessed through tasks, hyperlinks, the Notes dashboard, and even surveys.
While notes are fully available in tasks, the Notes dashboard is still in its alpha phase and is subject to change.
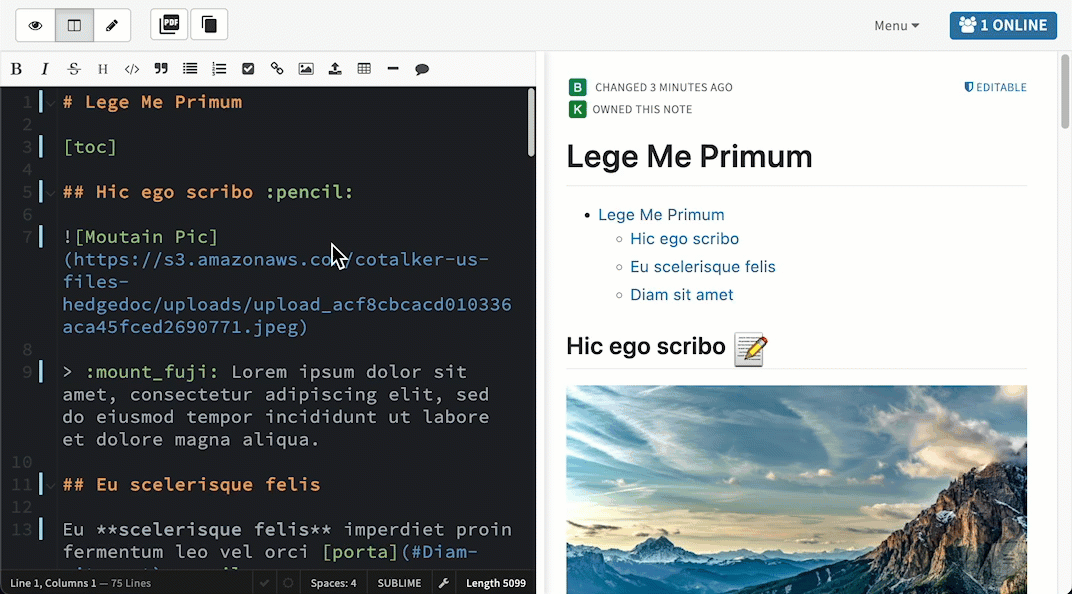
Here's an example of how the Notes tool turns markdown syntax (left) into a readable document (right):
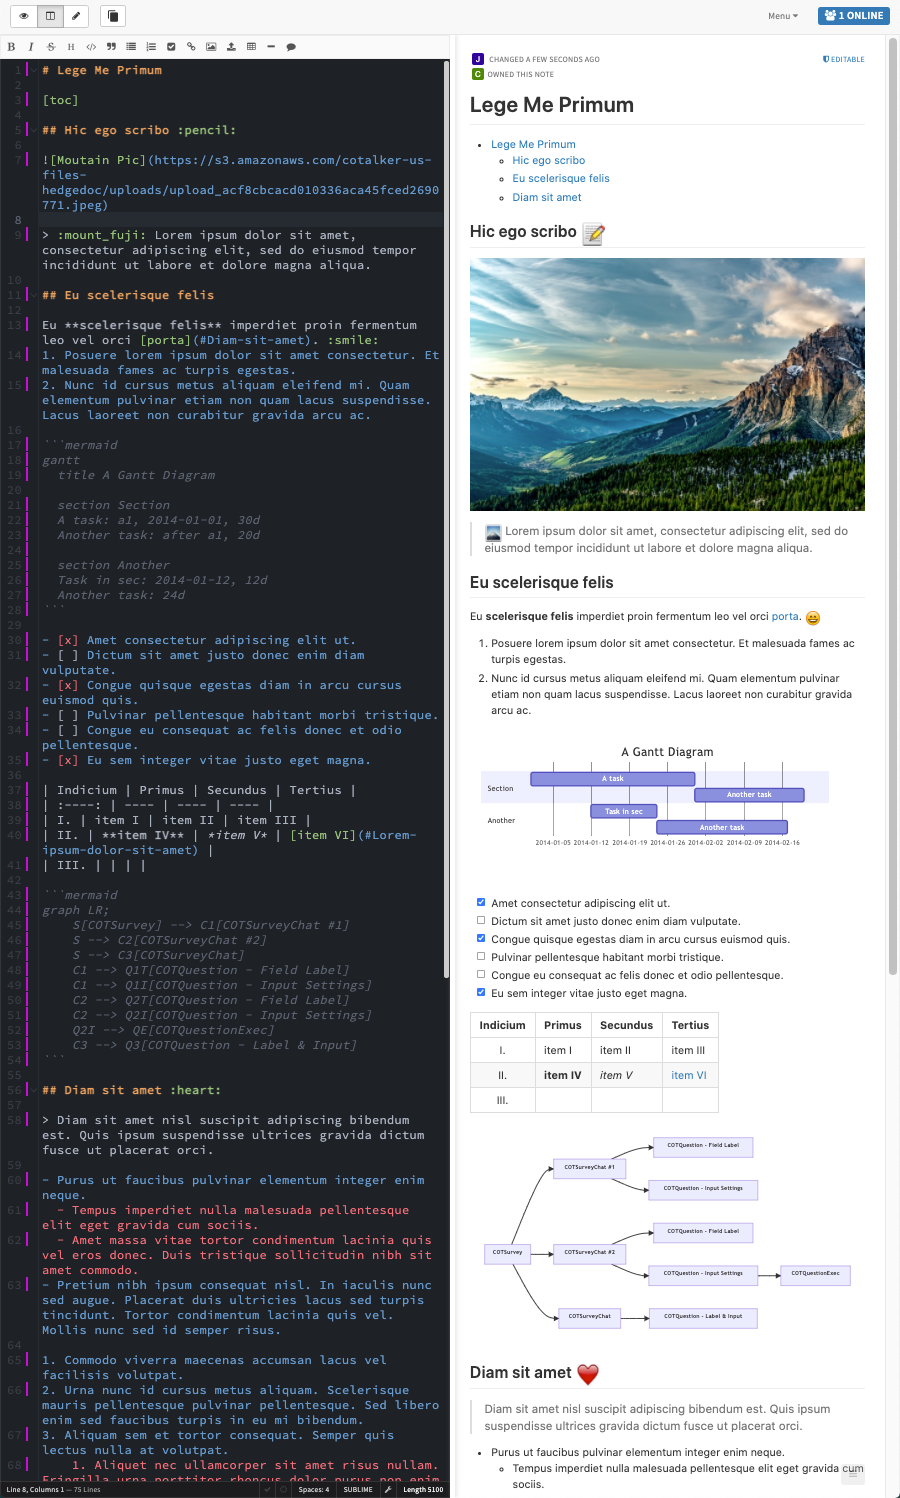
Go to our Markdown Syntax page for information and examples on how to format text, insert images, add links, create diagrams, and much more.
Task Notes
Task notes are a great way to register and share relevant information concerning your individual tasks. You can even create tasks notes with the goal of collecting information and building your knowledge base.
All task notes are indexed for search queries, making it easier to find the information you need.
Create as many notes as you want within your tasks.
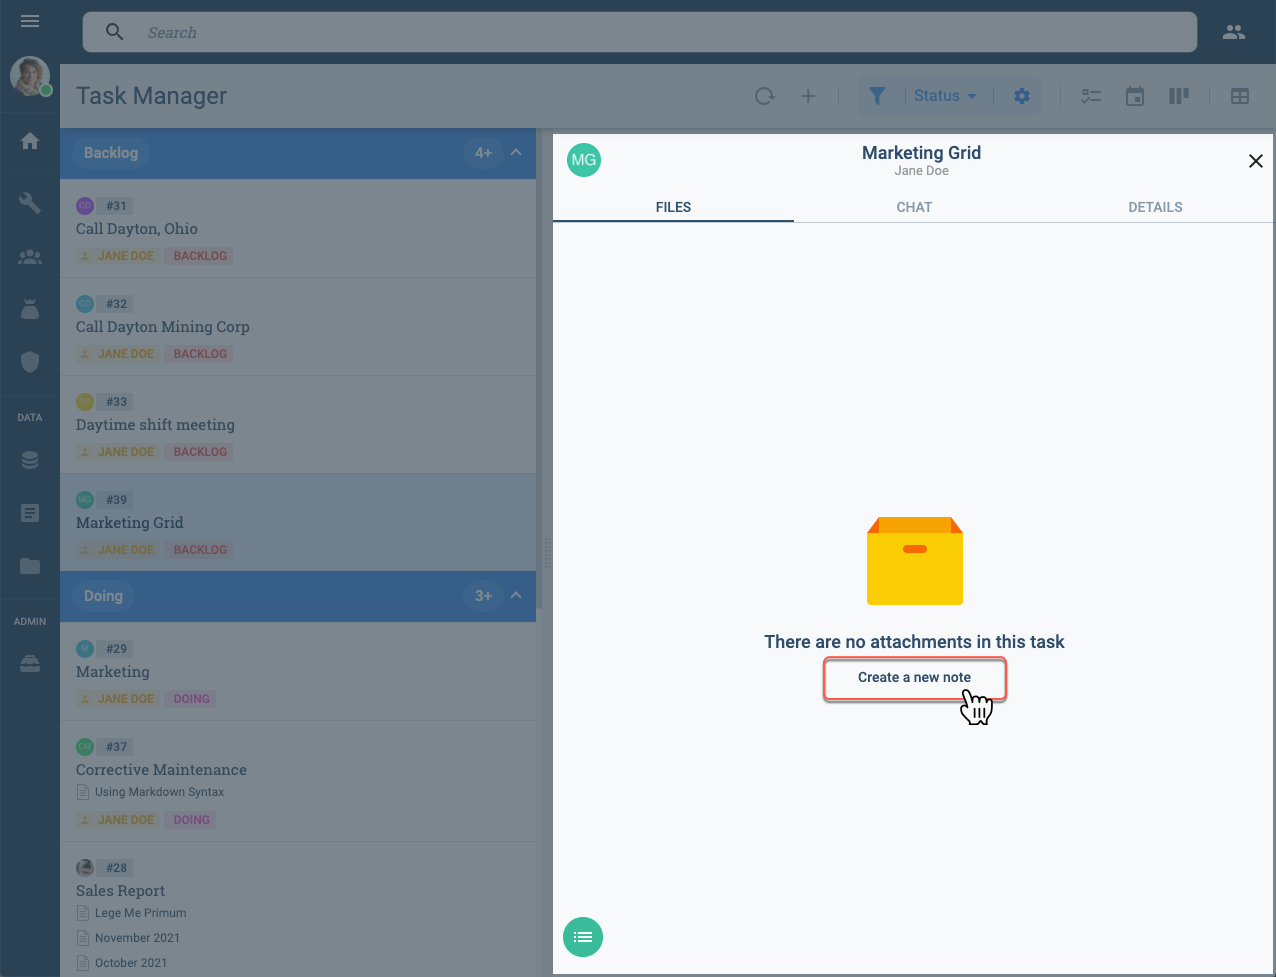
Creating Task Notes
To create a task note, go to the task's details, either from the group view or task view.
Here are three ways to create a note within a task:
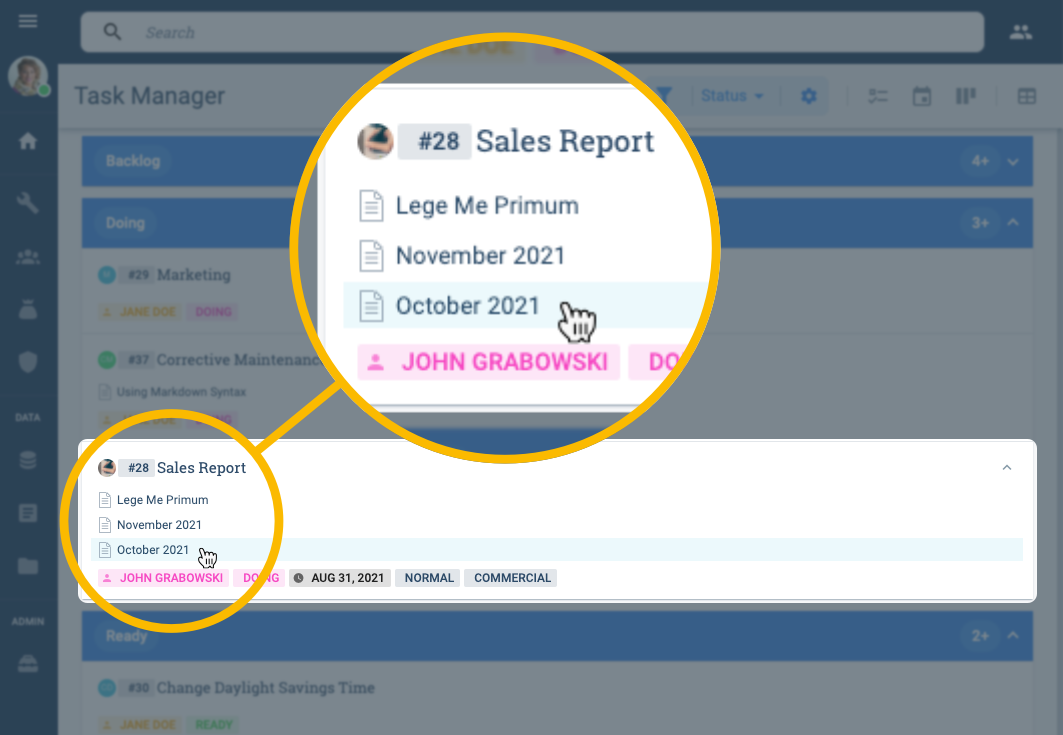
the Group View's task panel
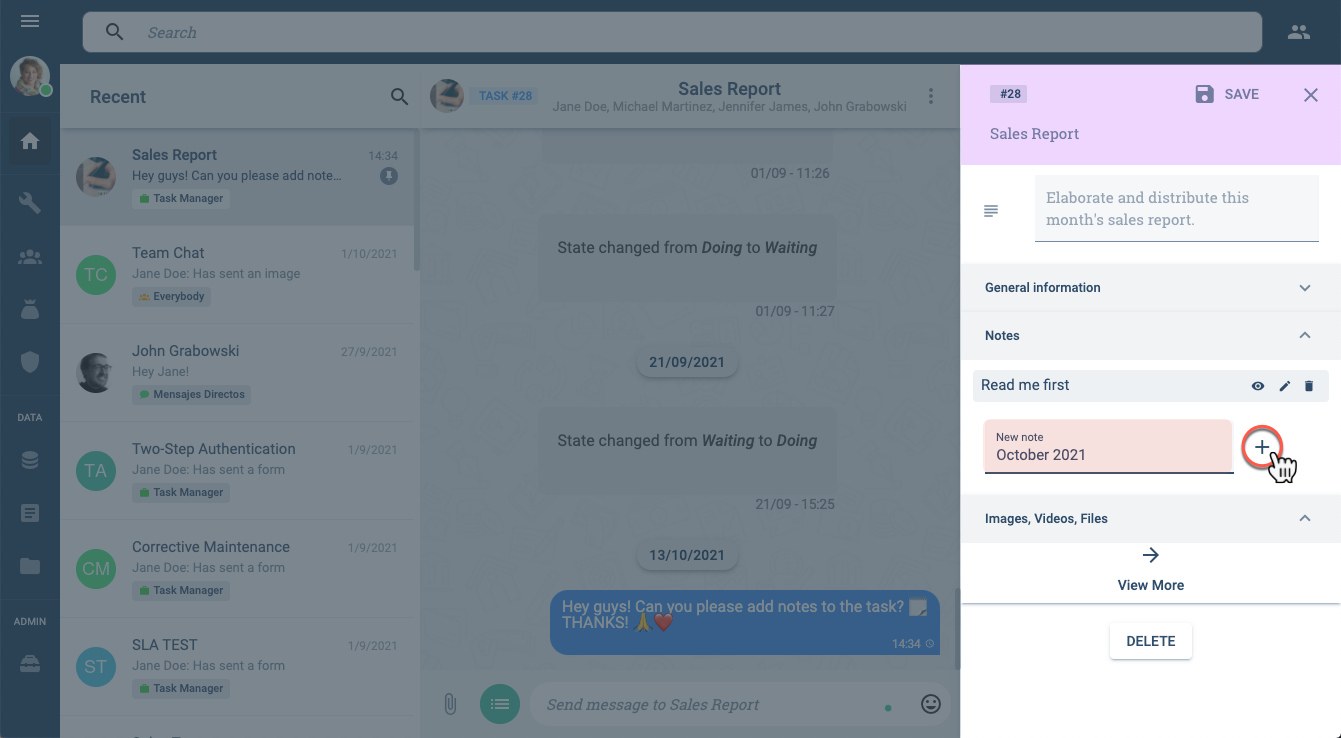
the Task View
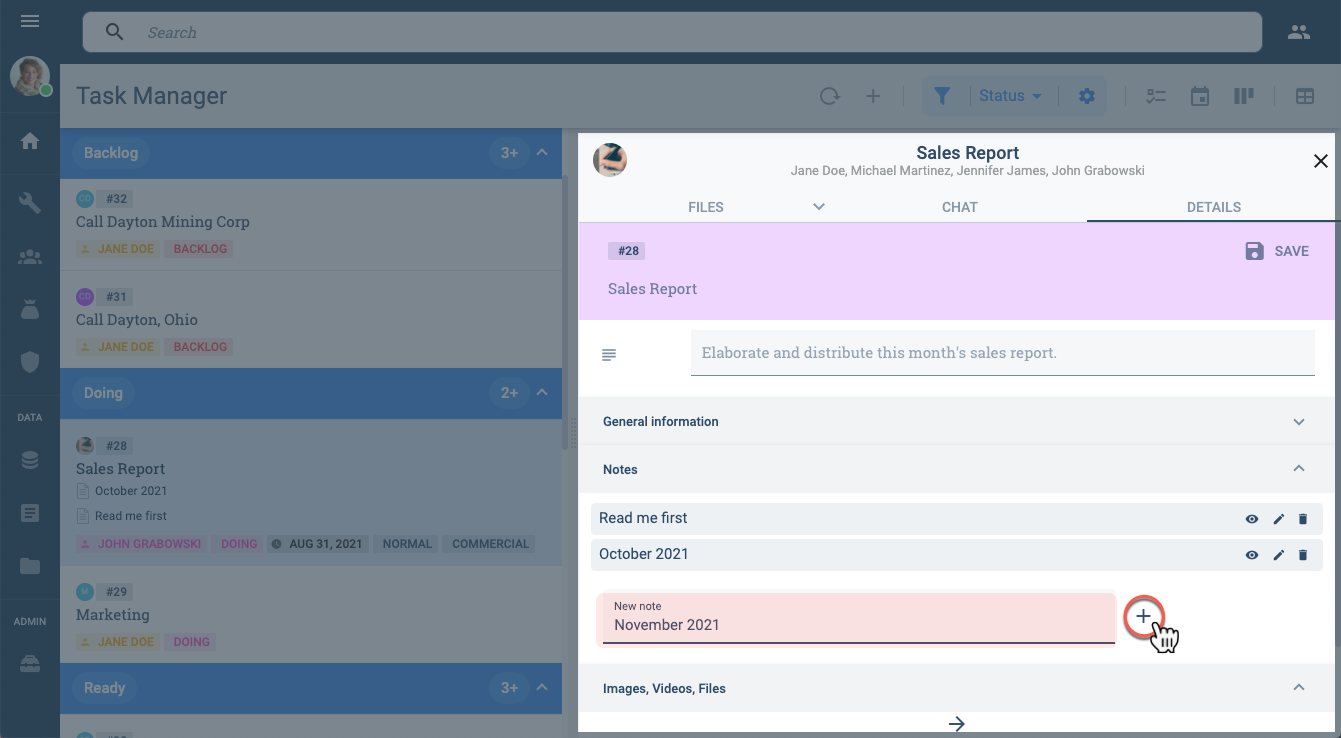
the Task View
Only new notes can be associated directly to a task. To associate existing notes to a task, use the API tools.
Accessing Task Notes
There are multiple ways to access a task note.
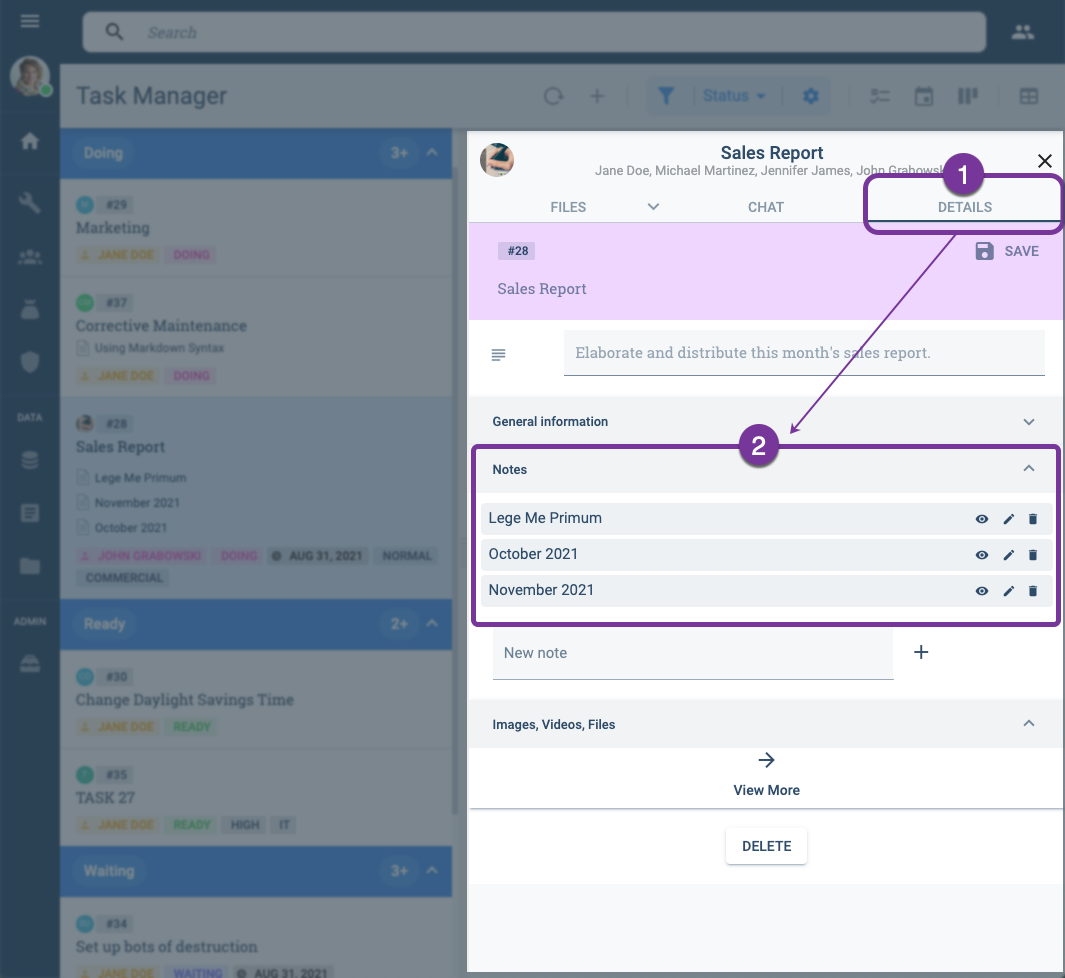
From the Task View:
From Task Details:
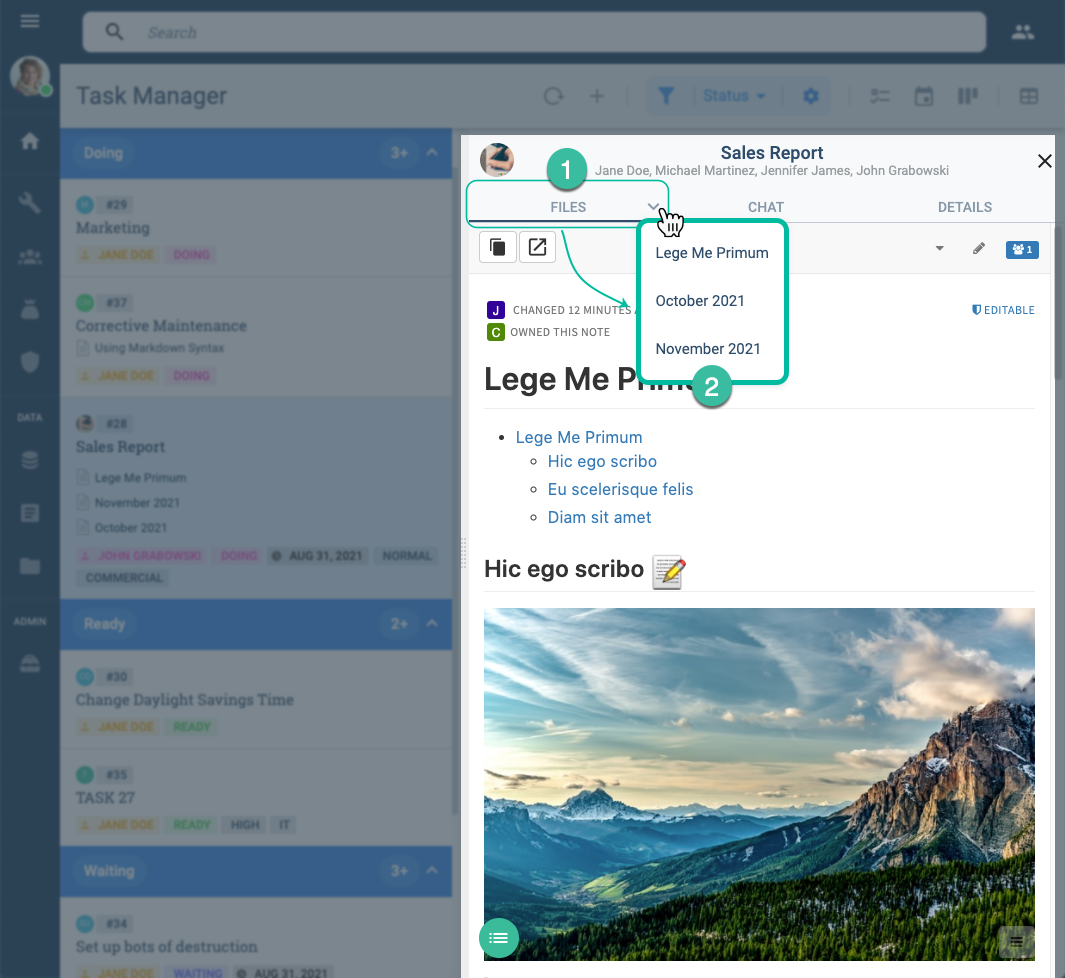
From Task Files:
Notes Layout & Toolbar
The Notes tool can appear either within the task view or as an individual web browser tab. In both cases, its layout and tools are distributed in a similar manner. Below is an example and description of the layout.
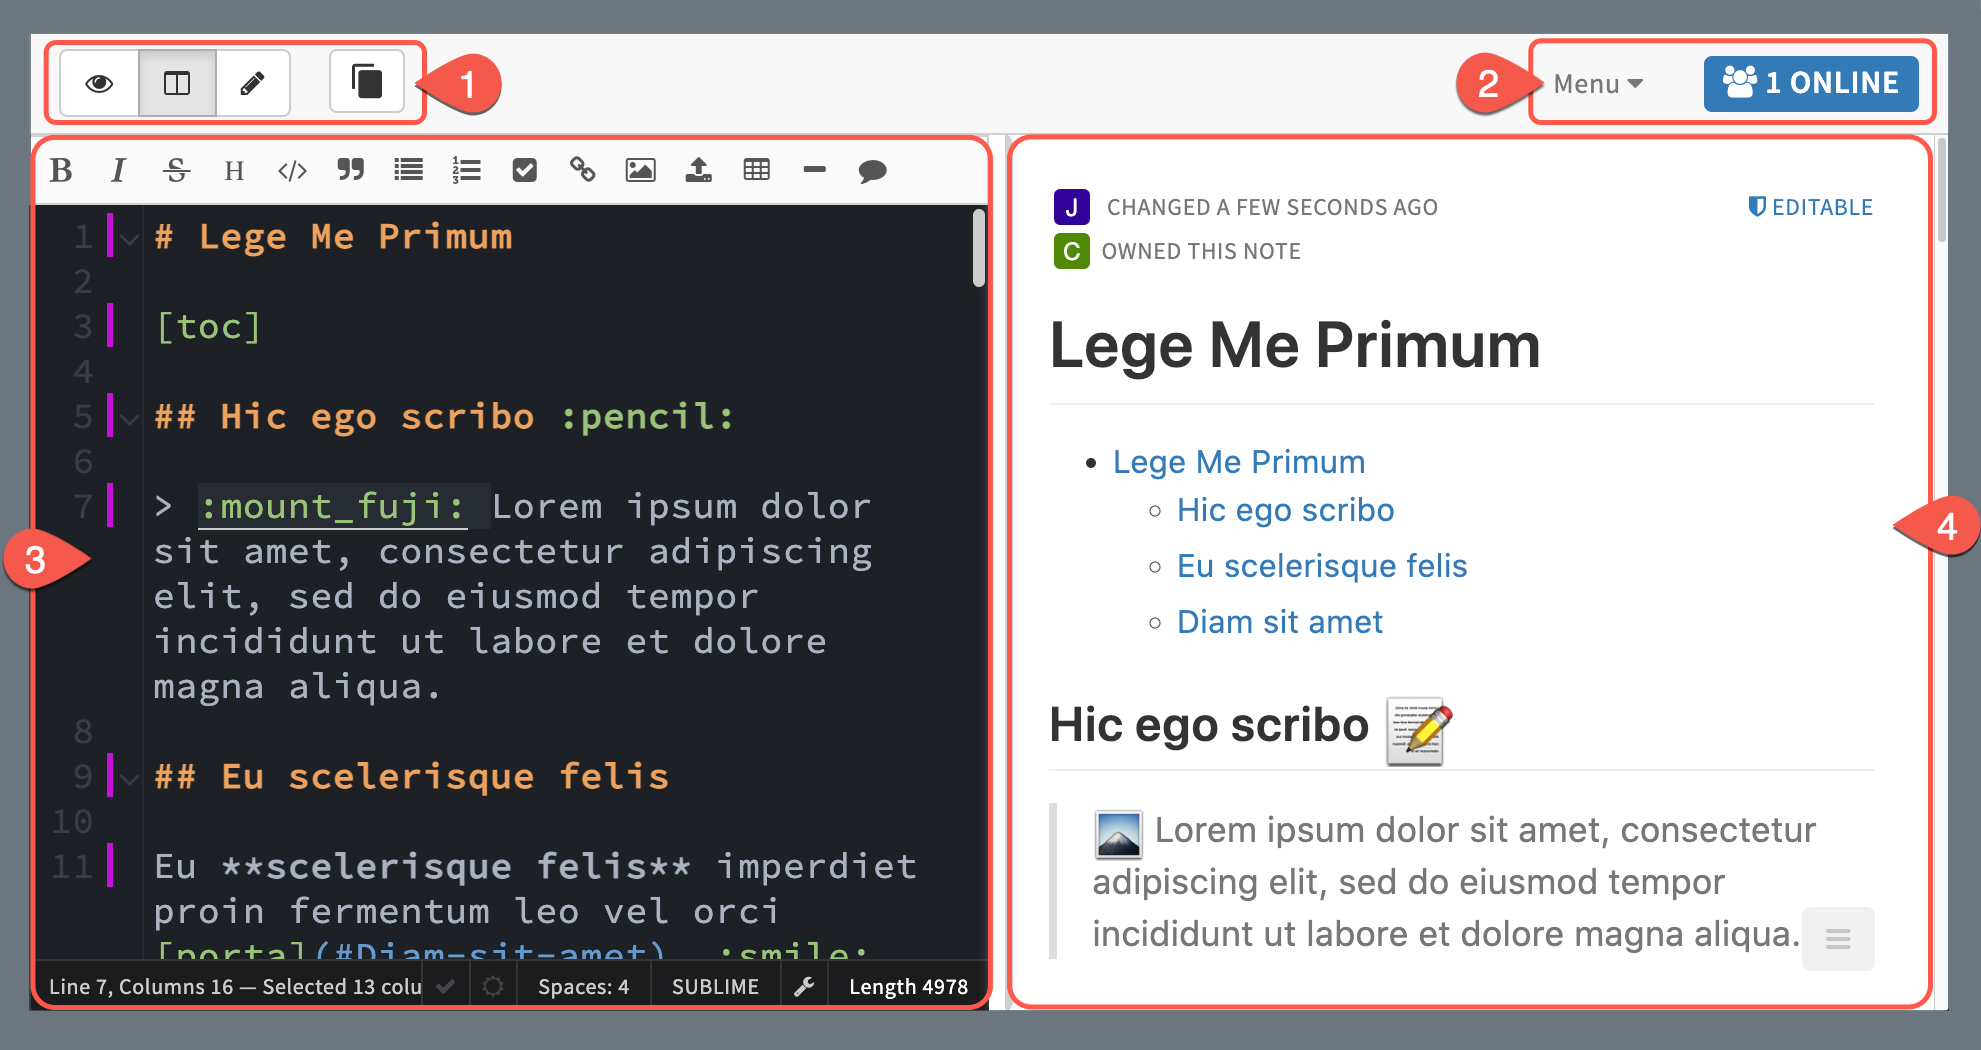
1. Main Toolbar

- View: Display the formatted document only.
- Both: Split view with the editor and formatted document.
- Edit: Display only the editor.
- PDF: Export the formatted document as a PDF document.
- Copy: Copy link to clipboard.
- Pop-out: Open note in new tab.
2. Network Tools
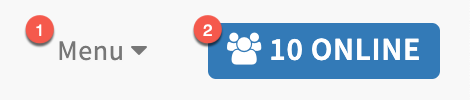
- Menu: See revision history.
- Online: See contributing online users.
3. Editor

- Toolbar: Formatting tools that add markdown syntax to text.
- Write pad: Text in markdown syntax written here.
- Status bar: Note stats, Spell Checker, Night Mode, Indent, Editor, and other options.
4. Document View
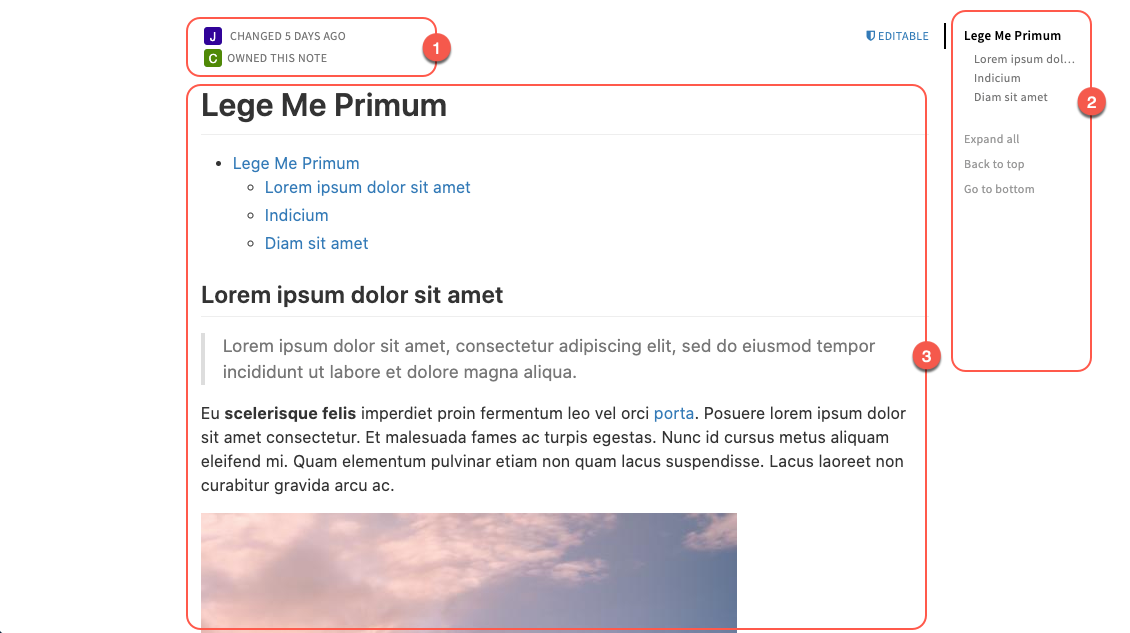
- History summary: Last change and ownership
- Navegation menu: Automatically created with document # headings
- Document: Formatted output for users to read.
PDF Exporter
The PDF exporter generates automatically formatted documents.
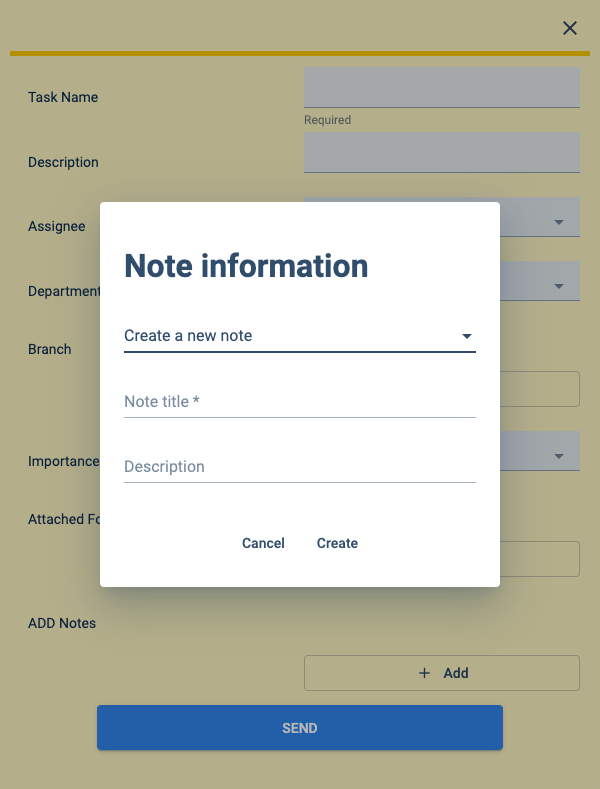
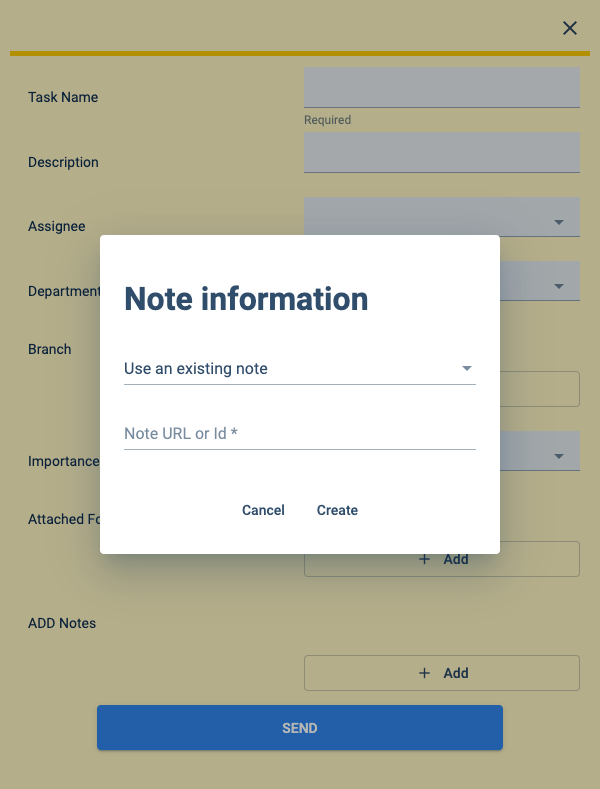
Adding Notes on a Survey Form
Some survey forms will give you the option to attach a note. You can either create a new note or add an existing one by indicating its URL or Id. Below are some examples.
Submit a new note:
Submit an existing note:
- To obtain an existing note's URL, click the copy icon in the Notes Toolbar or copy it from your browser's address bar.
- To obtain an existing note's Id, find it among the string in your browser's address bar.
⚠️ The Notes Dashboard is still in its alpha phase.
Accessing Notes Dashboard
To access the Notes Dashboard, press Notes on the Main Menu Bar:
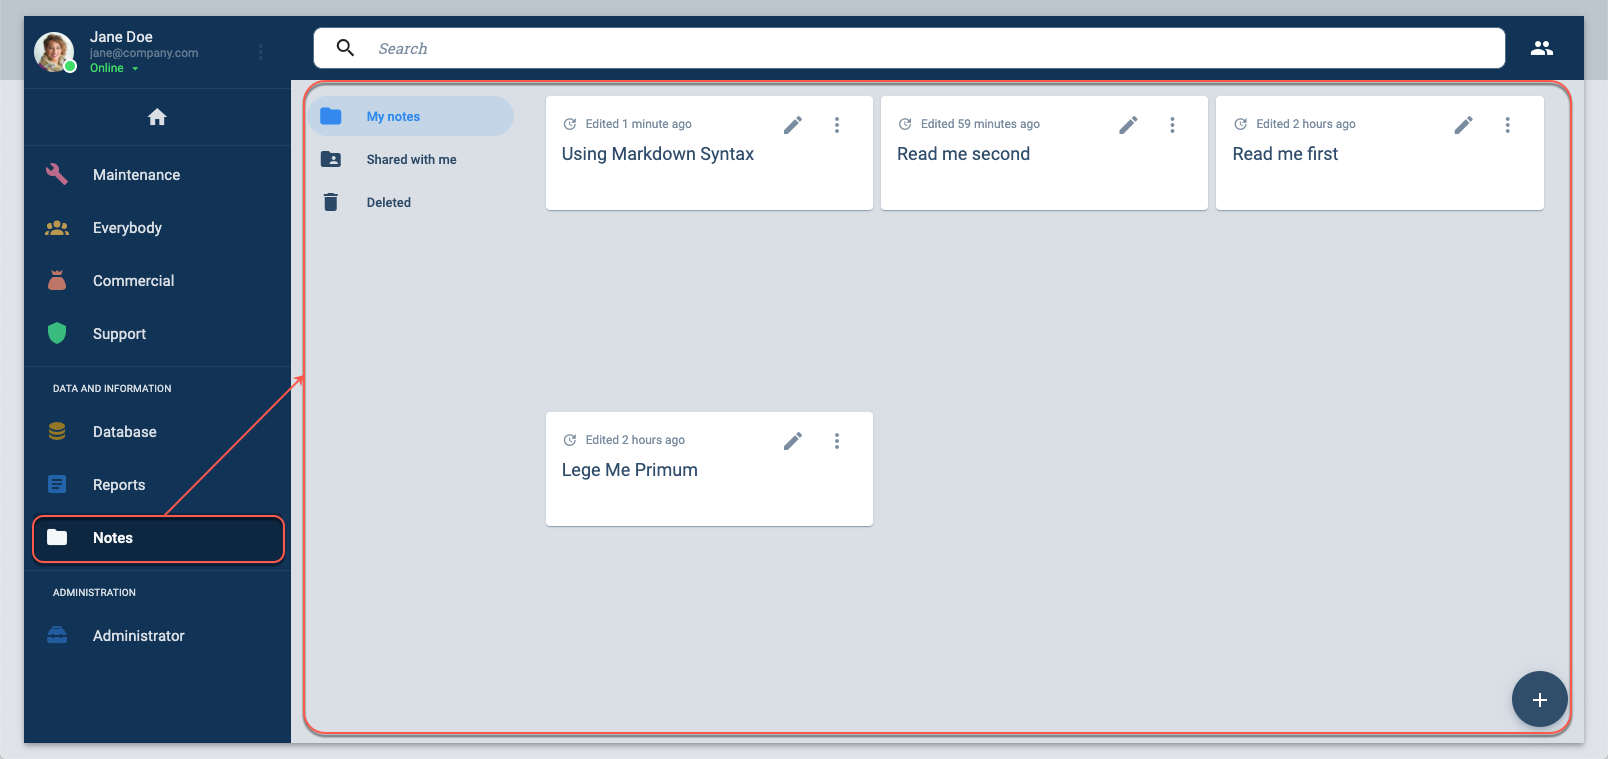
Notes Dashboard Layout
From the Notes Dashboard, you can view and edit the notes you and your coworkers have written. You can also create new notes from here.
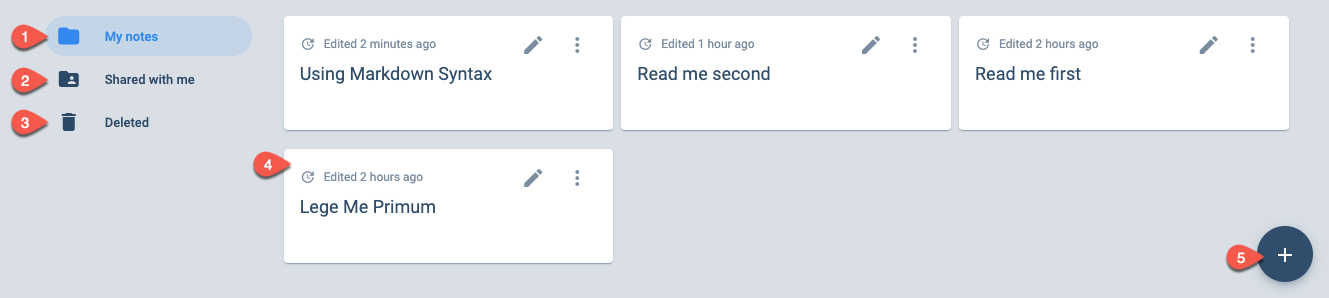
- My Notes: Access the notes you have created.
- Shared with me: Access all the notes your coworkers have created.
- Deleted: View and recover deleted notes.
- Note Card: Press the card to open the note in a pop-up window (more options are also available).
- Add icon: Press to create a new note.
Note Options
On every note card, you have access to the following options:
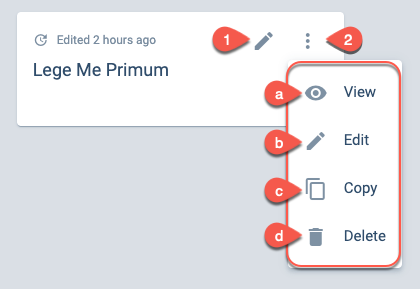
Edit Icon: Opens the note in a new browser tab.
Kebab Icon: Opens menu with more options.
- a. View: Opens the note in a pop-up window.
- b. Edit: Opens the note in a new browser tab.
- c. Copy: Copies the note's link to the clipboard.
- d. Delete: Moves the note to the Deleted section.
Creating Notes from the Dashboard
To create a note, follow these simple steps:
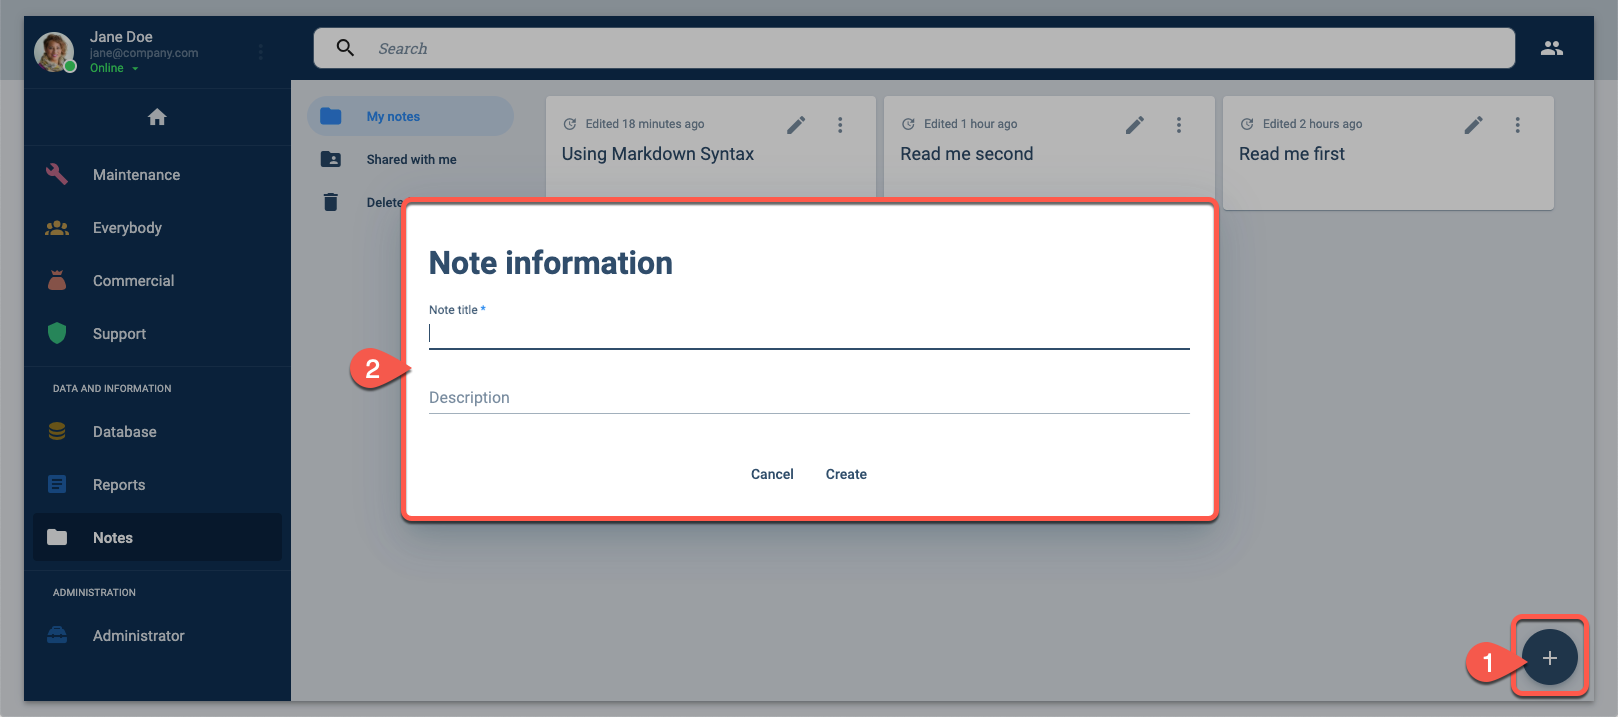
- From the Notes Dashboard, press the + icon in the lower-right corner.
- In the pop-up window, fill in the details for the new note.
- To add content to your new note, choose the note from the Notes Dashboard.