Task View Tutorial
Esta página aún no se encuentra traducida al español.
Tutorial on configuring tasks and using filters to organize tasks in the task view.
Time: 15 minutes
The task view is a tool used to display and organize tasks within a workflow. Tasks can be arranged using customized filters, allowing you to view at a glance the state of tasks according to your needs. Filters can also be shared globally so that all company members can use the same criteria for organizing tasks.
Company Requirements
In our last tutorial, Ruanda requested a task manager. Now they want to see how to configure, view, and arrange tasks. They just want to see a demo, so we'll go to Cotalker's best and easiest way to manage tasks: Task View.
For this demo, we will create three filters to sort tasks according to the following criteria:
- Status: tasks grouped by status
- Critical Tasks by Department: high importance tasks grouped by department
- My Tasks: sort a specific user's tasks by status
We will use three built-in criteria to demonstrate how to sort and arrange tasks. Plus, we will make the first two filters visible to the rest of the team. The third one will be visible only to the user.
Tutorial Objectives
- A. Configure task details
- B. Create first filter: status
- C. Create second filter: critical tasks by department
- D. Create third filter: my tasks
Pre-Requisites
User
- A user with access to the Task Manager Workflow-Group. To have access, users must have the permissions specified in the workflow group configuration.
Tasks
- It will be very convenient to have created about four or more tasks to work with during this tutorial. Click here to see how to create a task.
- It will also be useful if you created at least one of those tasks using one of the mock users we created previously. Remember to add the necessary permissions to the user's access role. The tasks created by another user will help us play around with the filters and see how you can display only the current user's tasks.
Steps
A. Configure Task Details
I. Go to the Task Manager Workflow Group.
From the Main Menu Bar:
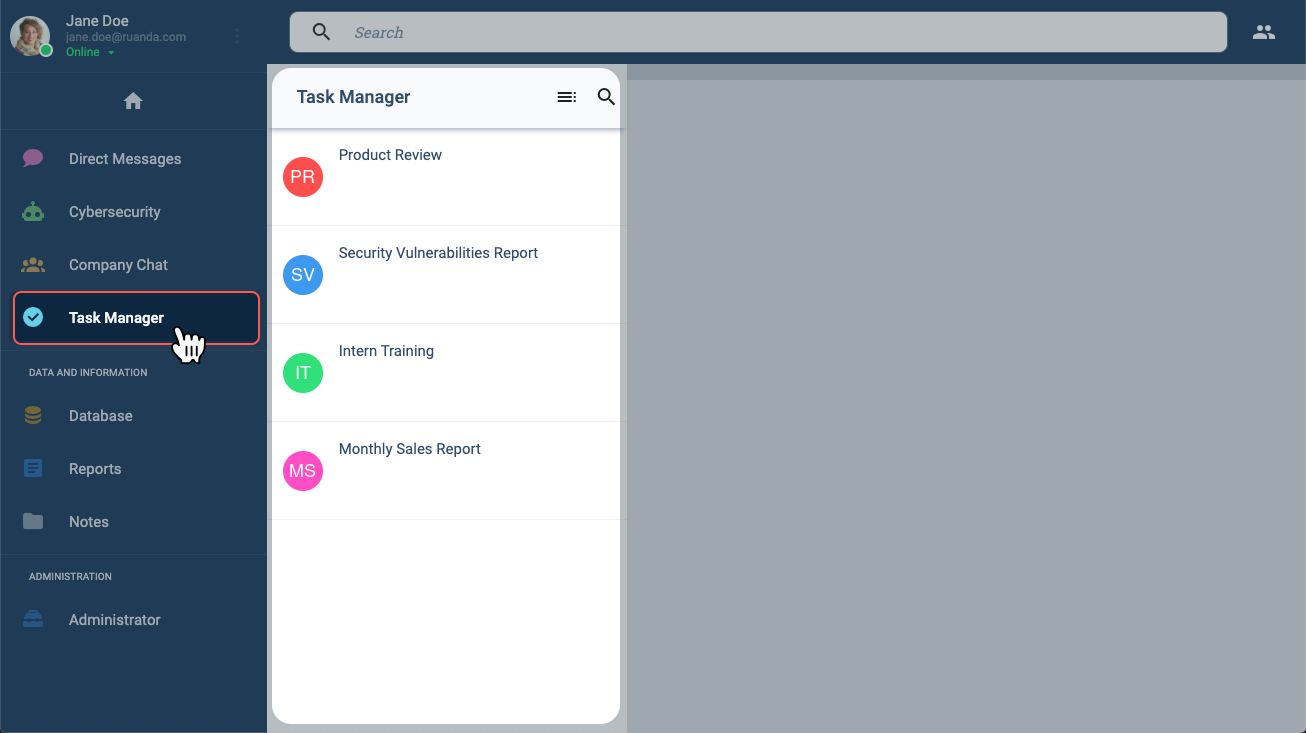
- Access the Task Manager group.
- The group panel will display the tasks that exist within the workflow group.
II. Access a task's details.
NOTE: We will view two ways to access task details below.
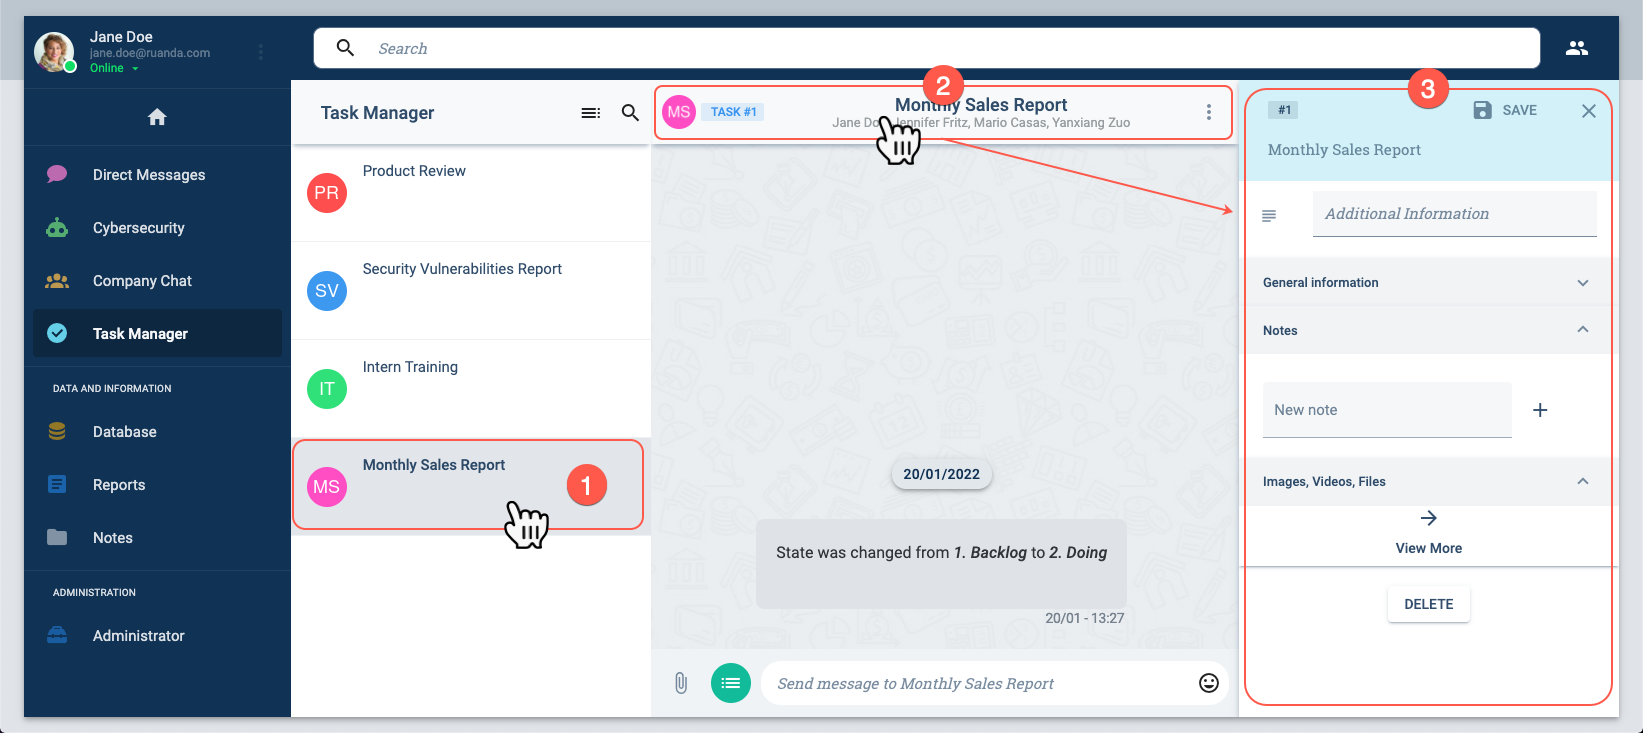
- Choose a task from the task group panel.
- Click the title section of the task's channel workspace.
- The task details panel will show up.
From the Task Manager group panel, press the task list button. The task view will open up.
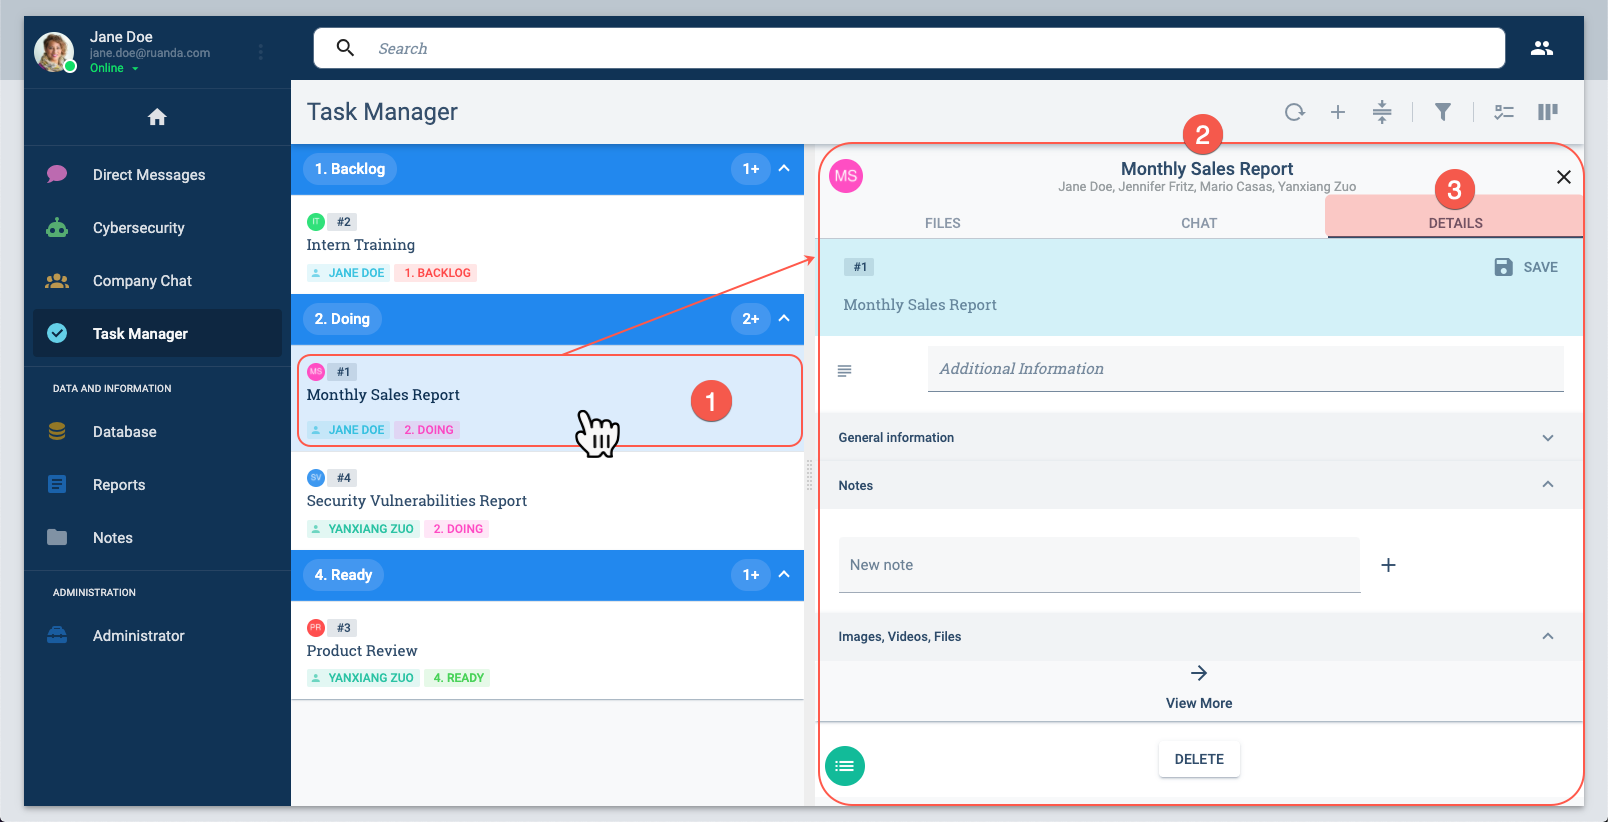
From the task view:
- Select a task.
- The task workspace panel opens up.
- Select the Details tab.
III. Set task details.
Whether accessed from the Channel Workspace or the Task View, the Task Details panel is identical.
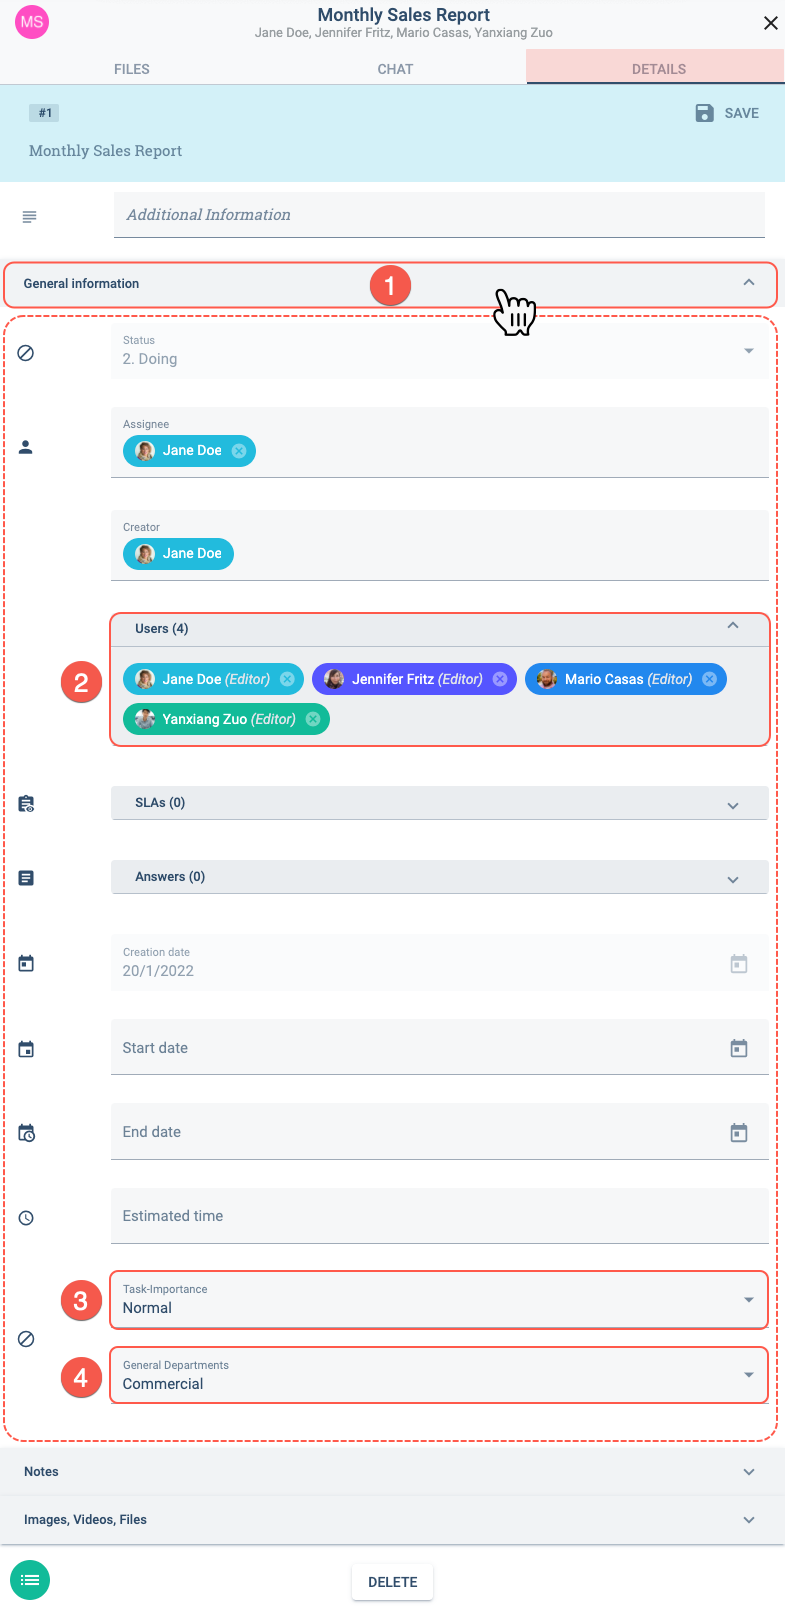
From the Details panel:
- Press the General information tab to open up the settings panel.
- Add users that will be able to view and modify the task.
- In the Task-importance field, choose an option.
- In the General Departments field, choose an option.
Repeat this process with the remaining tasks that you have created. Configure the details differently for each task so that you can order them using diverse filters.
B. Create Status Filter
I. Open the filter configuration panel.
From the task view:
- Press the filter icon.
- Then, press the configuration icon that shows up afterward.
- Finally, you will see the Filters configuration panel open up on the left side of the window.
II. Set up filter.
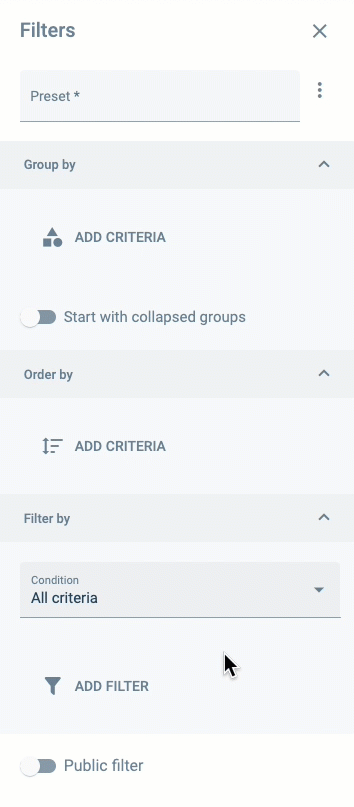
From the Filters configuration panel, set up the Filter as follows:
- Preset: Status
- In the Group by section, press ADD CRITERIA.
- Field: Status
- In the Order by section, press ADD CRITERIA.
- Field: General Departments
- Toggle on the Public filter switch.
- The filter preset is automatically saved.
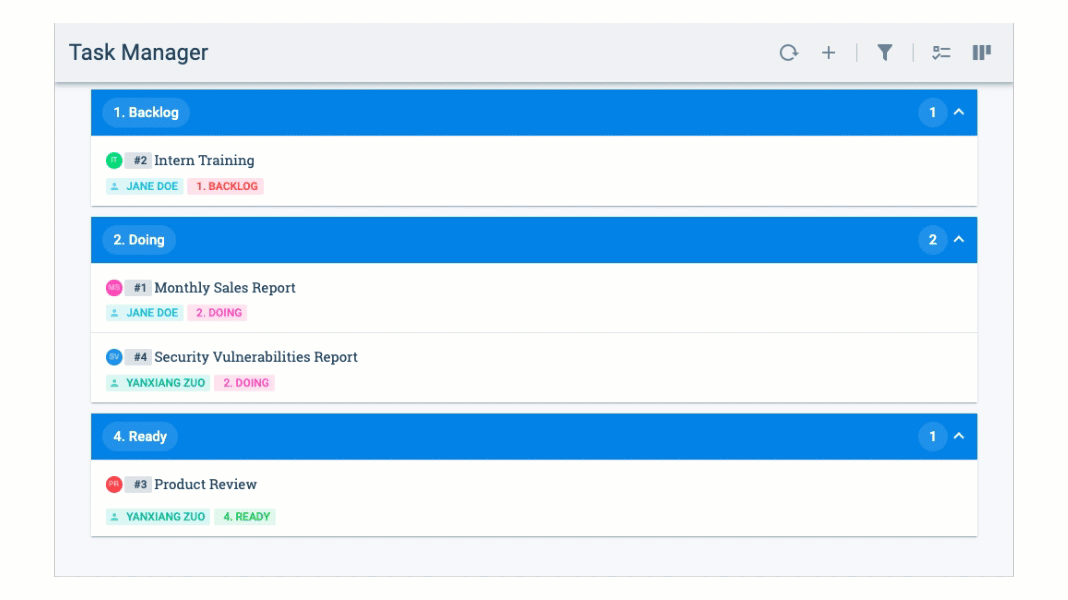
You should now see your tasks arranged by status and department.
C. Create Critical Tasks by Department Filter
I. Create a new filter.
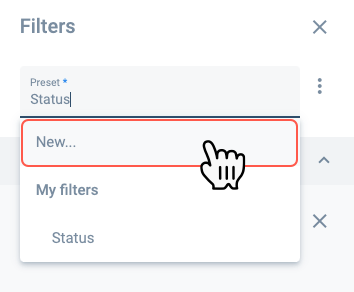
In the Filters panel,
- Press the Preset field.
- Select the New... option from the dropdown menu to clear all the fields and set up the new filter.
II. Set up the filter.
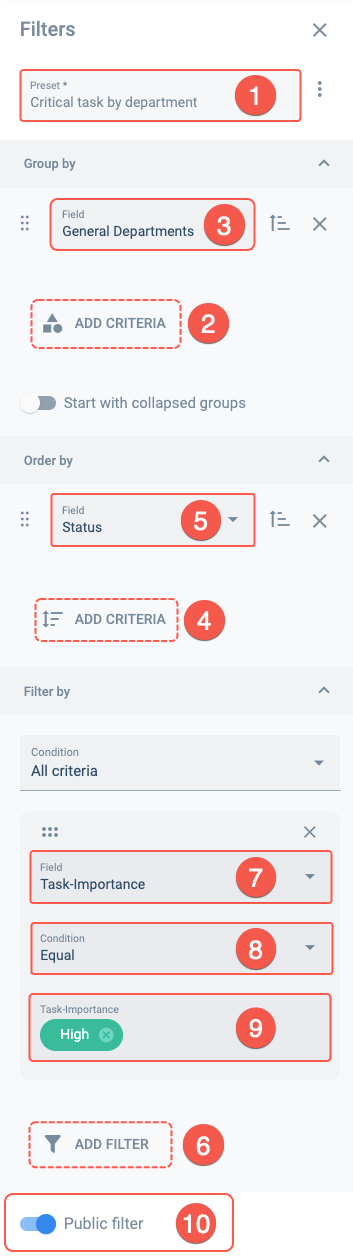
- Preset: Critical task by department
- In the Group by section, press ADD CRITERIA and set the following:
- Field: General Departments
- In the Order by section, press ADD CRITERIA and set the following:
- Field: Status
- In the Filter by section, press ADD FILTER and set the following:
- Field: Task-Importance
- Condition: Equal
- Task-importance: High
- Toggle on the Public filter switch.
You should now only see "high" importance tasks arranged by departments in the task view.
D. Create My Tasks Filter
I. Create a new filter.
As in the last step, from the Filters panel, press the Preset field and select the New... option to clear all fields and set up the new filter.
II. Set up the filter.
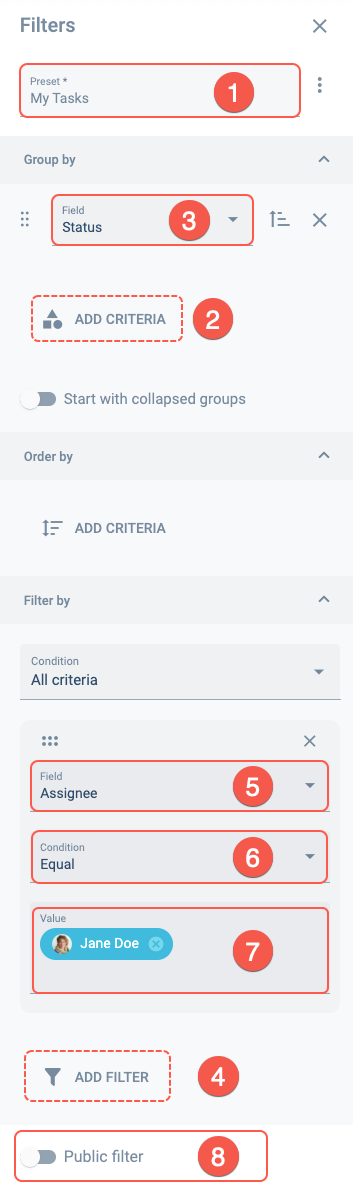
- Preset: My tasks
- In the Group by section, press ADD CRITERIA. Set the following:
- Field: Status
- In the Filter by section, press ADD FILTER. Set the following:
- Field: Assignee
- Condition: Equal
- Value: your user name
- Deactivate the Public Filter option.
You should now only see your assigned tasks arranged by status.
Once you have finished creating the filters, you can close the settings panel.
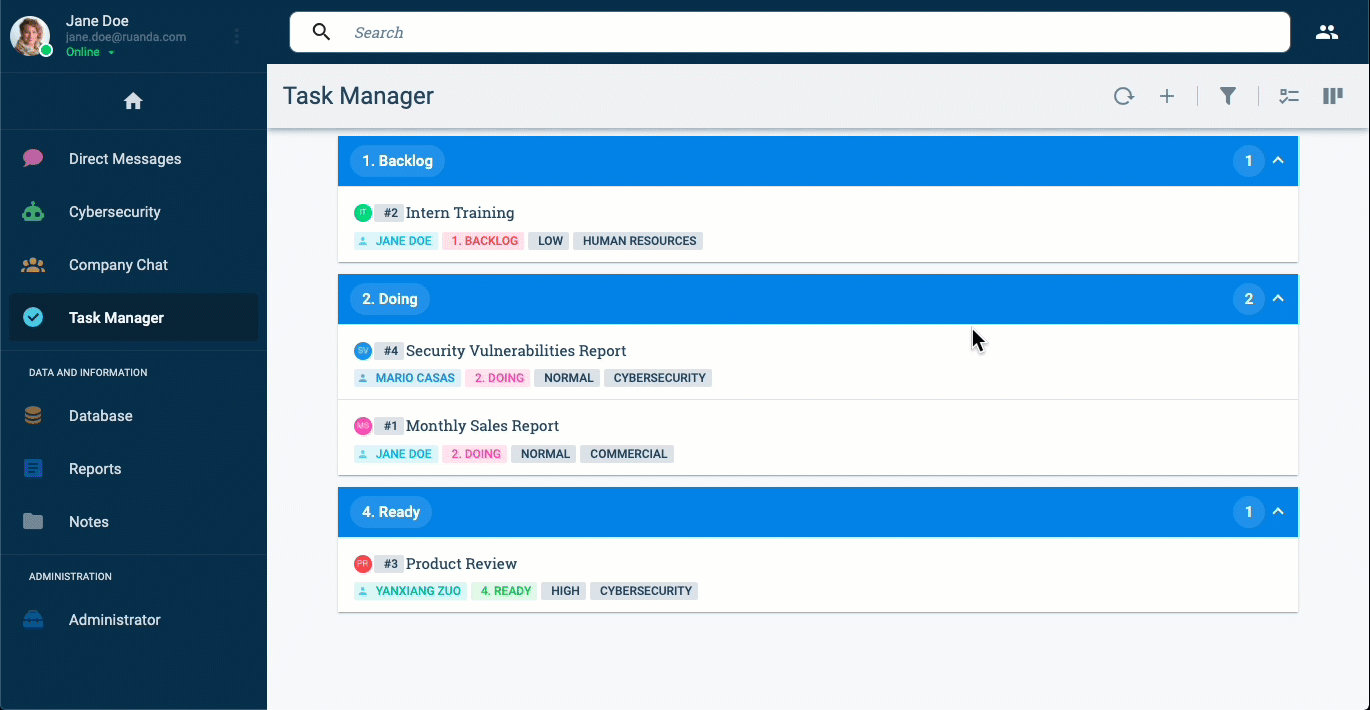
Expected Result
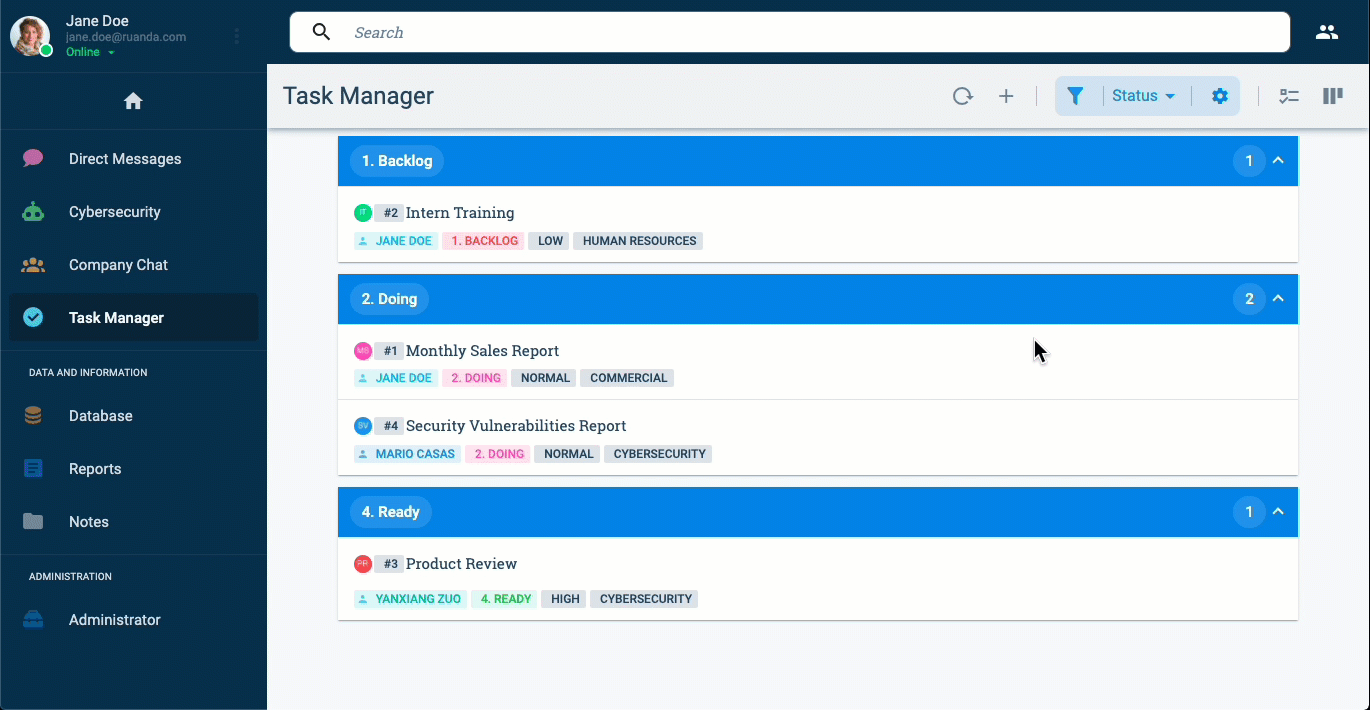
From now on, everytime you go to the Task view, you can use the filter presets you have just created. To do this, simply click con the filter icon and choose a preset from the dropdown menu, as shown below:
Filters created with the Public filter activated will be visible to you and all other users. In this manner, strategic filters can be shared within the company.
You can also adjust the view type. Let's practice using the kanban view and see how the filtered tasks look like:
NOTE: More views can be added to the toolbar through the Workflows settings panel.
Related Topics
- Task View: Getting Started Documentation