Routines Section

Overview
Routines are the automations that you can create and save for later use. They're perhaps one of our most valuable tools because they make automations easier to replicate throughout your processes. They can be recycled or modified by other users and applied to any operation, bringing a lot of scalability to all your processes.
For example, let's say that in many of your workflows you need to send a system message and an email in each state change. You can create a routine with that specific automation sequence and add it as a stage through any routine builder. You can reuse the routine in any and as many processes as you need. If you need a similar routine but with some slight differences, open the existing routine, make the chagnes, and save it with another name, conserving both routines for later use.
Accessing Routines
To access the Routines section:
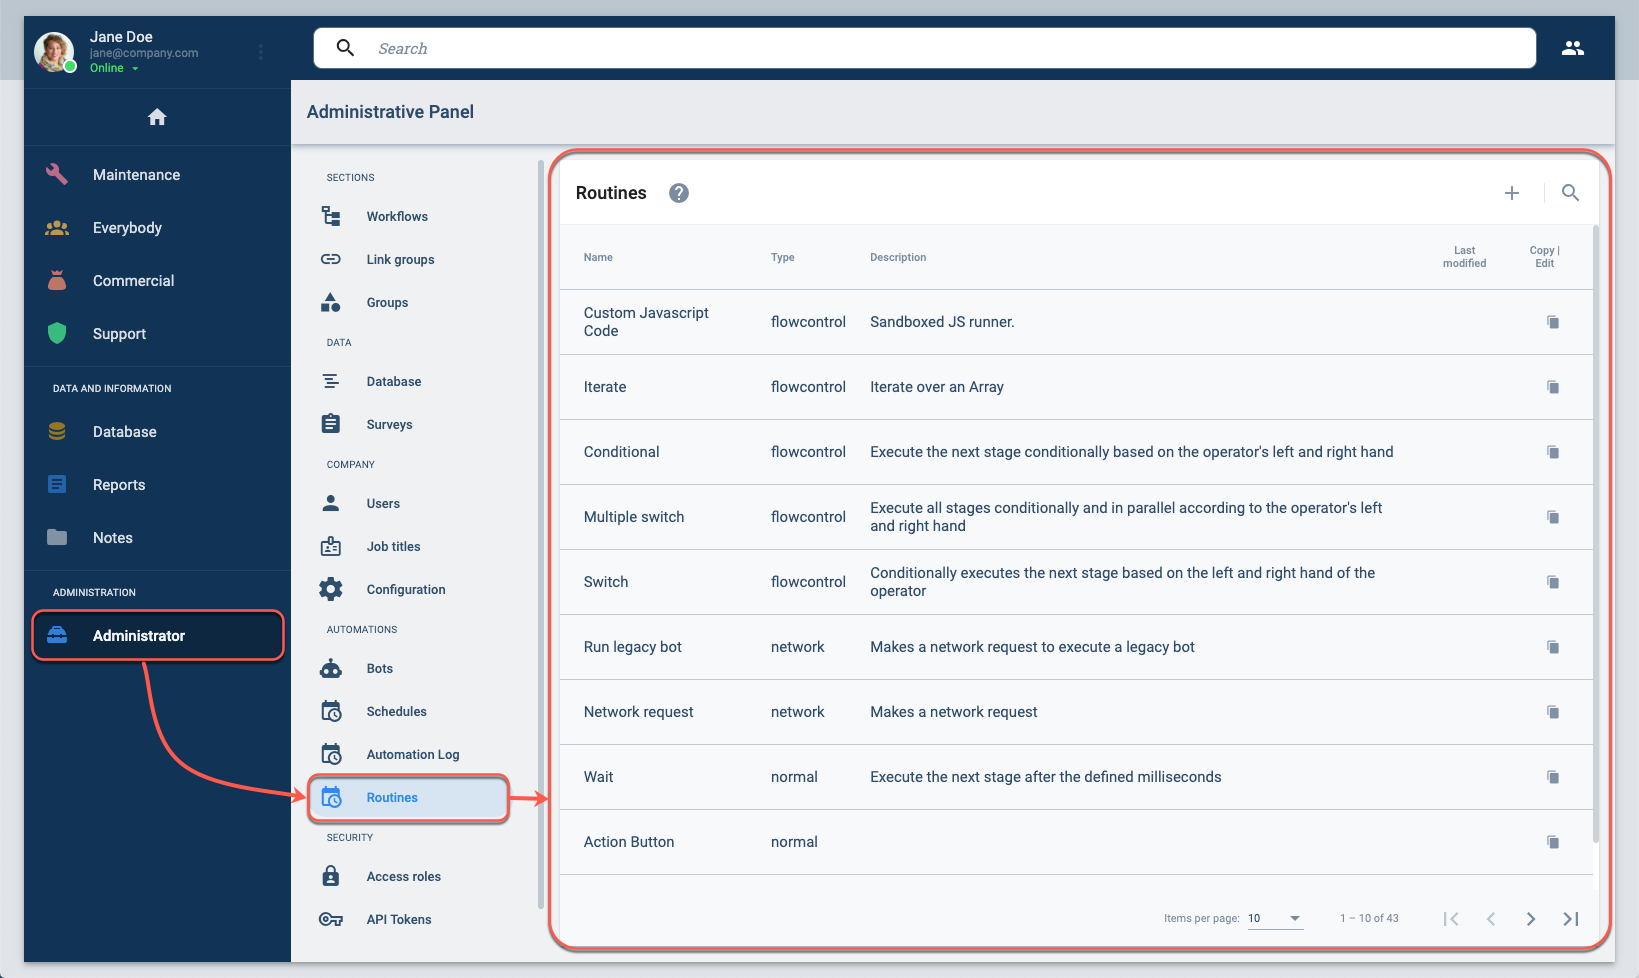
- Press Administrator in the Main Menu Bar.
- Select Routines from the Administrative Panel.
- The Routines settings panel will open up.
Create Routine Settings Panel Layout
Create or edit a routine from the Routines settings panel:
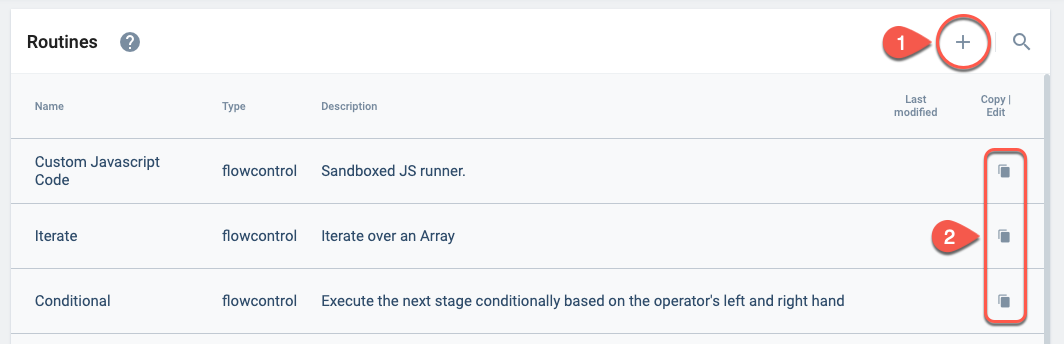
To begin working with routines, you have three main options:
Create a new routine from scratch:
Select this option if you want to design a completely new automation sequence. You will be able to define all the steps, inputs, and actions according to your specific needs.Copy an existing routine:
If you want to use an existing routine as a template, choose this option. This allows you to duplicate a routine, make any necessary modifications, and save it as a new routine. This is useful when you need a similar routine with slight changes, saving you time and effort.Edit an existing routine:
Use this option to modify the configuration of a routine that has already been created. You can update its steps, inputs, or any other settings to better fit your current requirements.
Choose the option that best fits your workflow. After making your selection, the routine settings panel will open, allowing you to configure or update the routine as needed.
After choosing an option, the following settings panel opens up:
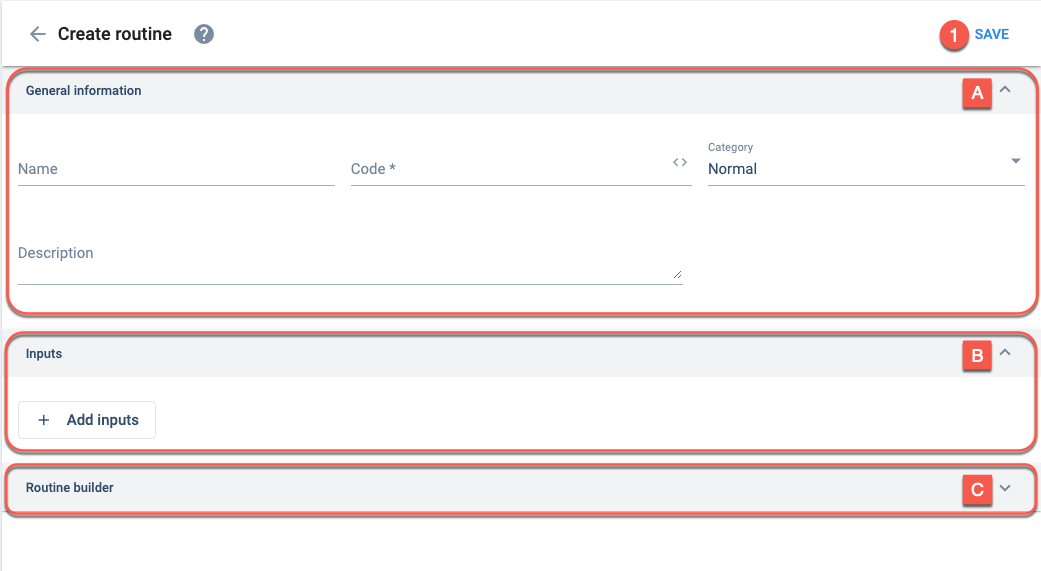
- Save: Saves the current configuration
- A. General information: basic identification settings
- B. Input: Indicates the different input types that will be requested
- C. Routine Builder: Creates an automation with the gathered data
A. General
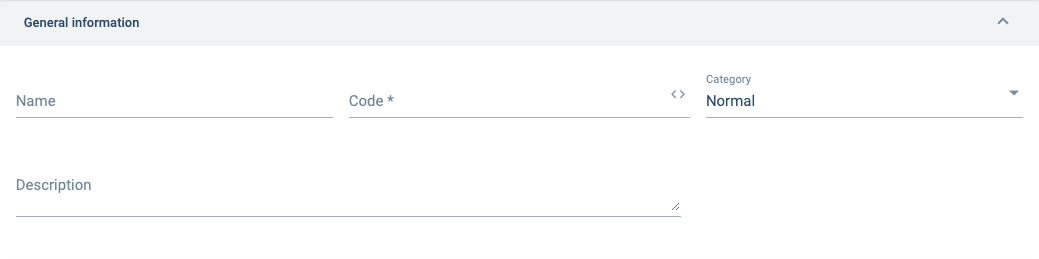
Options are: Flowcontrol, Network, or Normal
B. Inputs
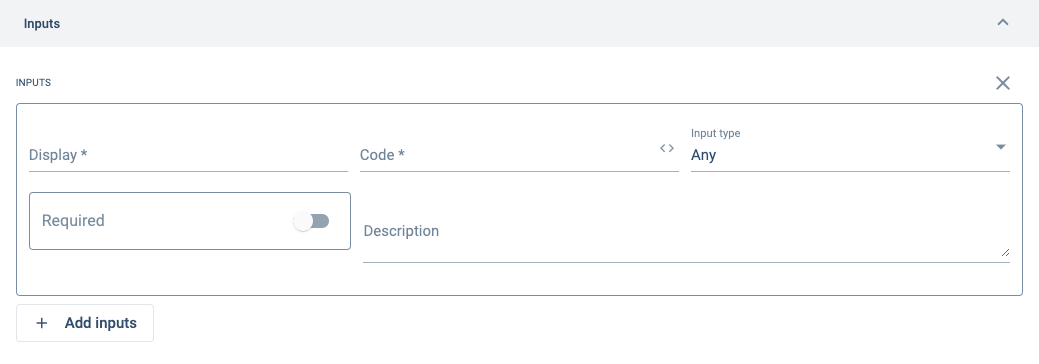
Indicates the input's data type. Options include: String, Number, Boolean, Date, Object, Any, Array, Dictionary, CotTaskId, CotUserId, CotChannelId, CotGroupId, CotAnswerId, CotGroupId, CotAccessRoleId, CotPropertyTypeId, CotPropertyId, CotStateMachineStateId, CotSurveyId.
Go to the Data Models section for more information about the COT* data types.
C. Routine Builder
For setup information, go to the Routine Builder section.
Related Topics
- Routine Builder: Read how routines are added to processes.
- Routine Stage Types: Learn more about the Routine Stage Types that can be used to make your routines.