Users Panel

Overview
Users are the basic unit of the Cotalker platform. They can log into their company's Cotalker environment and perform various actions. According to their access roles, they can view company data, create tasks following a workflow process, send messages to other users, submit information through surveys, interact with bots, initiate automated processes, and much more.
Users can represent real people (team members, clients, associates, supervisors, platform administrators, etc.) or even non-people, such as robots. For example, a user may be the company's Chief Operating Officer or a bot who reminds you of pending tasks.
Users can also view and perform changes in the Administrative Panel, depending on the permissions included in their access roles.
Accessing the Users Panel
To access the Users panel:
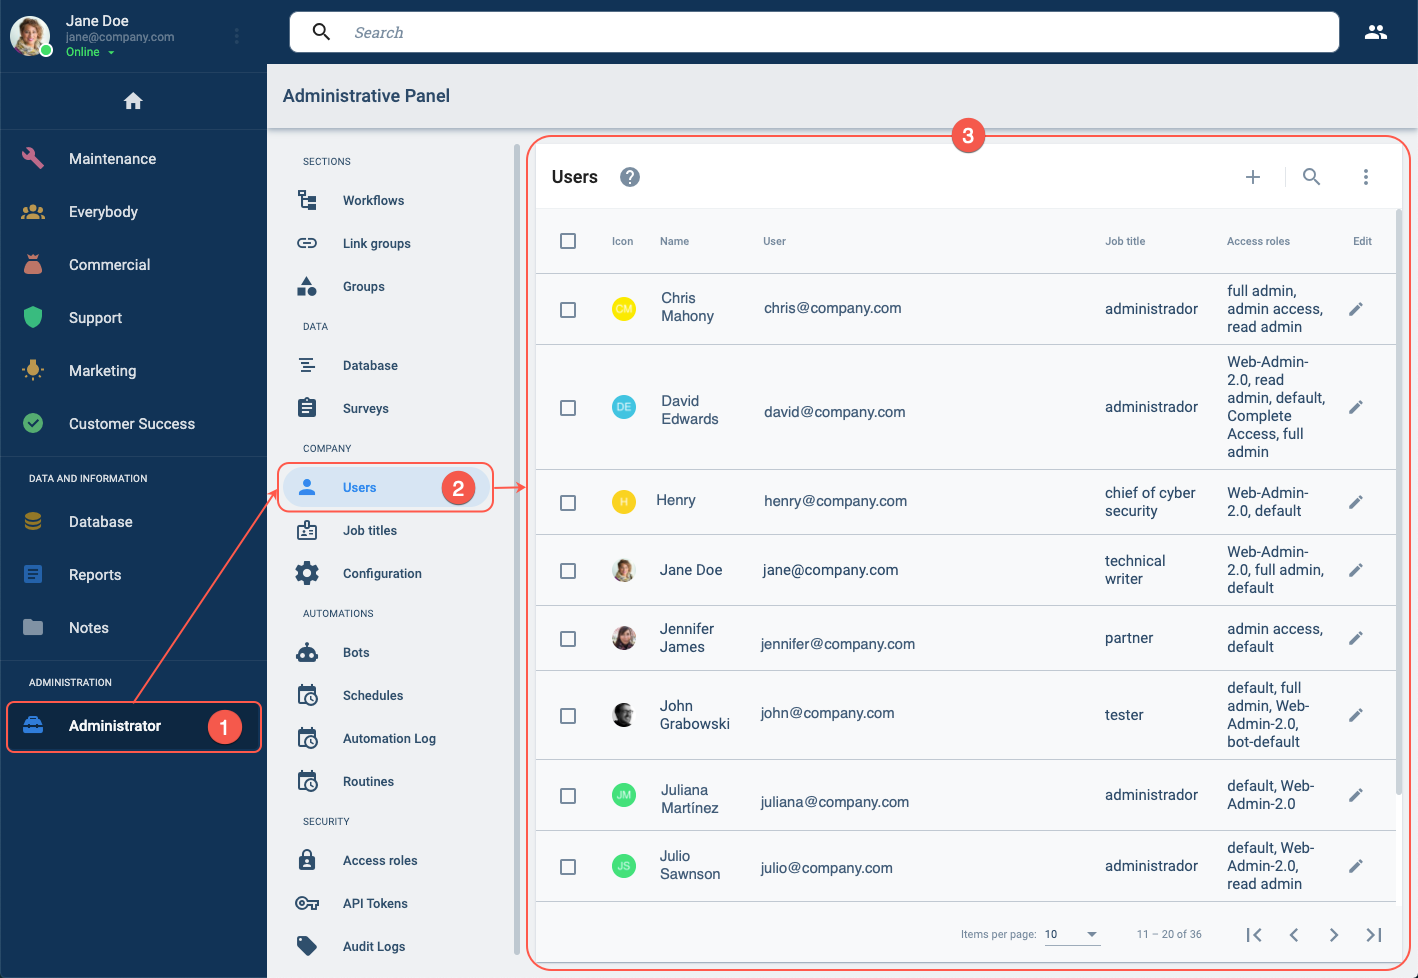
- Press the Administrator in the Main Menu Bar.
- Select Users from the Administrative Panel.
- The Users Panel will open up.
Users Panel Layout
In this section, you can find the complete list of users that have been created within the company.
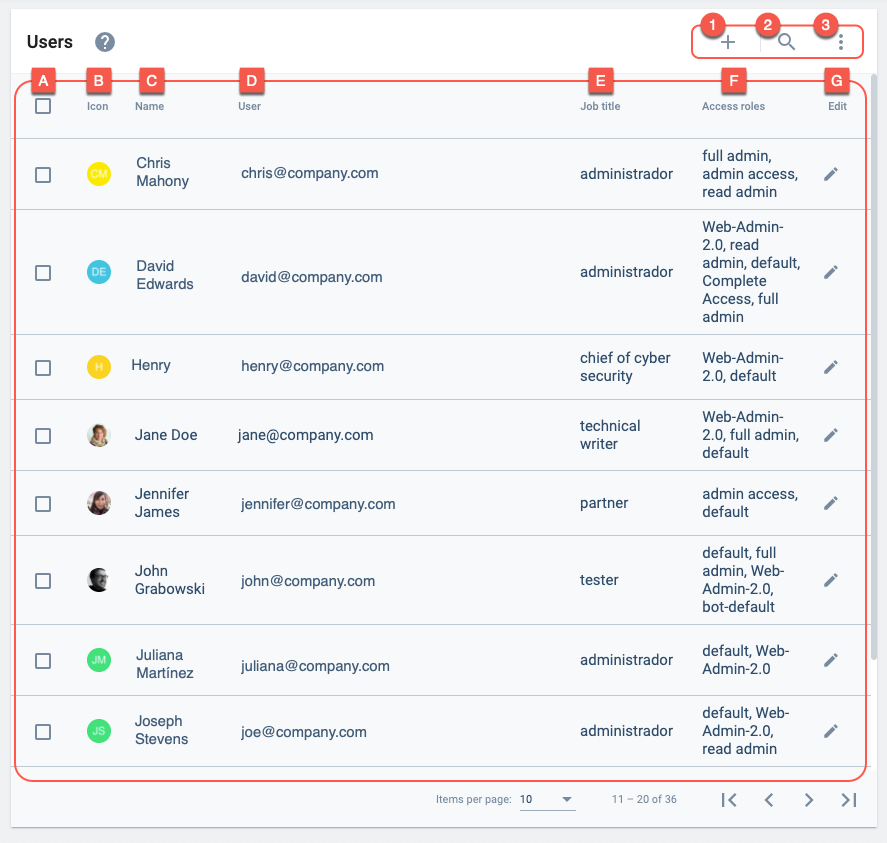
Actions:
- 1. Create user: Create a new user within the company.
- 2. Find user: Searches for users within the company.
- 3. More options: Allows viewing users that have been disabled and system users, i.e., bots created automatically by the platform.
Table and Options:
- A. Checkbox: Selects users in order to activate or deactivate them. When selected, the Deactivate/Activate button will appear on the upper part of the layout.
- B. Icon: Displays the user's avatar.
- C. Name: Displays the user's full name.
- D. User: Indicates the user's identification code. The user's email is used in case of human users. For bots, a string with an email format is automatically generated.
- E. Job title: Indicates the job title associated with the user.
- F. Access roles: Displays the user's access roles.
- G. Edit: Opens the user settings panel for editing.
Create User
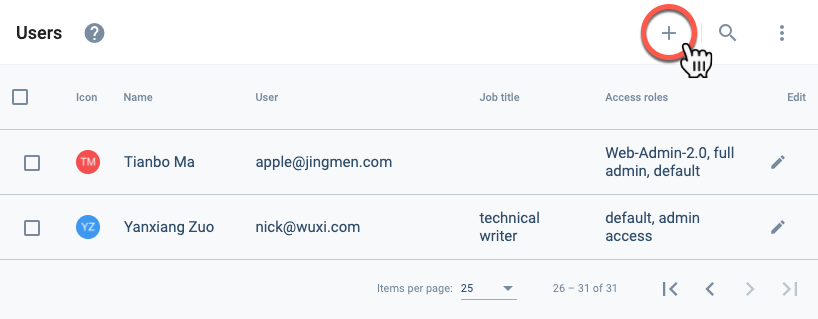
Create a new user by pressing the + icon in the upper right corner of the Users Panel. The User Settings Panel will open up.
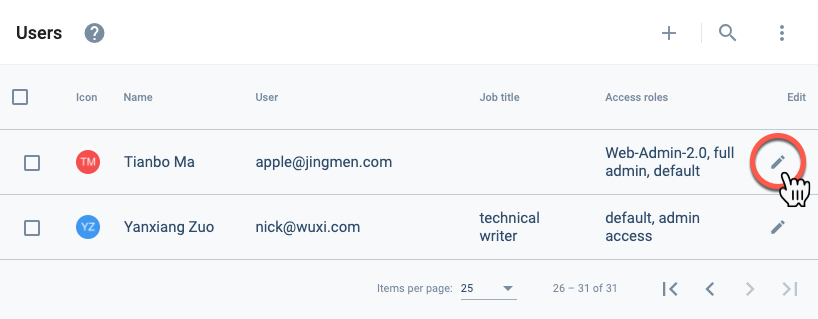
Edit User
From the Users Panel, edit an existing user by pressing the pen icon on its row. The User Settings Panel will open up.
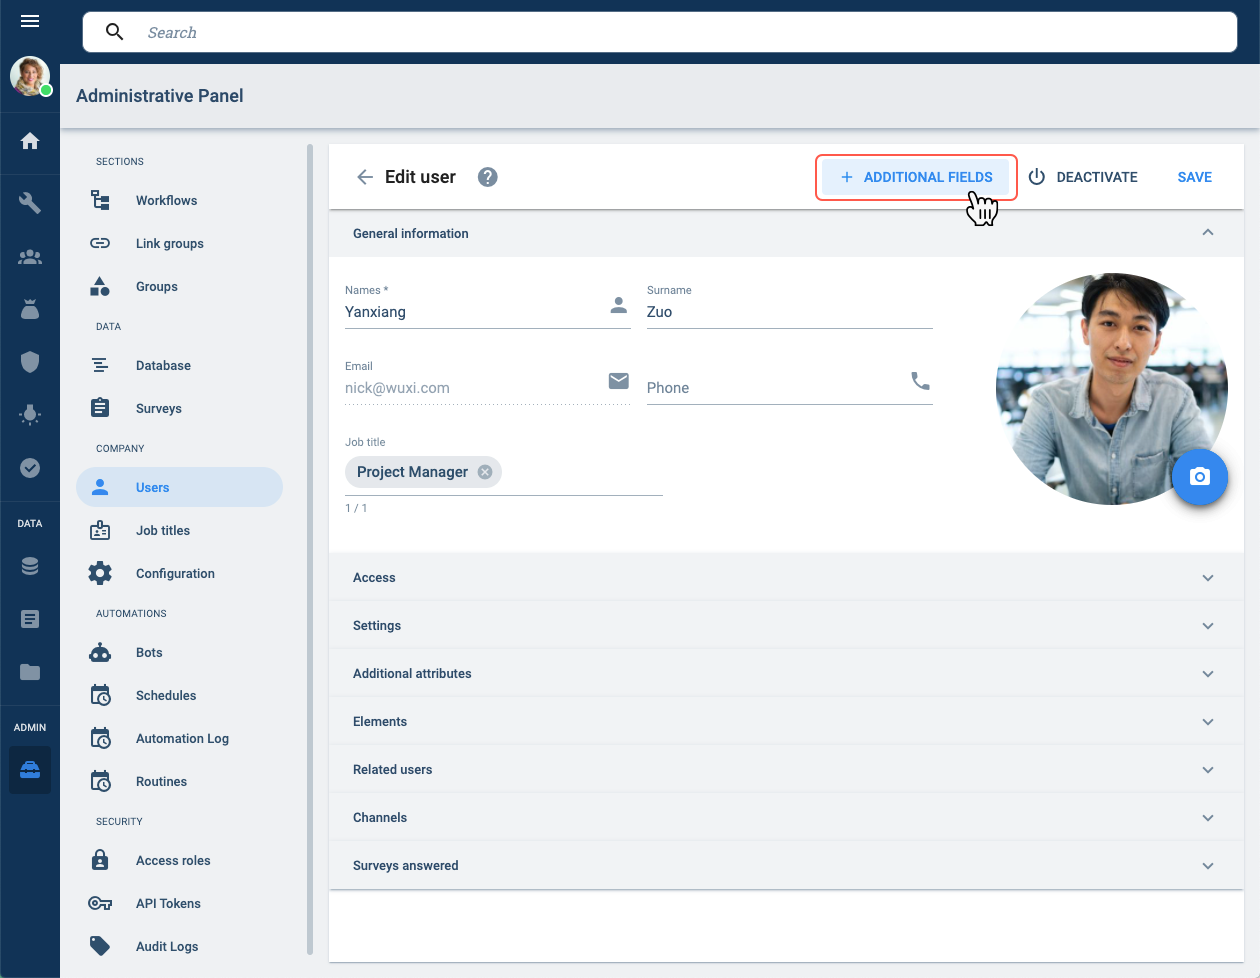
User Settings Panel
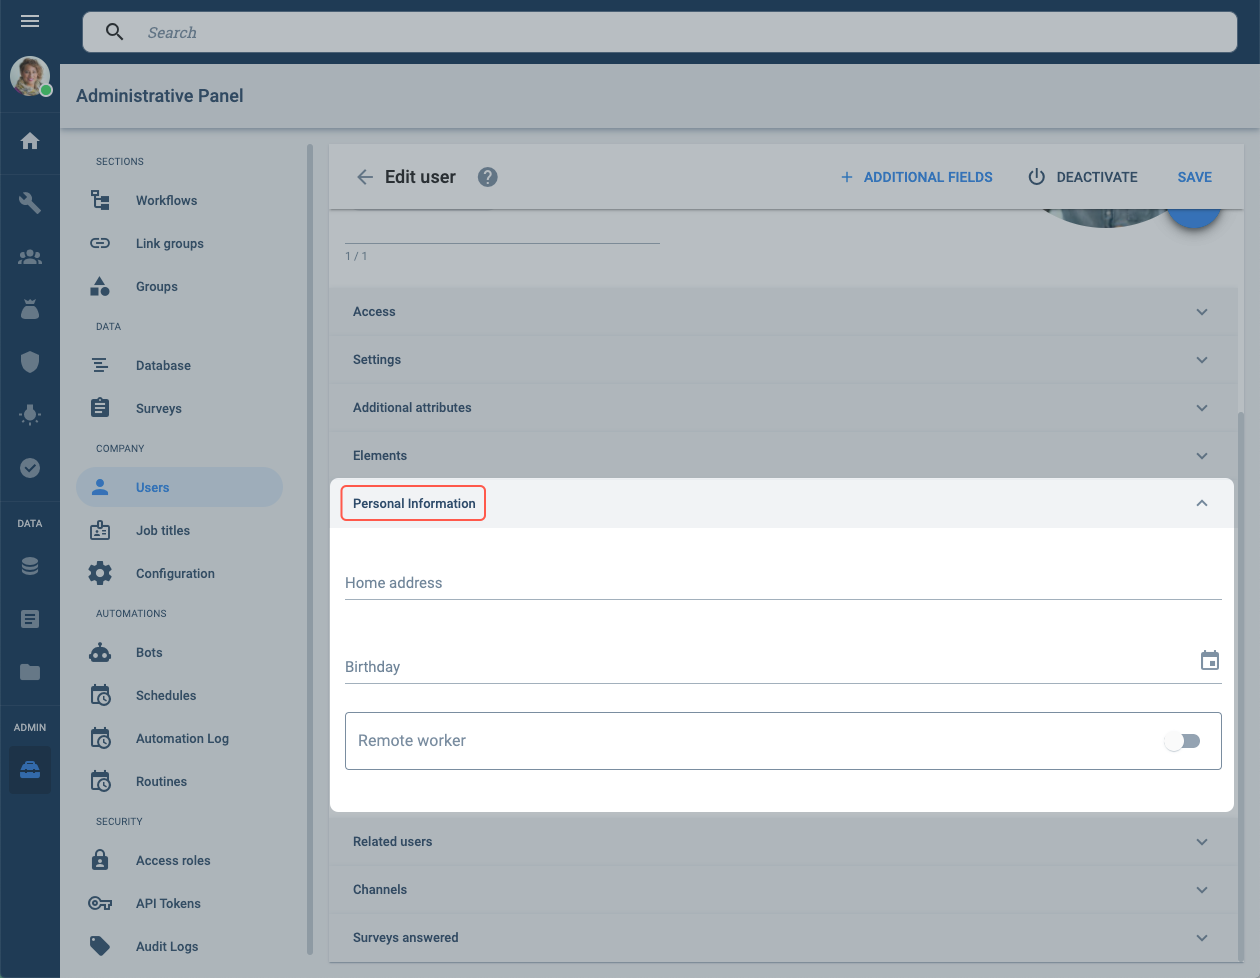
Whether creating or editing a user, the following user settings panel opens up. The Channels and Surveys answered sections are available only when editing a user. The Additional fields vary from user to user and according to the collections used.
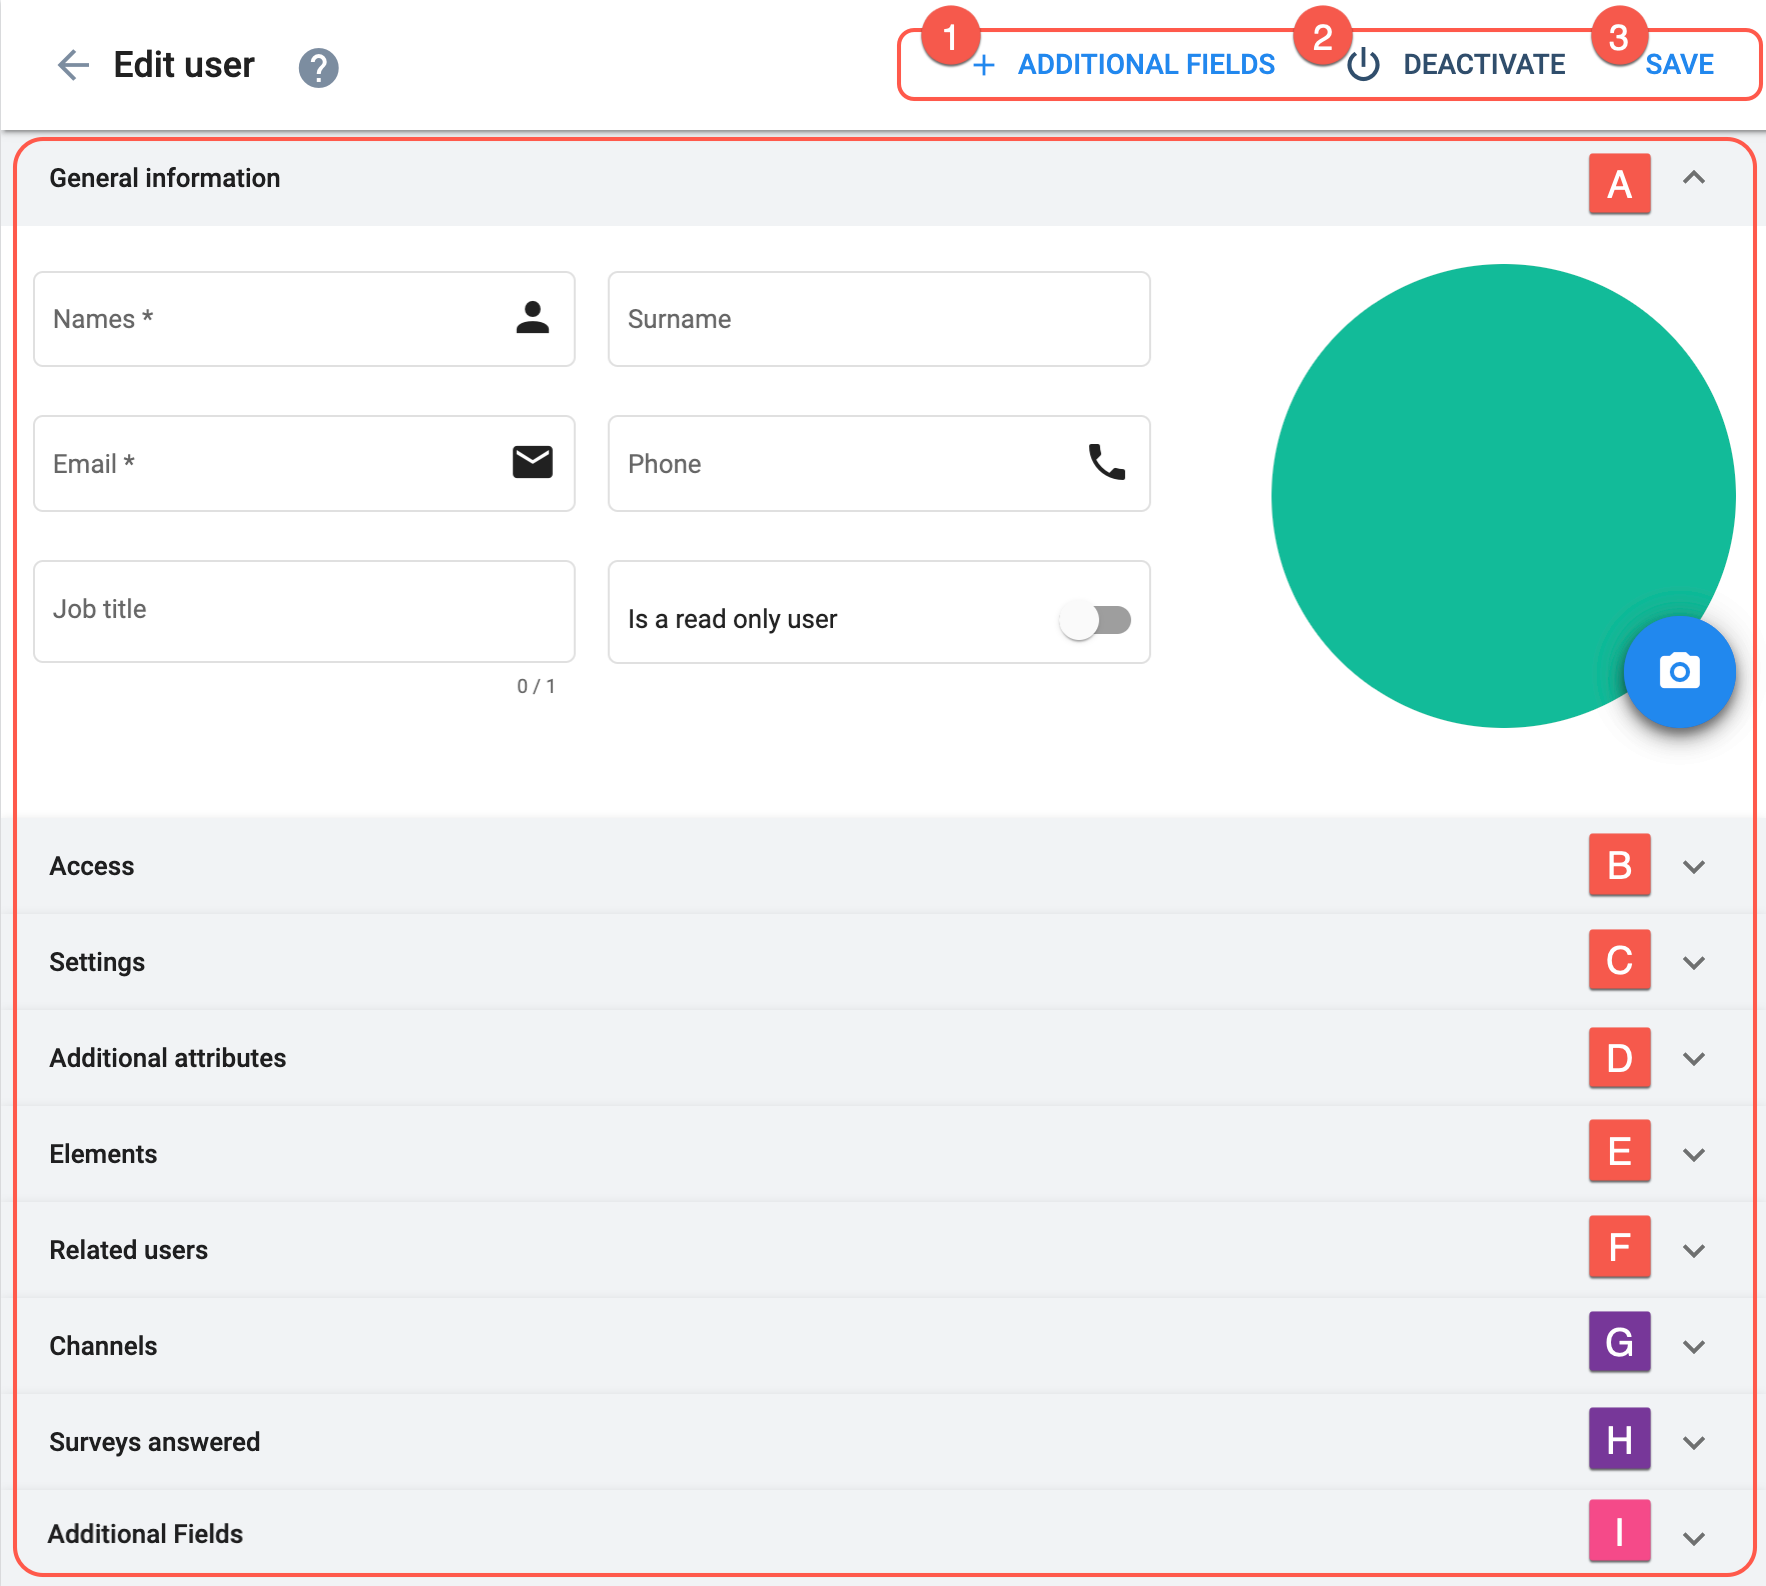
Actions:
- 1. + Additional fields: Associates a collection's additional fields to a user. Details on Additional fields.
- 2. Deactivate/Activate: Deactivates or activates the user.
- 3. Save: Saves the user with the current settings.
Configuration:
- A. General information: Basic user information.
- B. Access: User's access roles, i.e., sets of permissions.
- C. Settings: Sets the visibility of platform shortcuts for the user.
- D. Additional attributes: Adds attributes to the user (deprecated).
- E. Elements: Associates elements to the user.
- F. Related users: Indicates users that are direct superiors and subordinates.
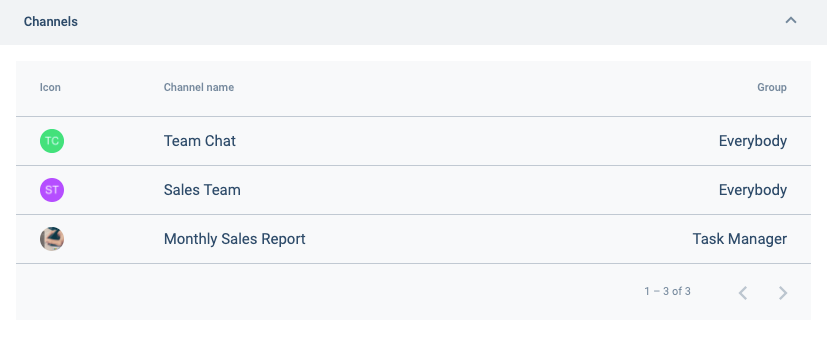
- G. Channels: Displays a list of the channels the user has access to.
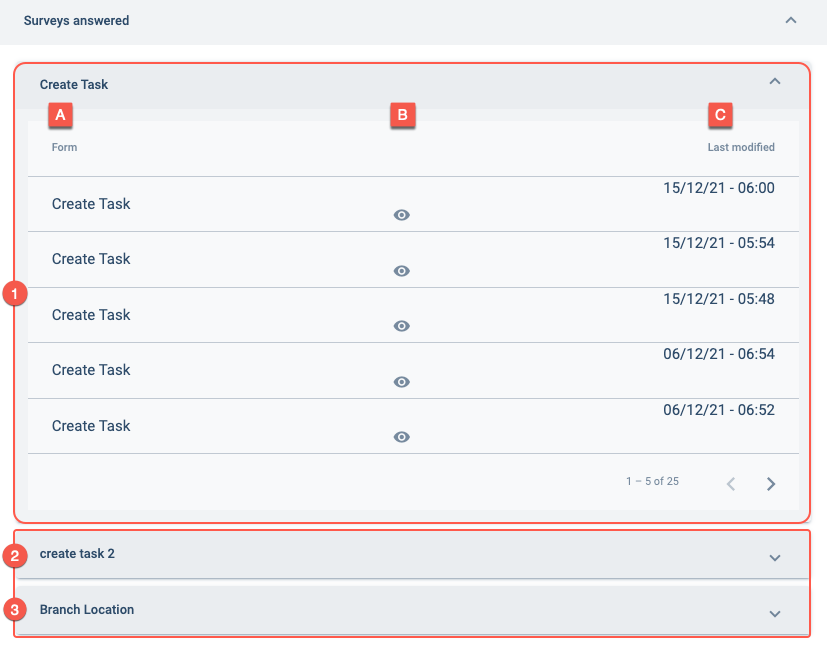
- H. Surveys answered: Displays a list of the surveys the user has submitted.
- I. Additional fields: Additional fields vary in name, type, and order of appearance according to the user's settings and the associated collection.
A. General information
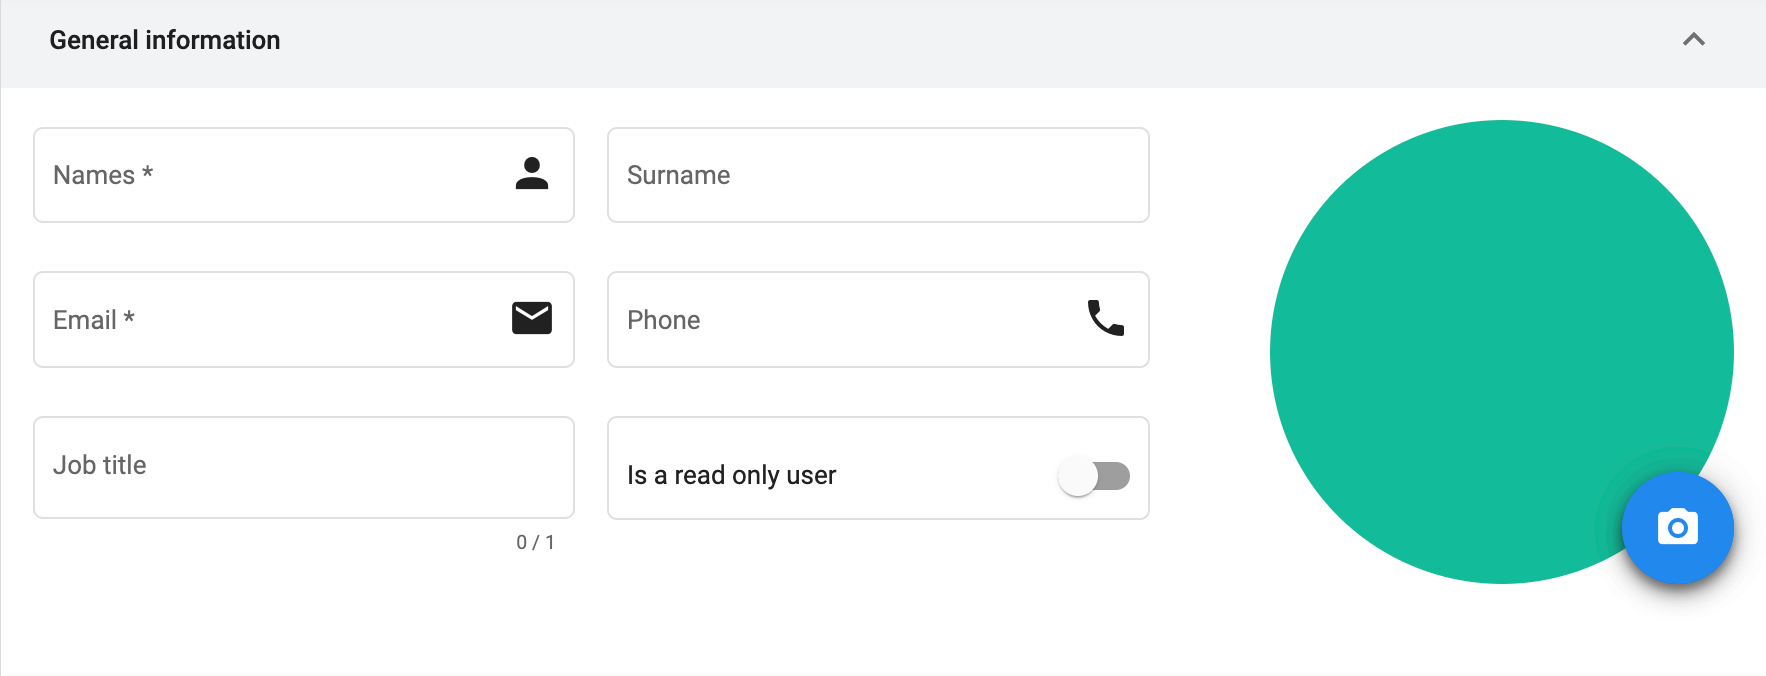
Job titles can be used to create pools of users, as well as granting them special attributes (additional fields), access roles, and elements.
The Administrative Panel allows this option to be activated only when the user is being created and permits it to be disabled later on. If disabled, it can only be reactivated through an API request modifying the isReadOnly field within the user's data model.
B. Access
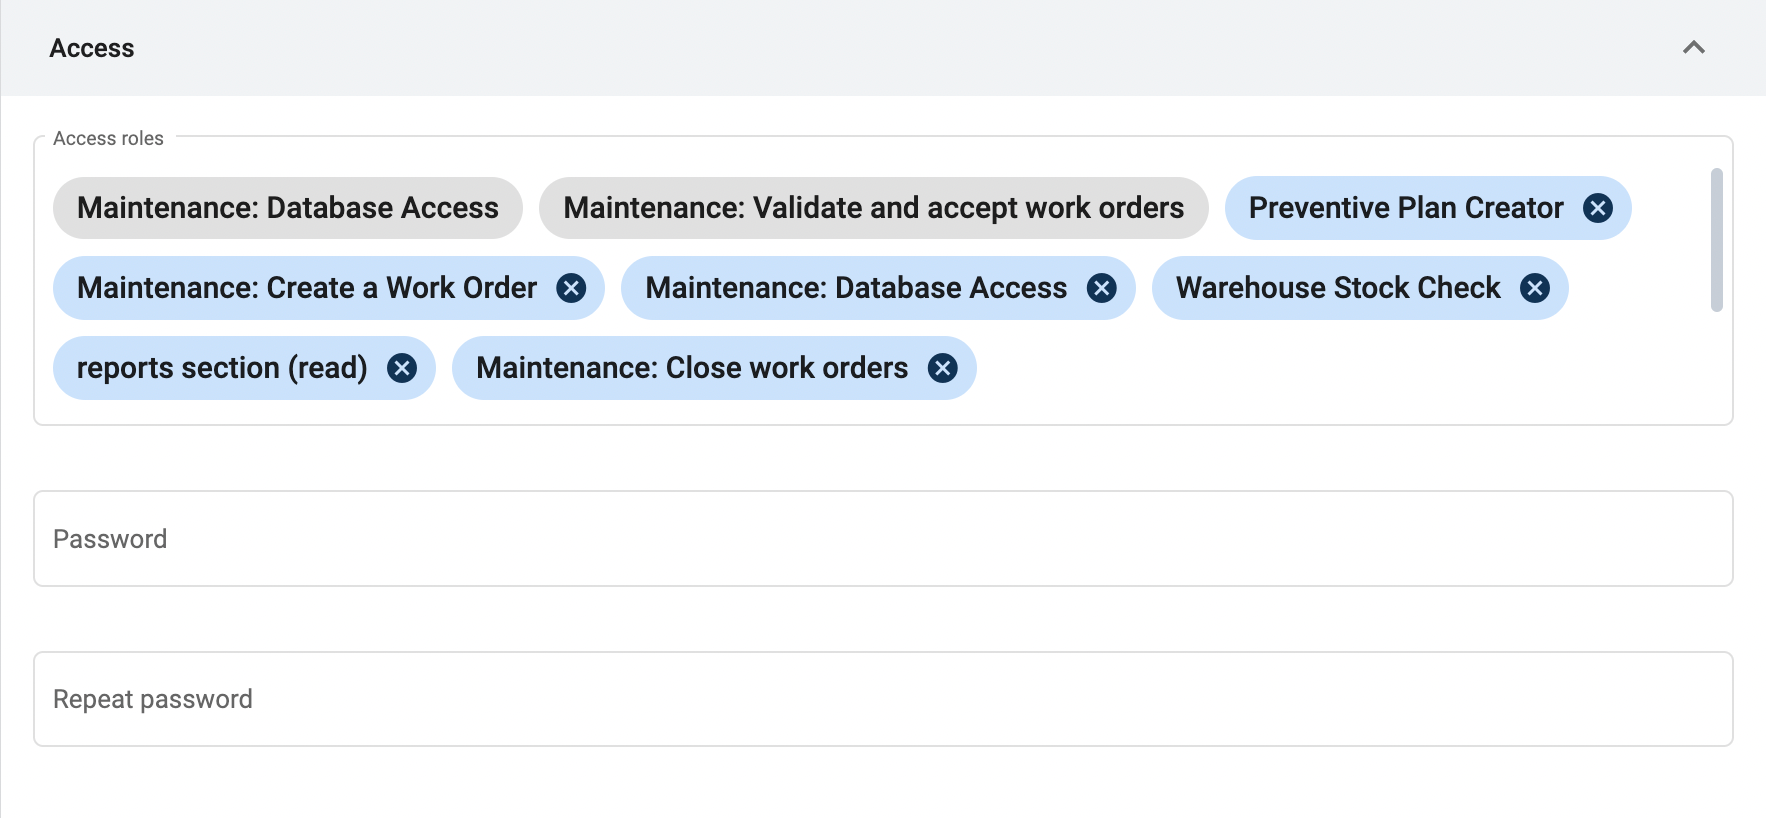
The access roles assigned to the user.
User access roles imported by their job title appear in gray.
For security reasons, it is EXTREMELY IMPORTANT to assign access roles with full knowledge of what their permissions allow users to do.
⚠️ – Keep access roles with the admin-accesscontrol-write and admin-*-write permissions limited to key users because they can assign access roles to all other users. Furthermore, they can access and change every configuration in the entire company.
⚠️ – Beware of changing or removing assigned user access roles. This could affect workflow or automation behavior, but adding new ones will generally not have any side effects.
Password rules can be set for each company by configuring the passwordRules field in COTCompany.
C. Settings
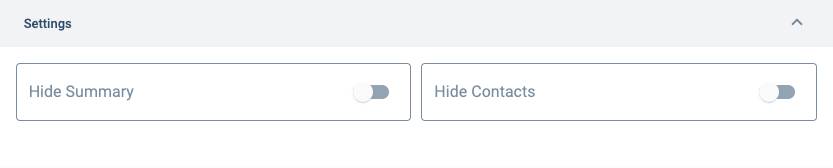
When this toggle bar is on, the home icon in the Main Menu Bar disappears, hiding access to all recent conversations.
When this toggle bar is on, the contacts icon disappears, hiding access to a complete list of all users in the company.
Found in the upper toolbar on desktop versions or the main menu in mobile versions.
D. Additional Attributes
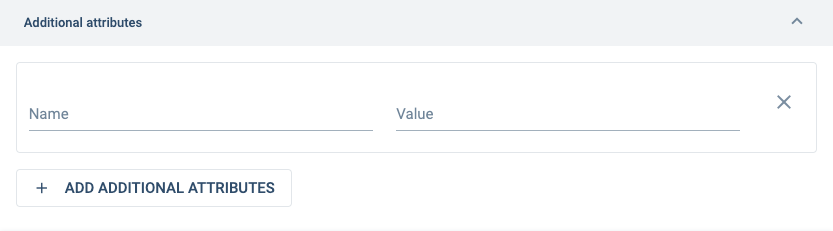
Additional attributes have been deprecated and used only on legacy systems. Prefer additional fields instead.
Appears when the + Add Additional Attribute button is pressed.
Appears when the + Add Additional Attribute button is pressed.
E. Elements
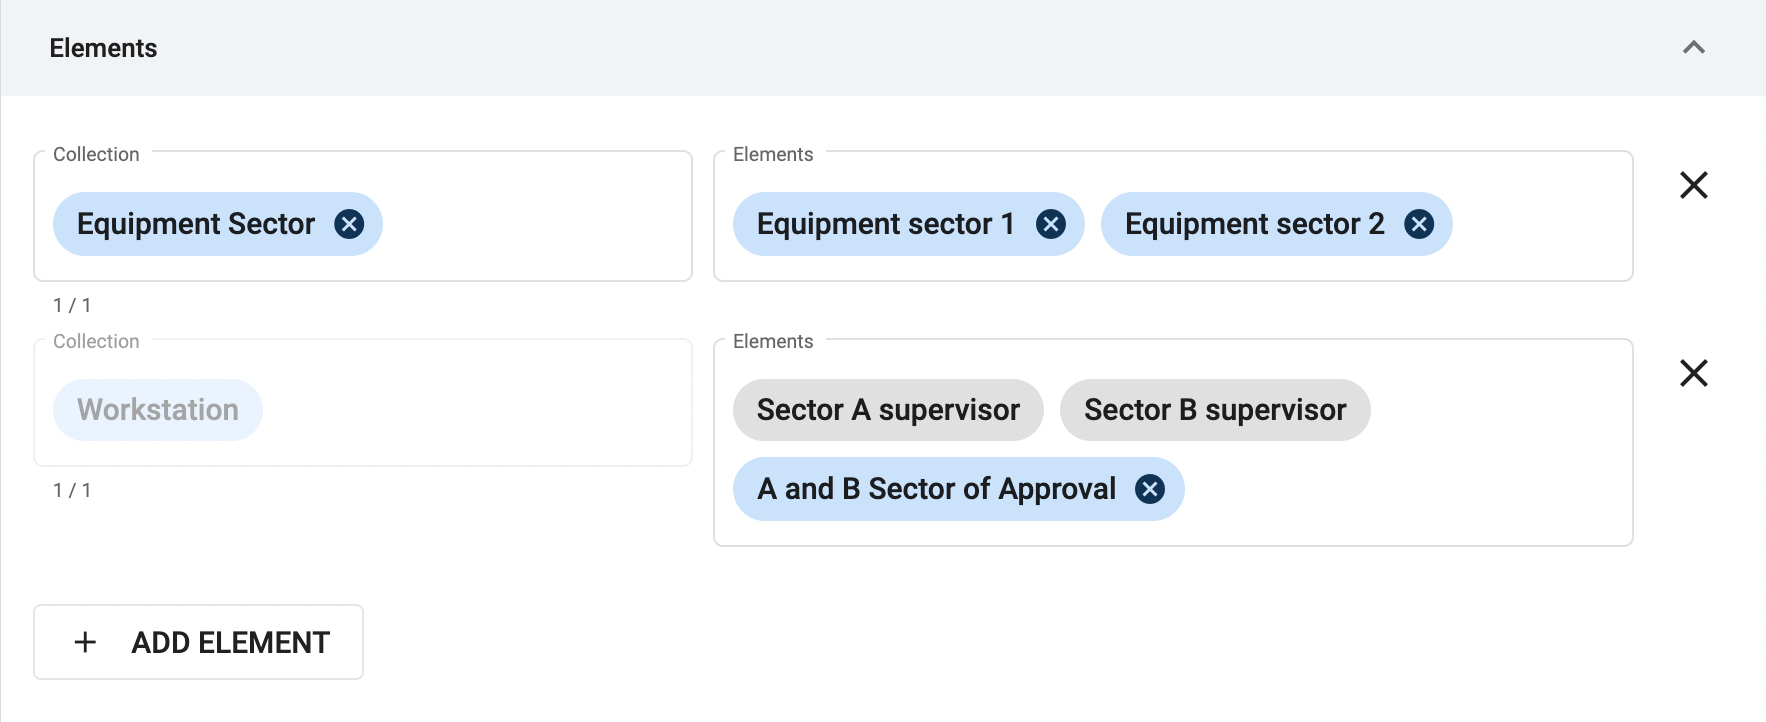
Opens the settings box to choose a database collection and its elements.
Indicates a collection from where to choose elements to be associated with the user.
Collections imported from the user's job title appear in gray.
Press the + Add Element button if elements from another collection are needed.
Indicates the elements from the collection chosen to be associated with the user.
Elements imported from the user's job title appear in gray.
Press the + Add Element button if elements from another collection are needed.
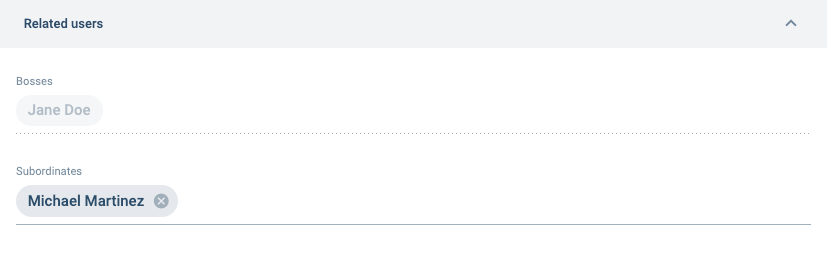
F. Related users
G. Channels
H. Surveys answered
I. Additional fields...
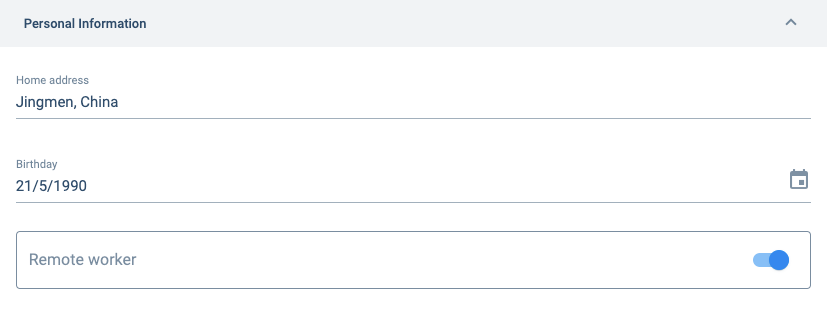
An additional field's name, input type, and order of appearance are customizable and depend on its collection. The image shown above is just an example.
Go to the Additional Fields section for setup information and more details on setting up additional fields for a particular user.
For information on adding additional fields through a user's job title, go to the Attributes section of the Job Titles page.
Additional Fields
When creating or modifying a user, it may be desirable to add extra information depending on the company's needs. Since this information can be multiple and varied, a special arrangement has been developed in order to associate a user to a collection created to host the extra user-data requirements. The additional fields can include information in string, number, date, boolean, and URL format. They can also host files, other elements, or even users.
- Additional Fields must be previously created within a Collection in the Database section.
- Information on how to set up an Additional Fields Collection can be found in the Database Admin Section.
- All the user data input into the additional fields is stored in the collection.
- Attributes assigned to a user's job title are automatically assigned as additional fields and cannot be removed from the User Settings Panel.
In order to activate Additional Fields, press the button in the upper-right corner:
From the following dialog box, choose the Collection containing the Additional Fields that you want to associate with the user.
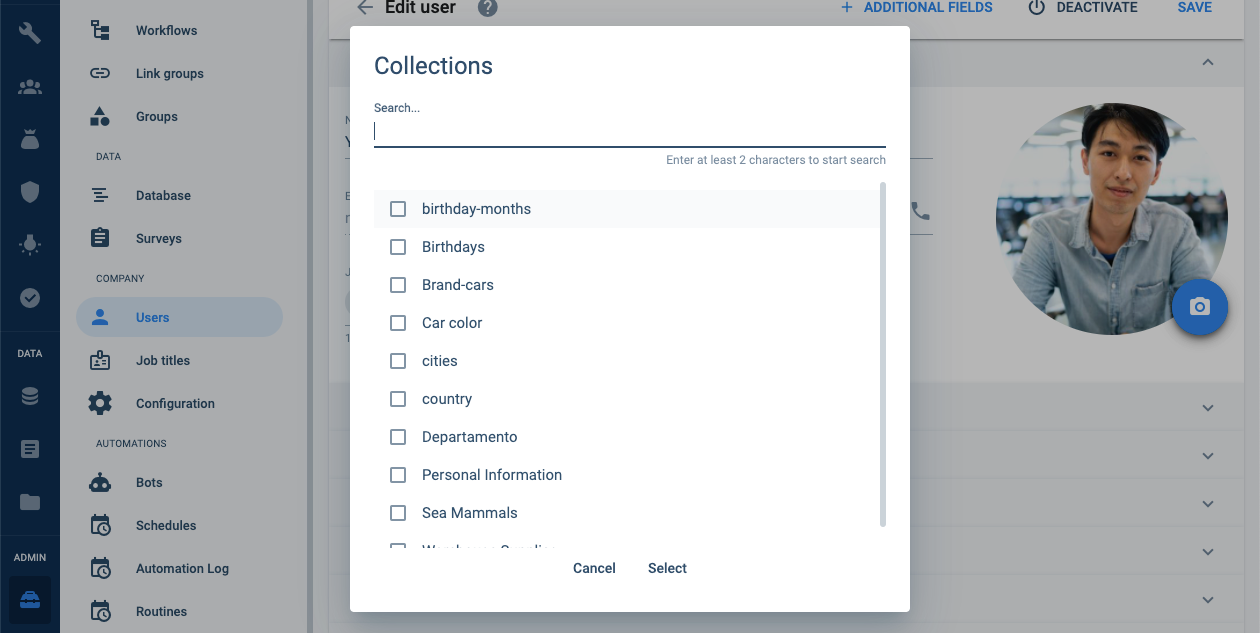
You can also search for the collection you are looking for.
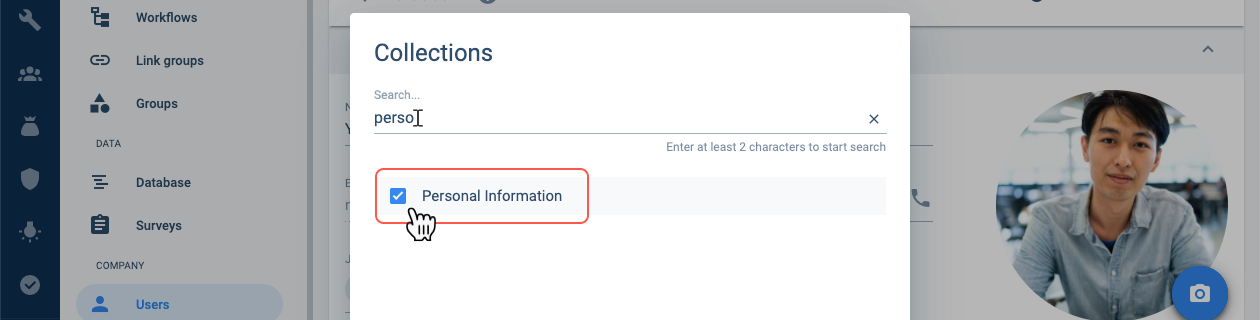
Once the Collection has been selected, a new tab will appear in the user settings panel with the name of the collection containing the additional fields.