Microsoft Azure AD Sign-in Configuration
Microsoft Work sign-in is available on Enterprise editions.
To enable users to sign in with Microsoft Work accounts, some configuration is required. Contact your Cotalker sales representative to obtain a Redirect URI before commencing the configuration.
Follow these simple steps:
- Sign in to the Azure portal.
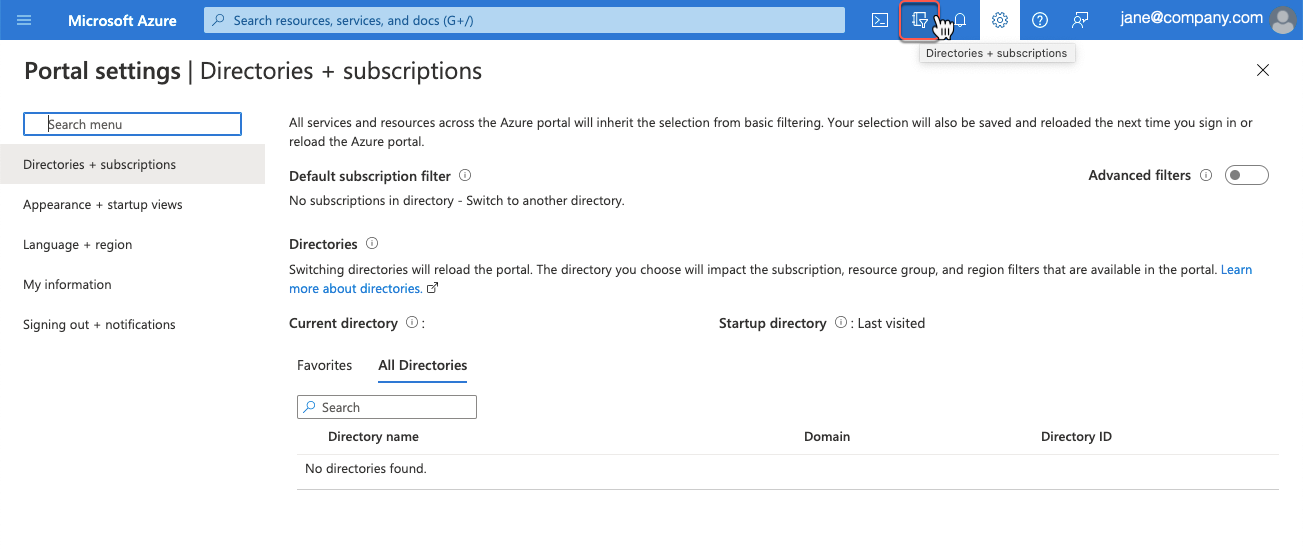
- If you have access to multiple tenants, use the Directory + subscriptions filter in the top menu to select the tenant in which you want to register the application.
- From the Home page, search for and select Azure Active Directory.

- On the left-side panel, under Manage, select App registrations, then press New registration.

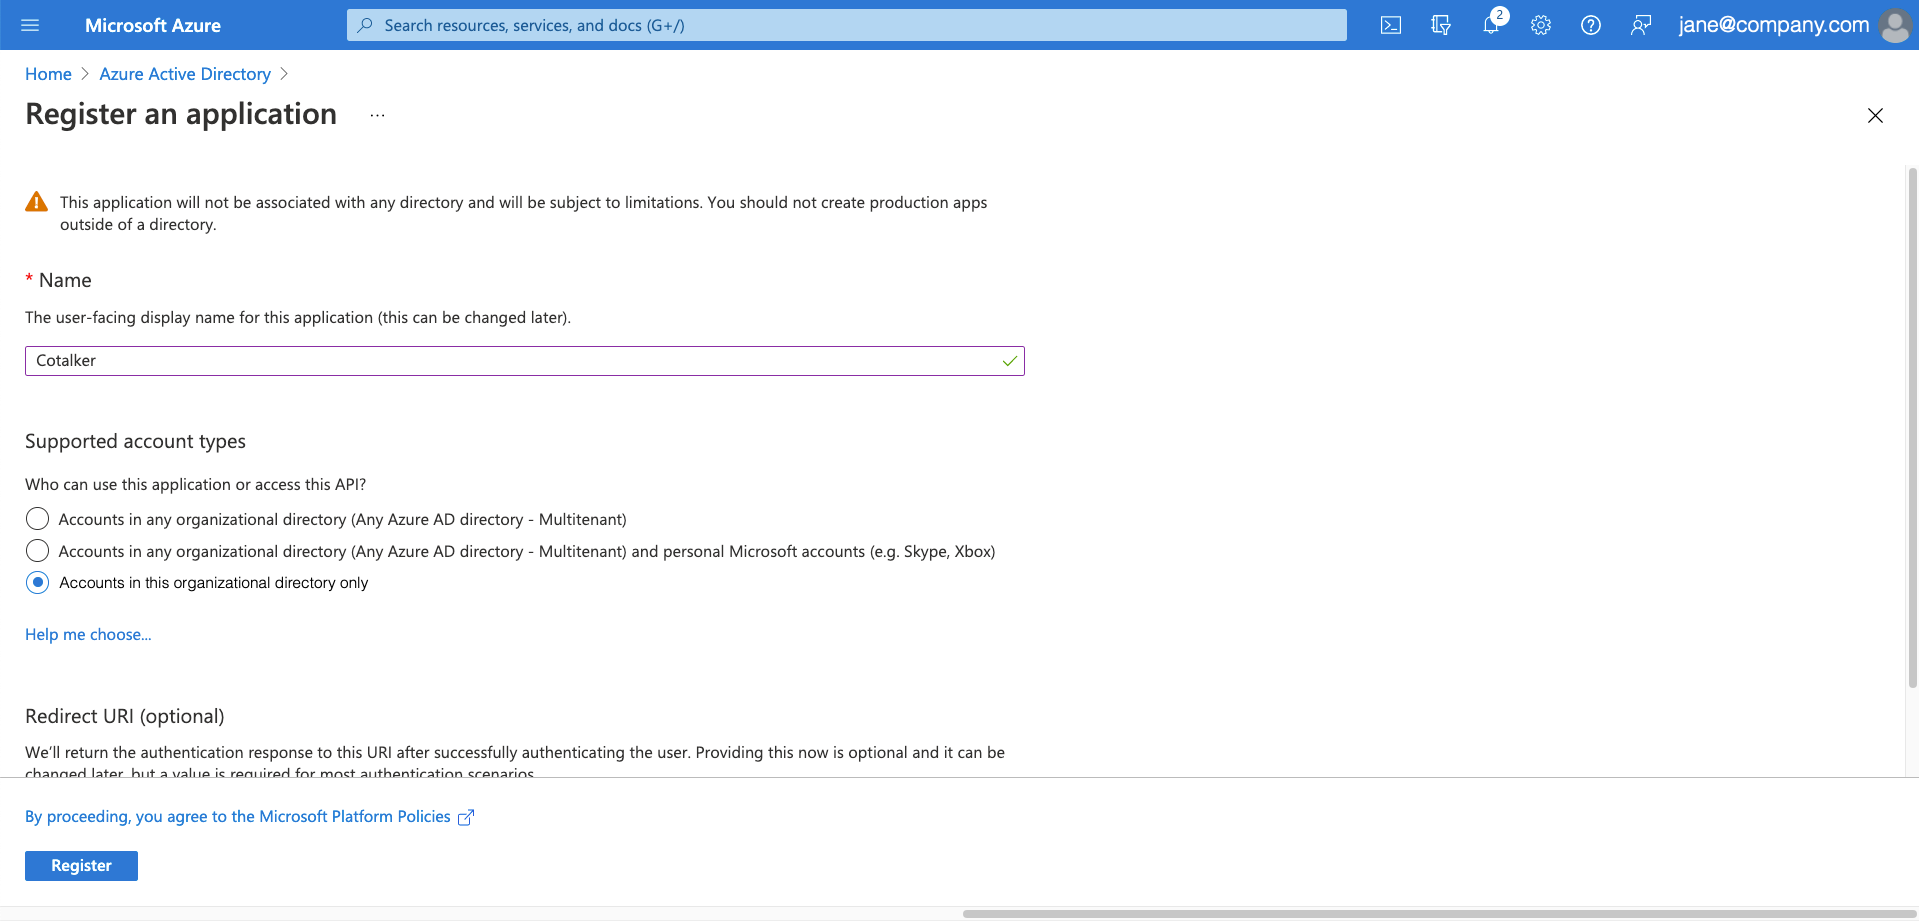
- From the Register an application page:
- Enter a Name for the application. "Cotalker" is a suitable name. Cotalker users might see this name, and if necessary, you can change it later.
- Choose "Accounts in this organizational directory only" as the Supported account type for the application.
- Do NOT enter a Redirect URI.
- Press Register to create the app registration.
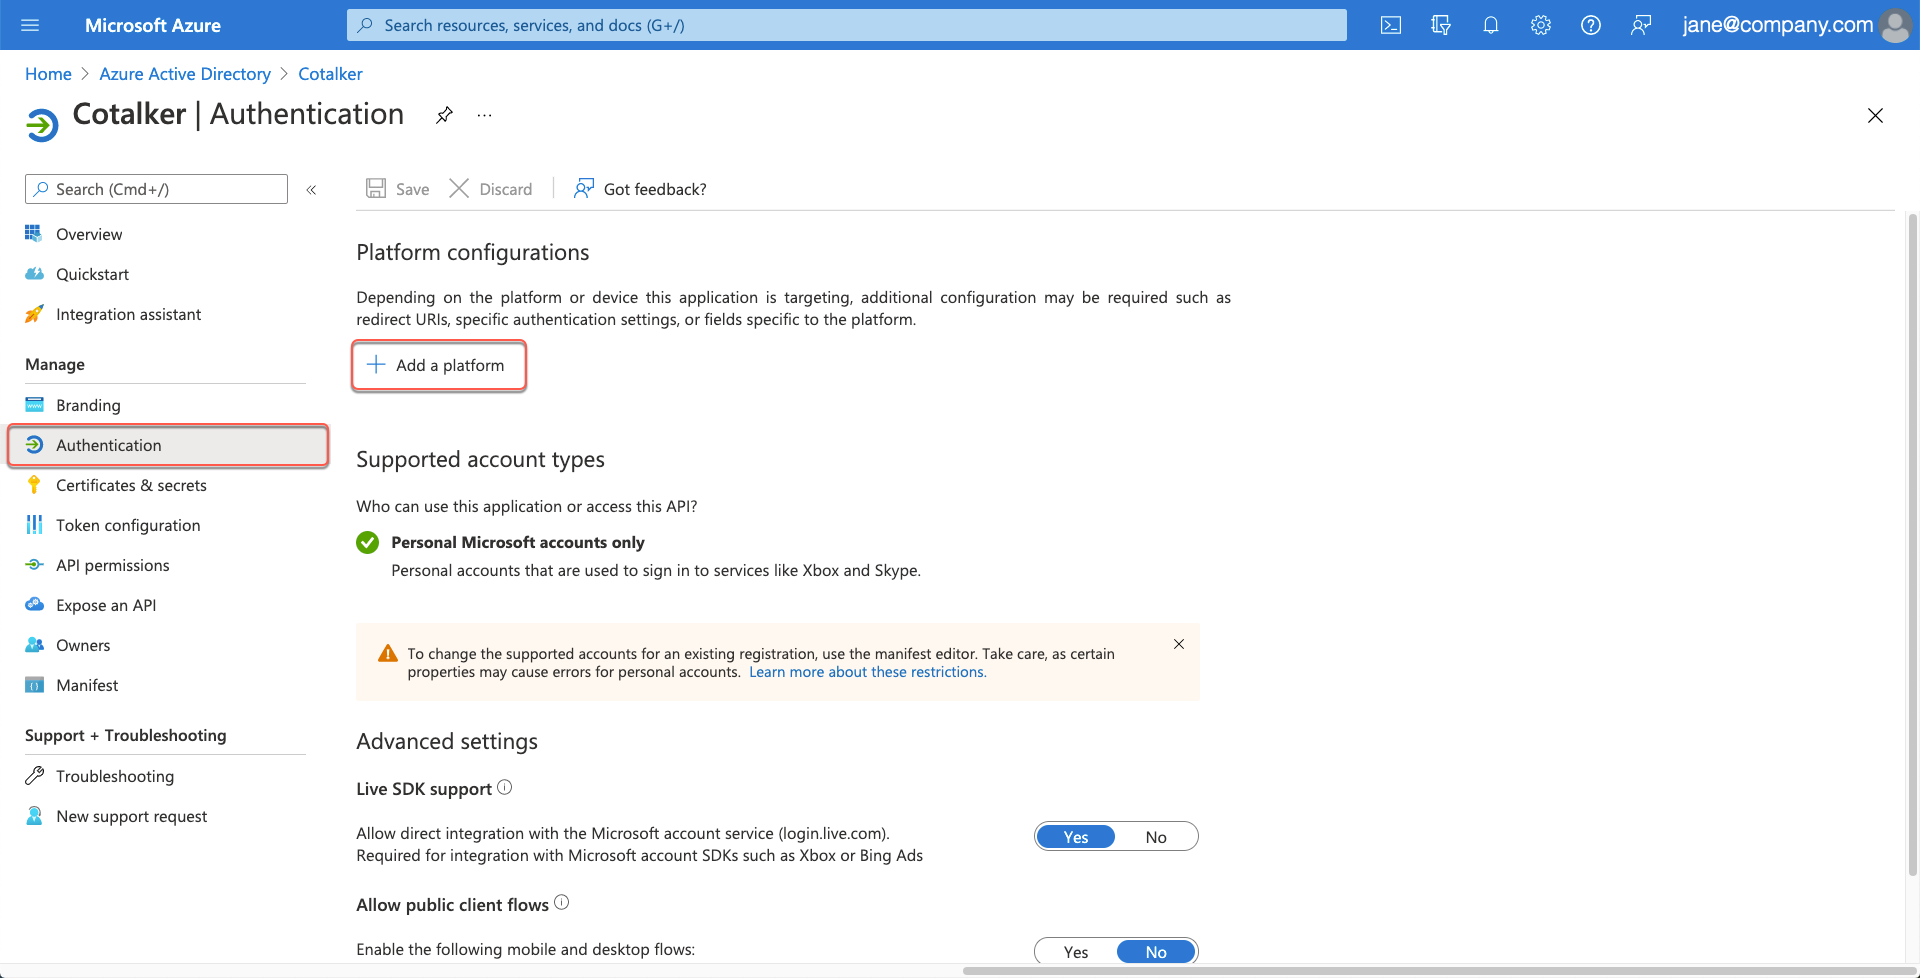
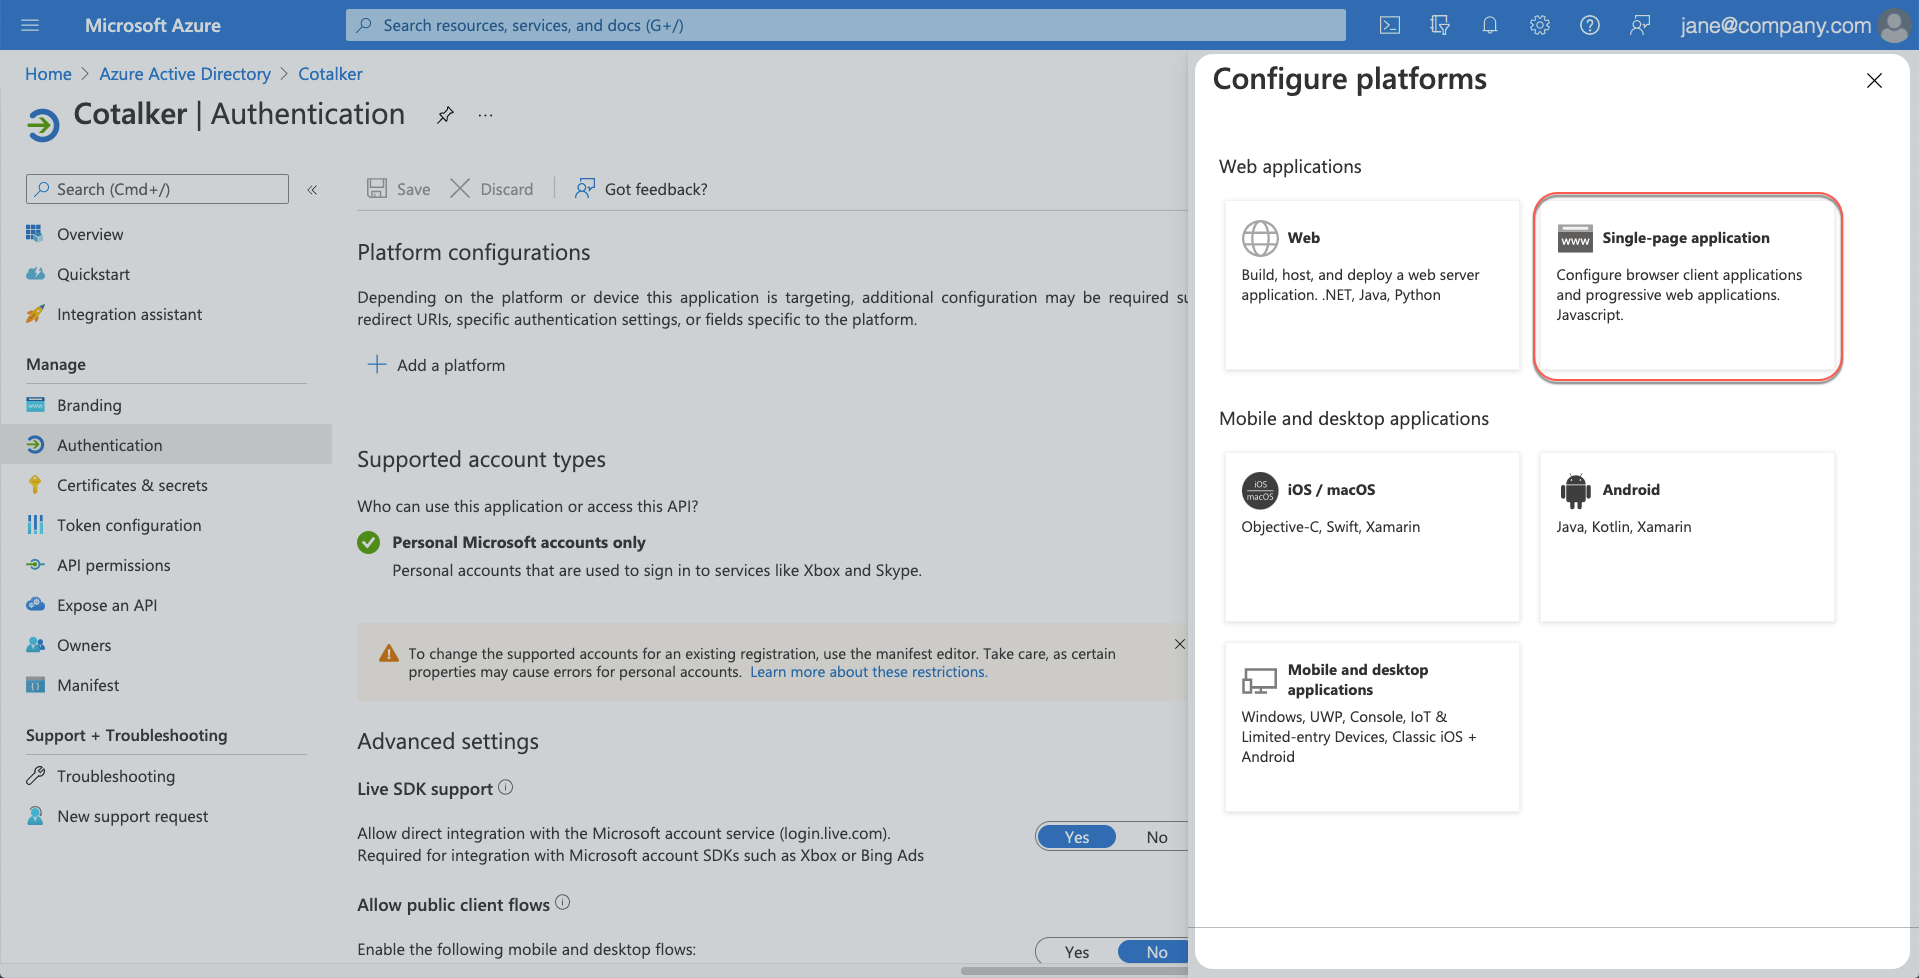
- From the left-side panel, under Manage, select Authentication, then press Add a platform.
- On the right-side panel, Configure platforms, under Web applications, select the Single-page application tile.
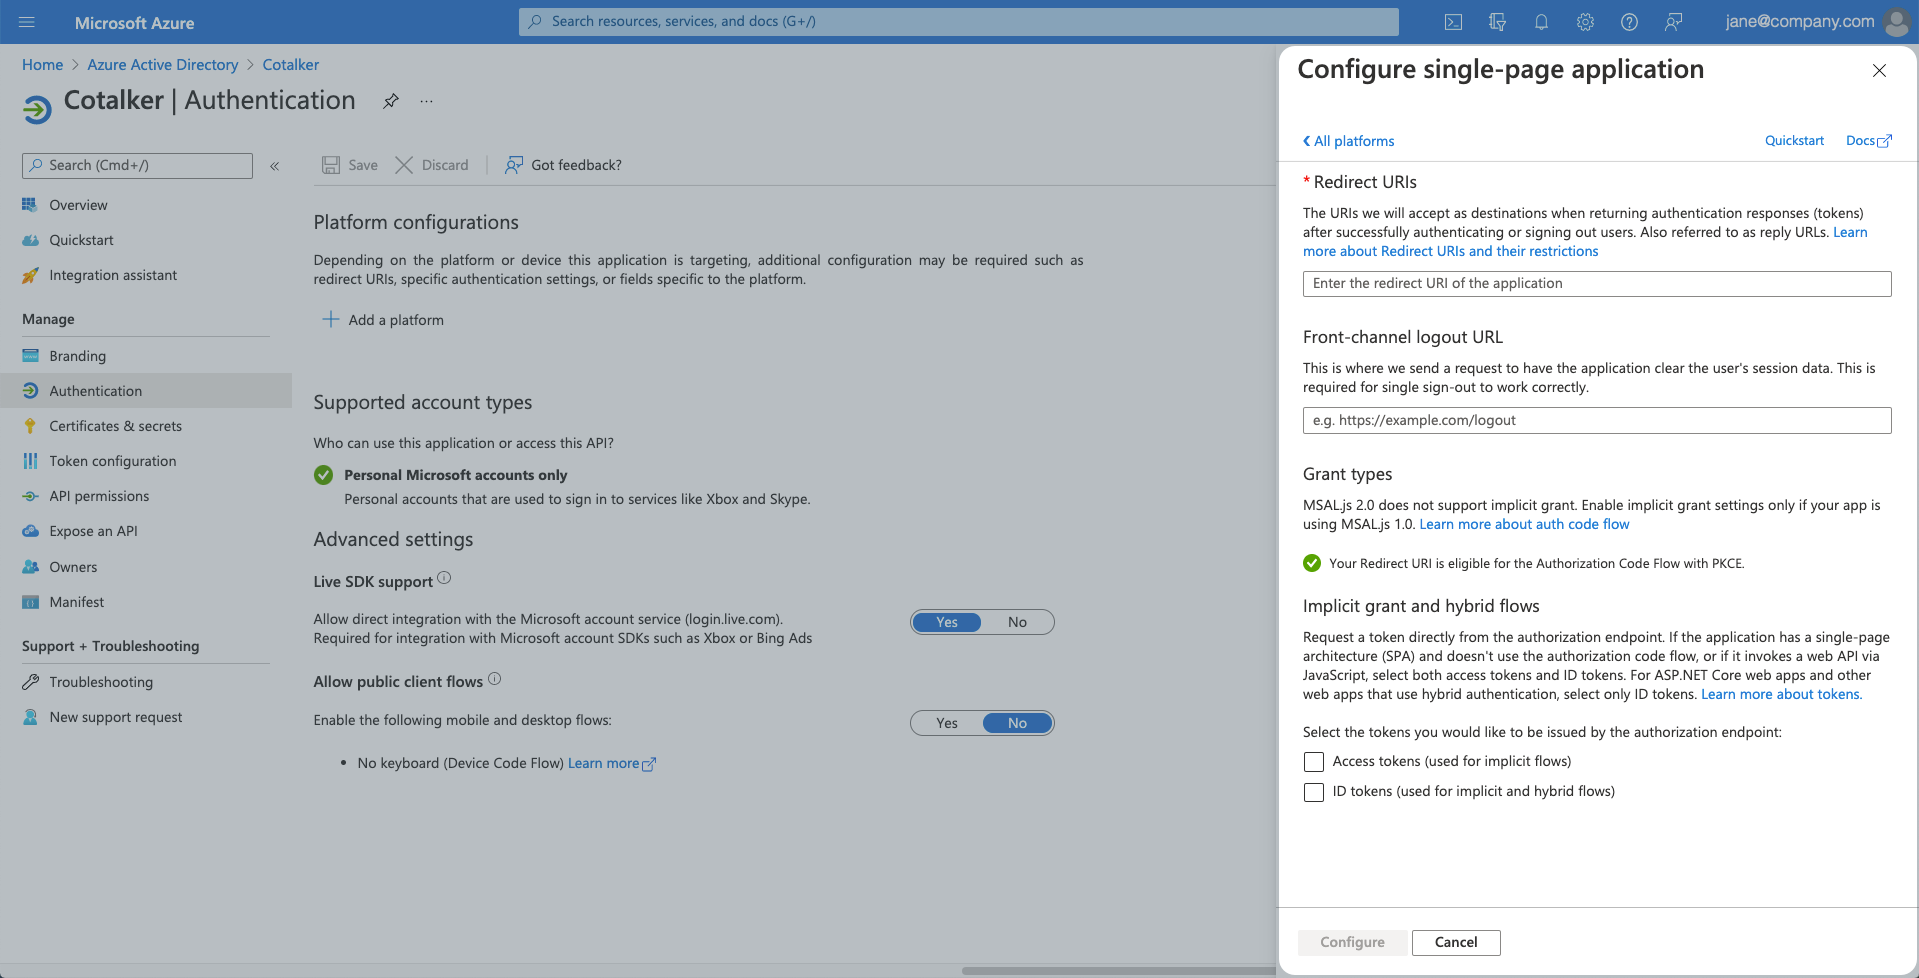
- On the right-side panel, Configure single-page application:
- Under Redirect URIs, enter a redirect URI. This value is supplied by Cotalker.
- Press Configure to finish adding the redirect URI.
note
Do NOT enter a redirect URI that was not supplied by Cotalker.
Do NOT select any of the implicit or hybrid flow checkboxes.
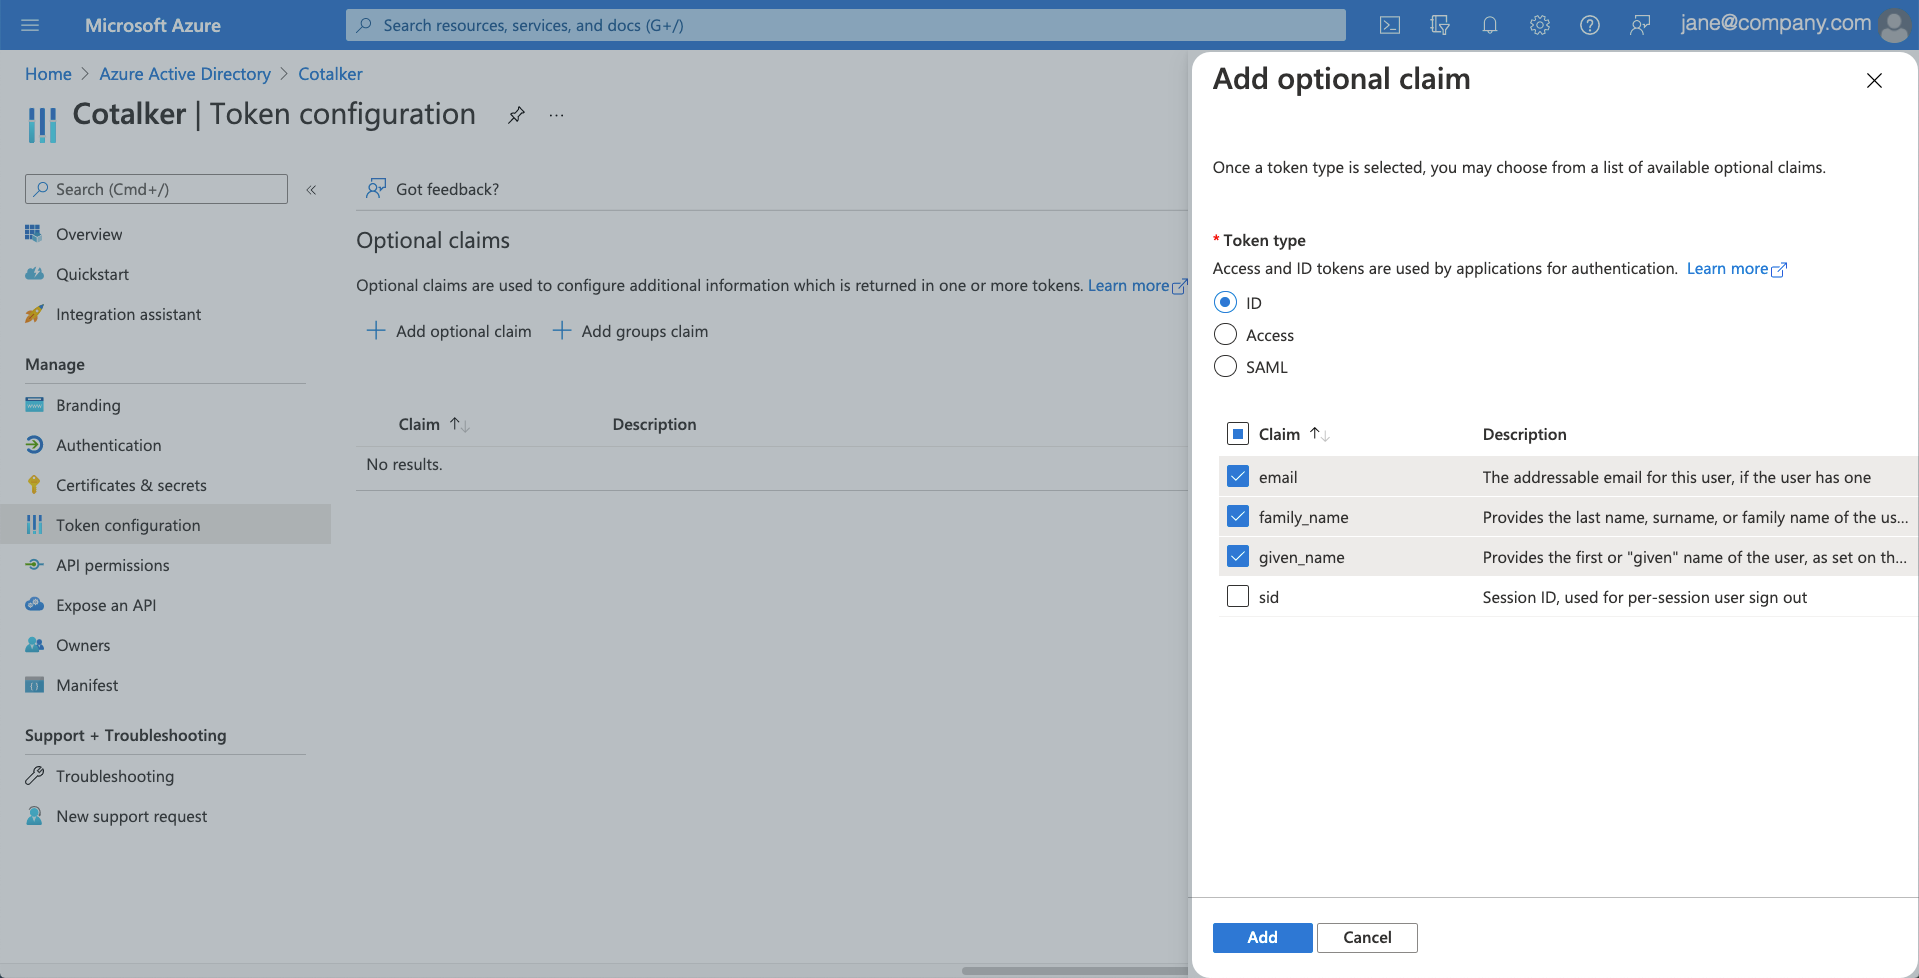
- On the left-side panel, under Manage, select Token configuration, then press Add optional claim.

- On the right-side panel, Add optional claim:
- Under Token type, select ID.
- Then select the email, family_name and given_name checkboxes.
- Press Add to continue adding the optional claim.
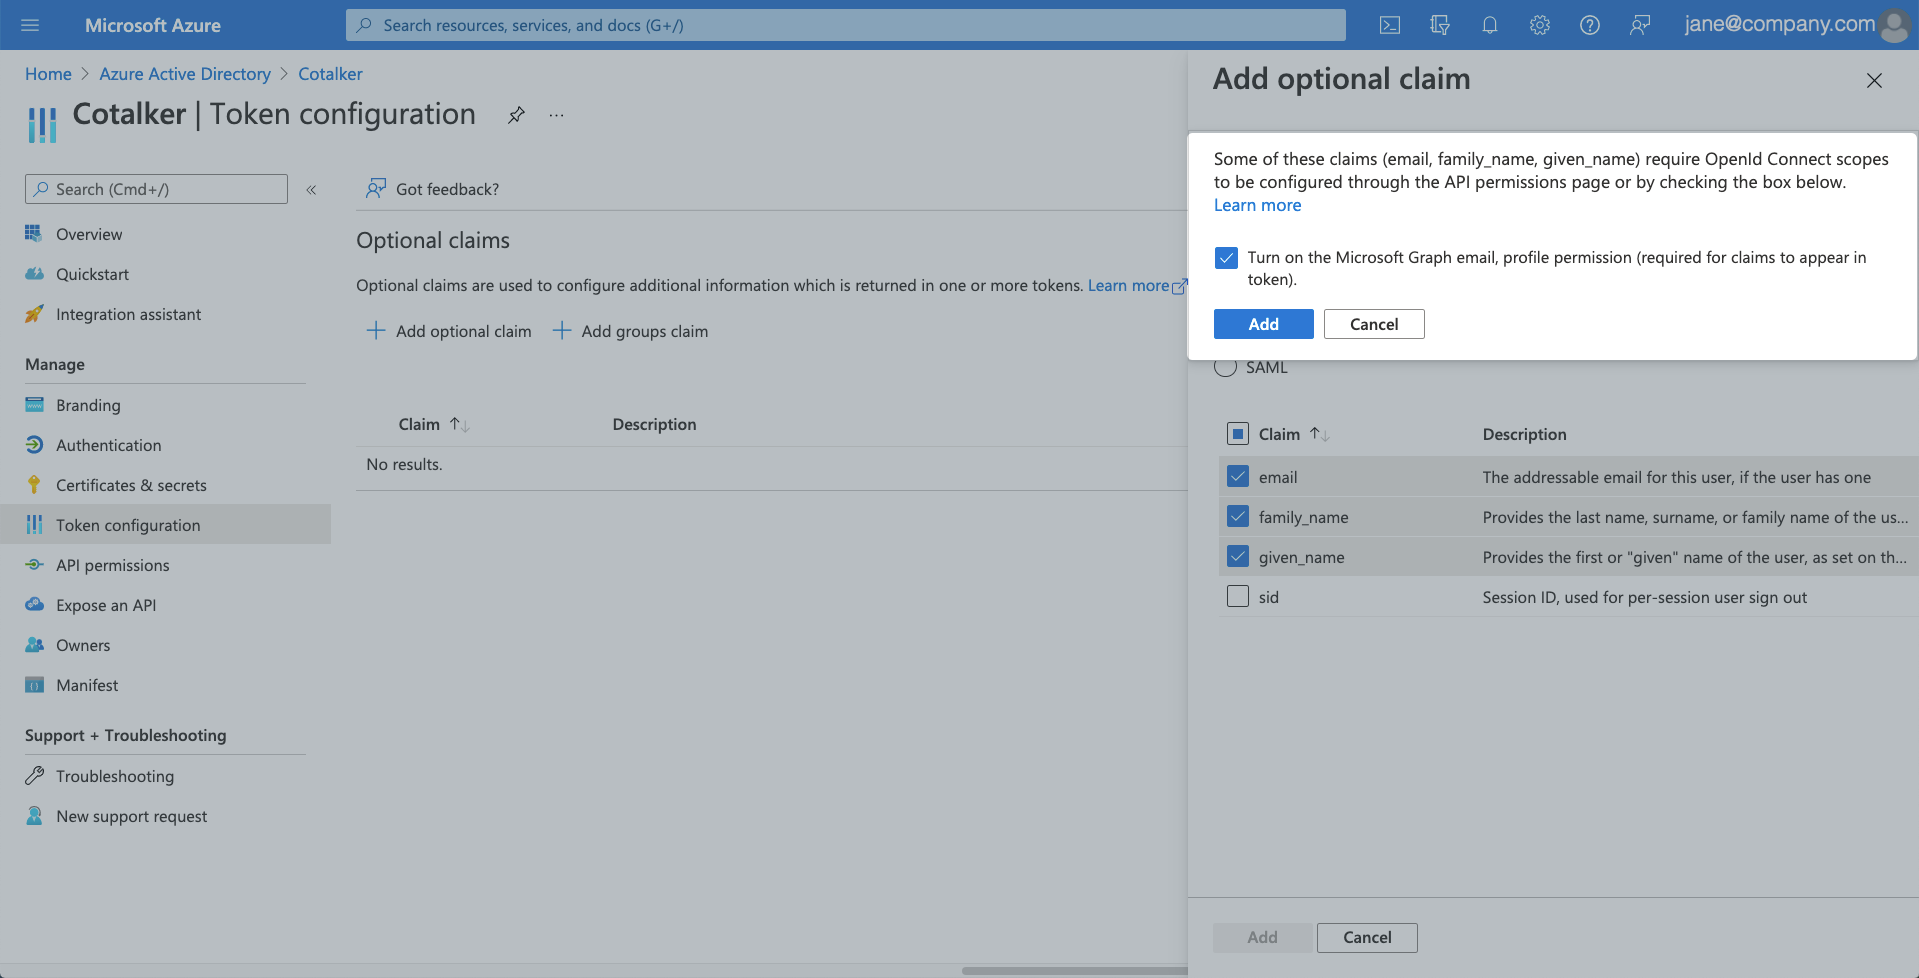
- A pop-up window appears:
- Select the checkbox "Turn on the Microsoft Graph email, profile permission (required for claims to appear in token)".
- Press Add to finish adding the optional claim.
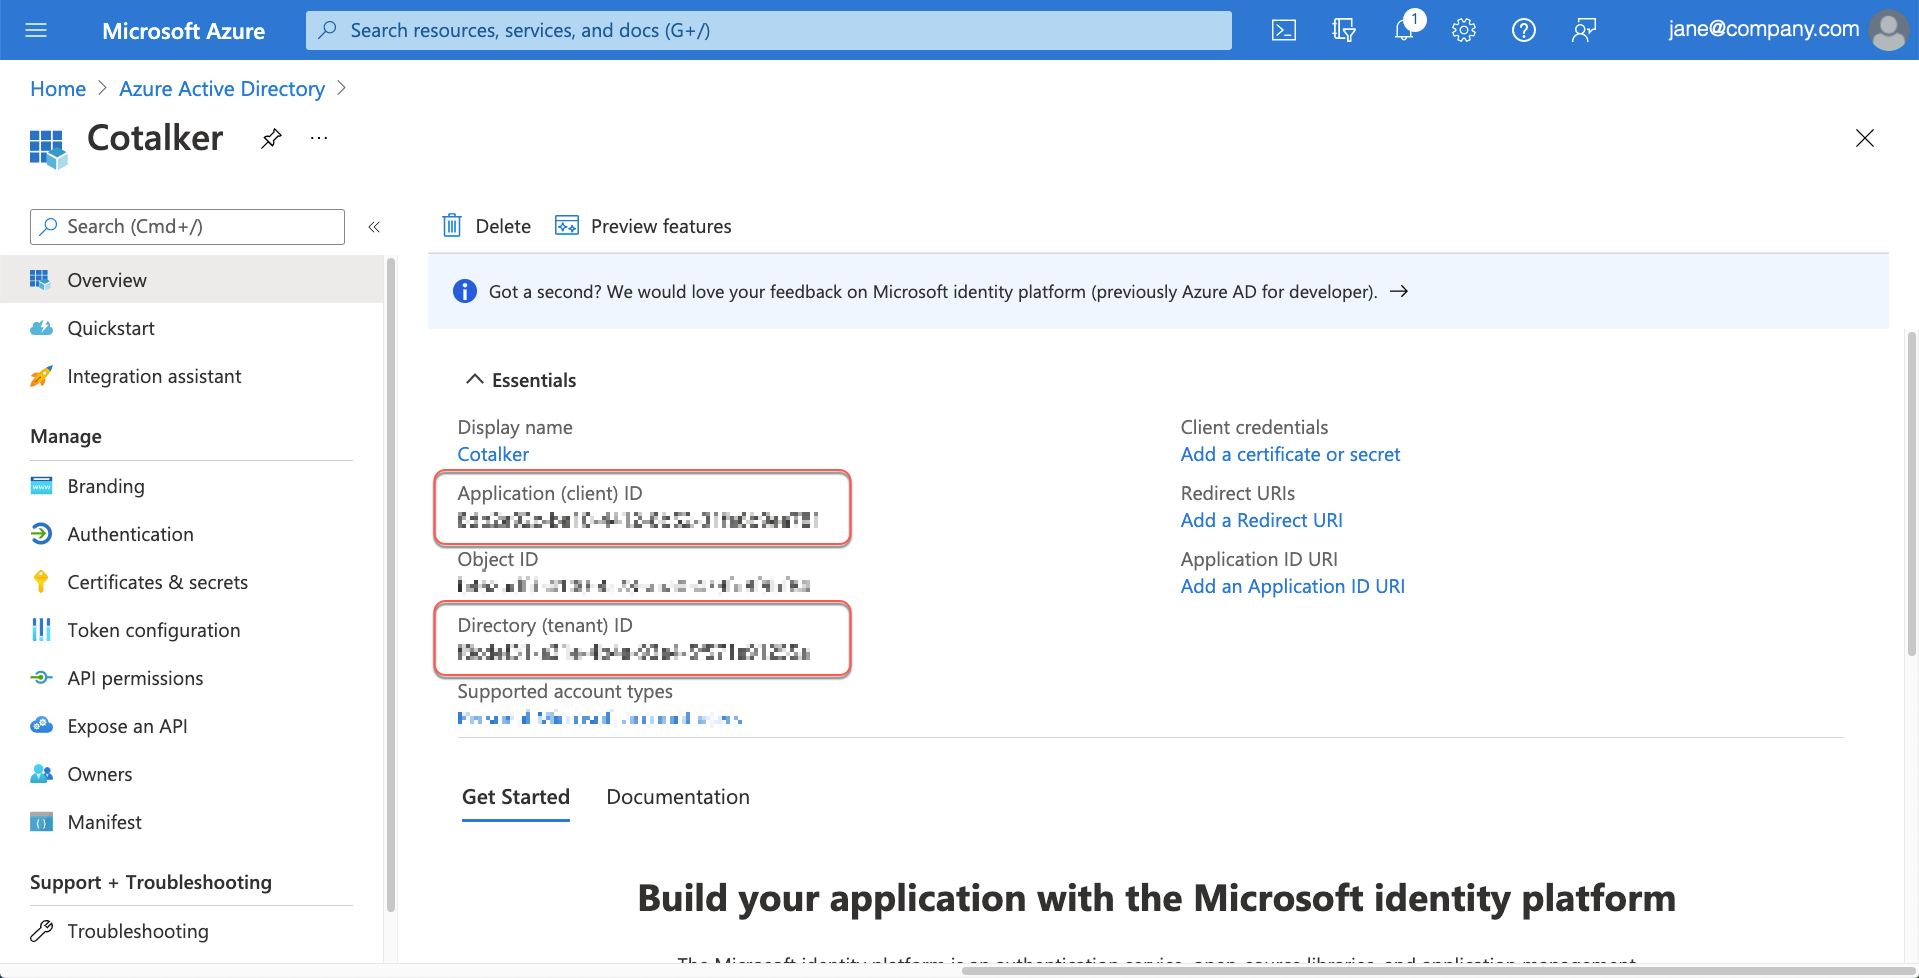
- Finally, Cotalker requires two values from the app just created. These values are found under the Overview option in the previously created app view (Azure Active Directory > App registrations > Cotalker):
- Application (client) ID
- Directory (tenant) ID
Once you have these values, update your Cotalker platform's configuration through an API PATCH request to the companies endpoint. The request must contain the following body filled out with the corresponding values:
{
    "branding": {
        "auth": {
            "azureAD": {
                "isActive": true,
                "clientId": "", //APPLICATION (CLIENT) ID
                "authority": "", // DIRECTORY (TENANT) ID
                "redirectUri": "" // OBTAIN REDIRECT URI FROM COTALKER STAFF.
            }
        }
    }
}
For more details about the request body, go to the COTCompany data model section.