Create User
Tutorial on how to create and configure user accounts.
Time: 10 minutes
In Cotalker, a user is a data model that represents either a real person or a bot. A user, whether human or not, can access and interact with the Cotalker platform. The user contains profile data, such as name, email, phone number, password, and other additional information. Users can also be configured to have different level access roles.
Company Requirements
Our mock company, Ruanda, wants to add all their employees (about 40 people) to the Cotalker platform. The company has sent all the employee details in this spreadsheet.
For the tutorial, we will be creating the user accounts for at least two employees. One of them is Jennifer Fritz, a developer in the cybersecurity division. Her email is jennifer@ruanda.cl and her phone number is 202-555-0477. The second one is her boss, Mario Casas, and his email is mario.casas@ruanda.cl.
Tutorial Objectives
- A. Create a user account for a lower level employee.
- B. Create a user account for a high level employee.
Users can also be created through an API request. For example, you could use Postman to automatically create users with spreadsheet data and the Create New User API request.
Pre-Requisites
Access Role
Your user profile's access role must have at least the following permissions:
admin-access(permission to access the Administrative Panel)admin-user-write(permission to create and edit users)admin-accesscontrol-write(permission to grant the user access roles)admin-jobtitles-writeoradmin-company-write(permission to give the user a job title)
Completed Tutorials You should have completed the following tutorials:
Steps
A. Create a user account for a lower level employee.
I. Go to the Users section.
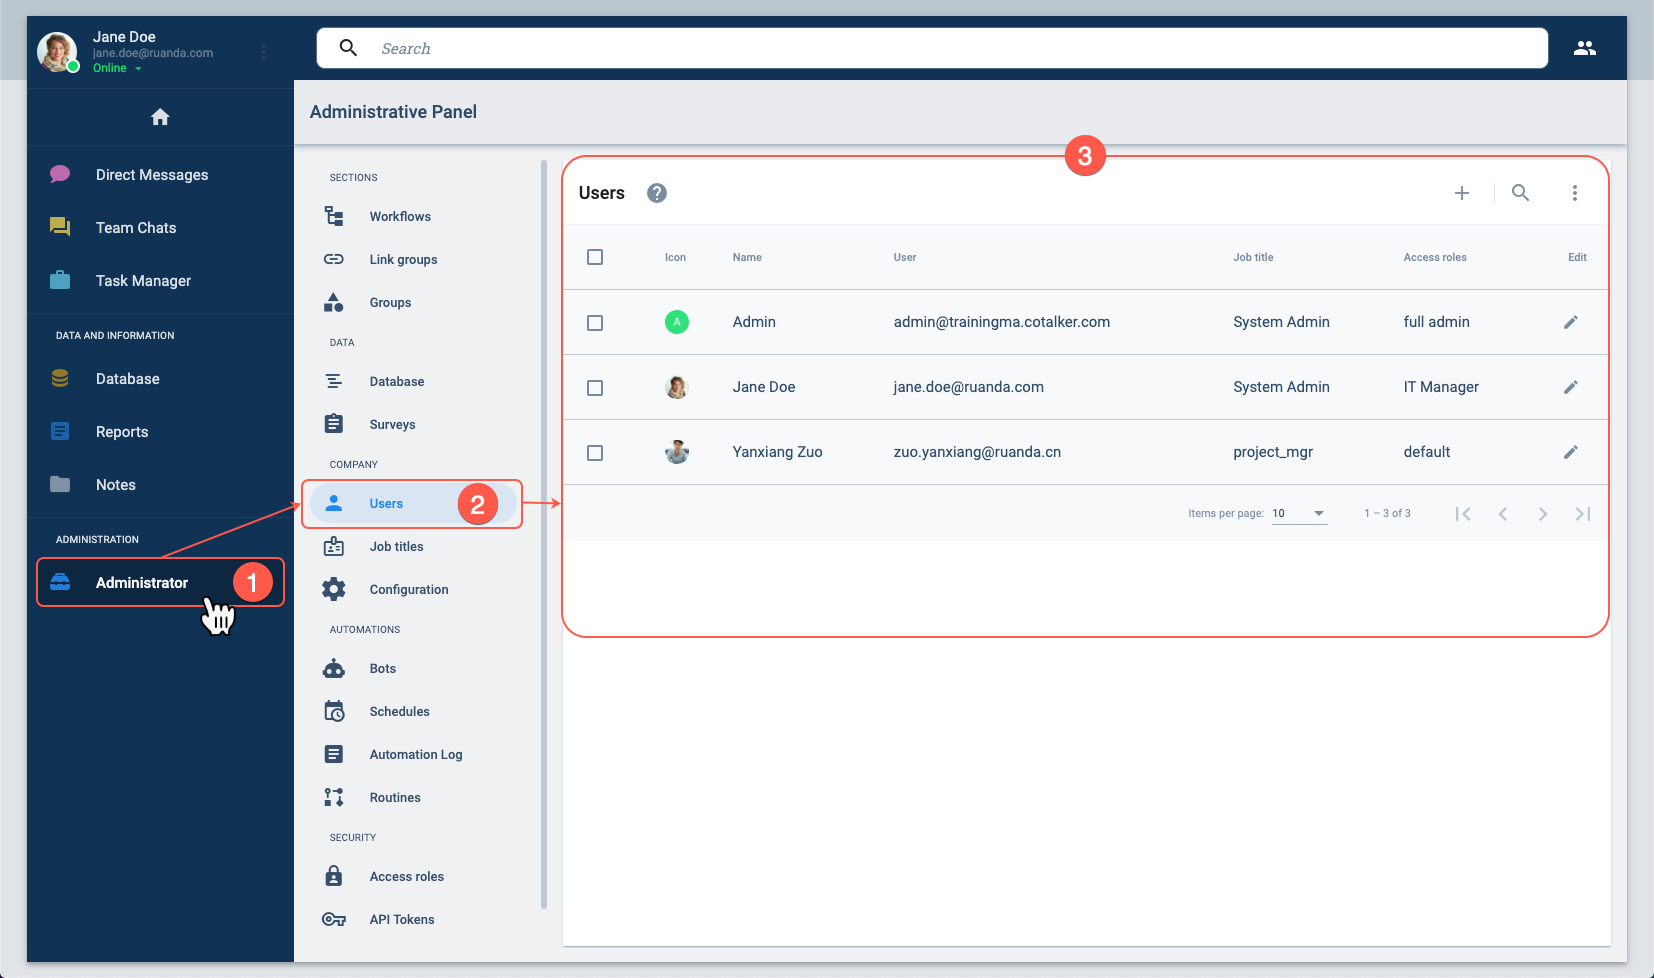
- From the Main Menu Bar, press the Administrator button to open the Administrative Panel.
- In the Administrative Panel, select Users.
- The Users section opens.
II. Open a Create user settings panel.

Press the + icon in the upper right-hand corner to open the Create user settings panel.
III. Set up general user information.
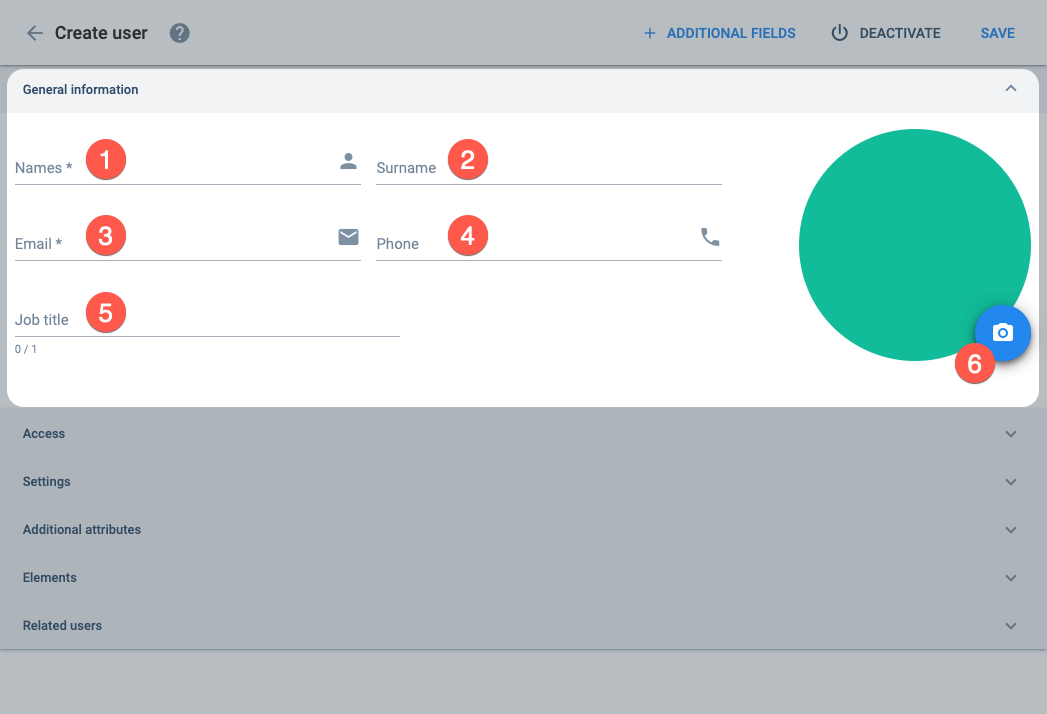
From the Create user settings panel, in the General information tab, set up the first employee with the following information:
- Names: Jennifer
- Surname: Fritz
- Email: jennifer@ruanda.cl
- Phone: 2025550477
- Job title: Developer
- Add a profile picture if you like.
- The email serves as the user's identification code. Hence, once it is saved it cannot be chagned or edited.
- Email addresses must be unique, even across companies.
- Try using a different made-up email address for this tutorial to avoid using an email already registered in the Cotalker environment.
IV. Set up access information.
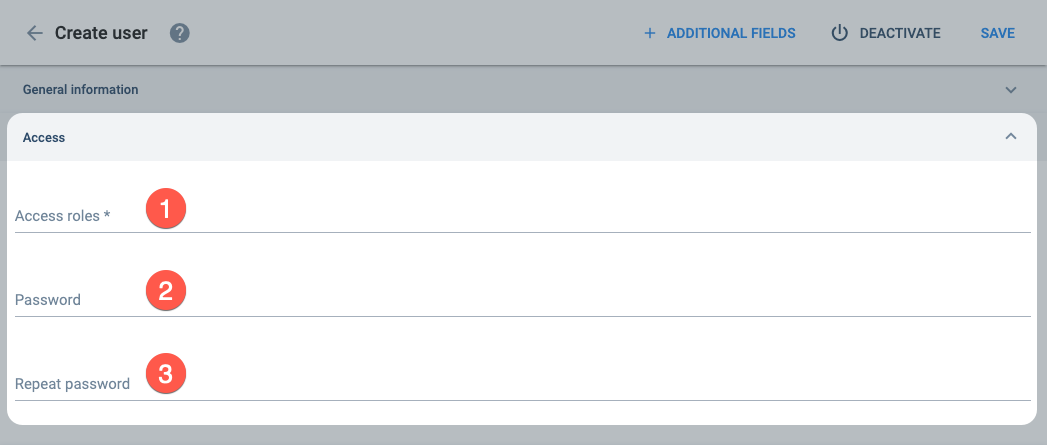
From the Create user settings panel, in the Access tab, add the following user information:
- Access roles: default
- Password: Create a password for the user.
- Repeat password: Retype the password for confirmation.
V. Save settings.

Press Save button in the upper right-hand corner to create the new user.
B. Create a user account for a high level employee.
I. Open a Create user settings panel.
Once again, press the + icon in the upper right-hand corner to open the Create user settings panel.
II. Set up general user information.
From the Create user settings panel, in the General information tab, set up the second employee with the following information:
- Names: Mario
- Surname: Casas
- Email: mario.casas@ruanda.cl
- Phone: left blank
- Job title: Chief of Cybersecurity
- Add a profile picture if you like.
- Email addresses must be unique, even across companies.
- Try using a different made-up email address for this tutorial to avoid using an email already registered in the Cotalker environment.
III. Set up access information.
From the Create user settings panel, in the Access tab, add the following user information:
- Access roles: default, Report Access
- Password: Create a password for the user.
- Repeat password: Retype the password for confirmation.
*IV. Associate subordinate users.
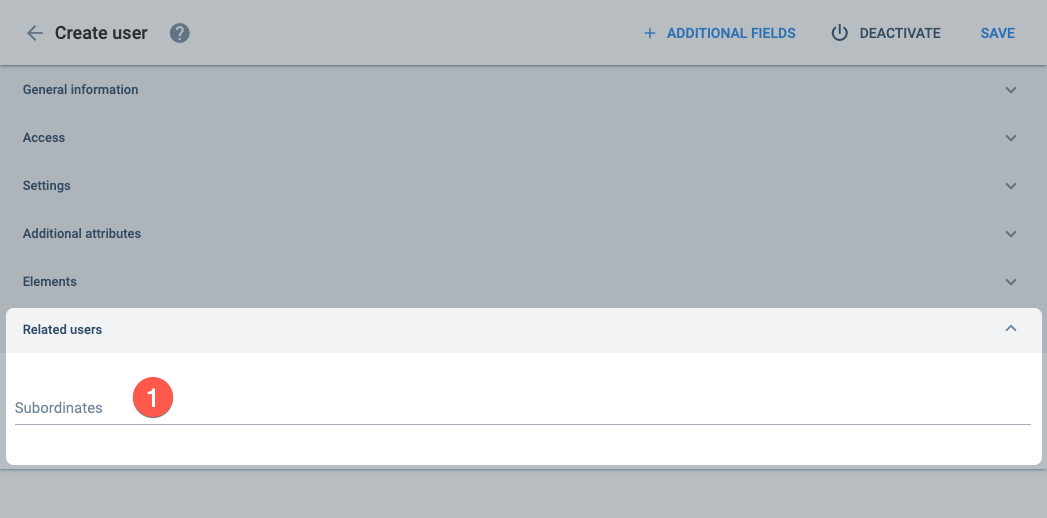
Under the Related users tab, fill in the field:
- Subordinates: Jennifer Fritz
V. Save settings.
Press Save button in the upper right-hand corner to create the new user.
Expected Results
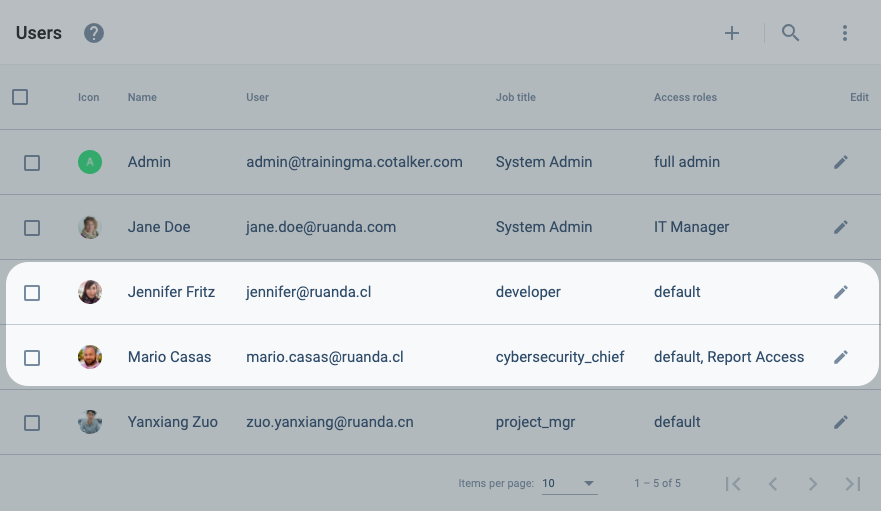
You should now be able to see all the users you created listed in the Users section, somewhat like in the following image:
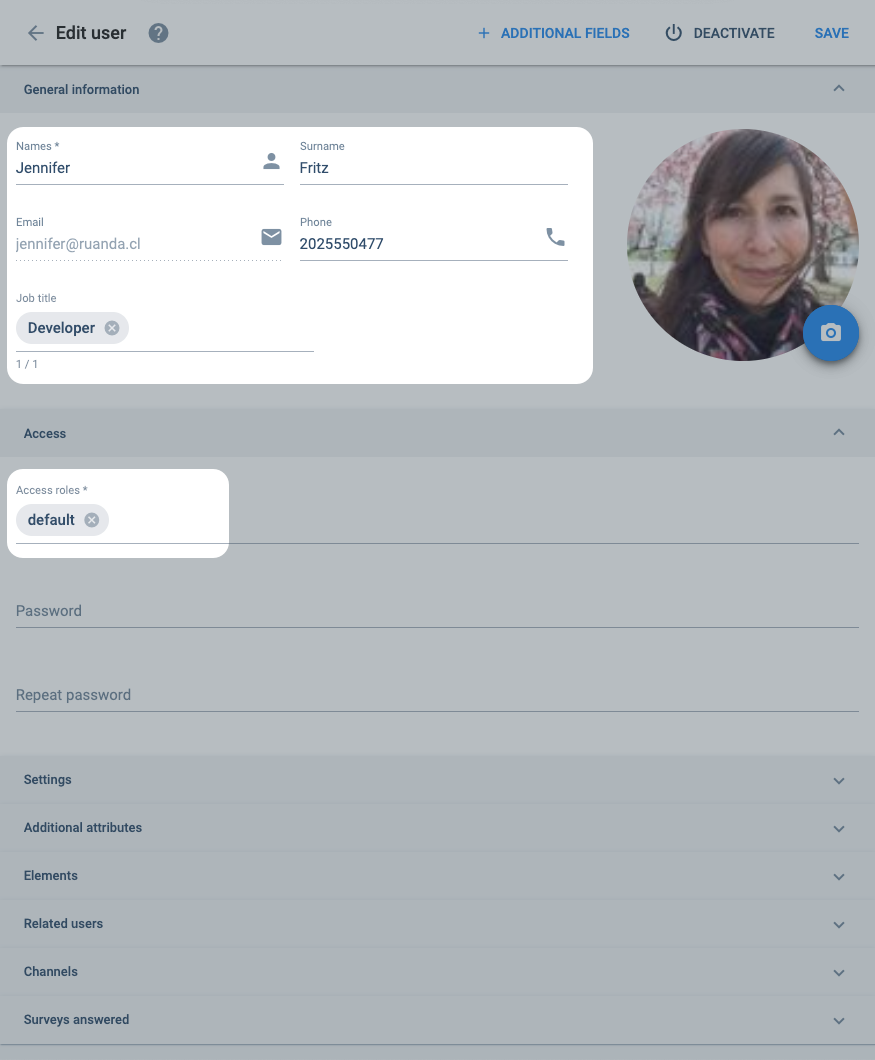
The first created user's settings should look like this:
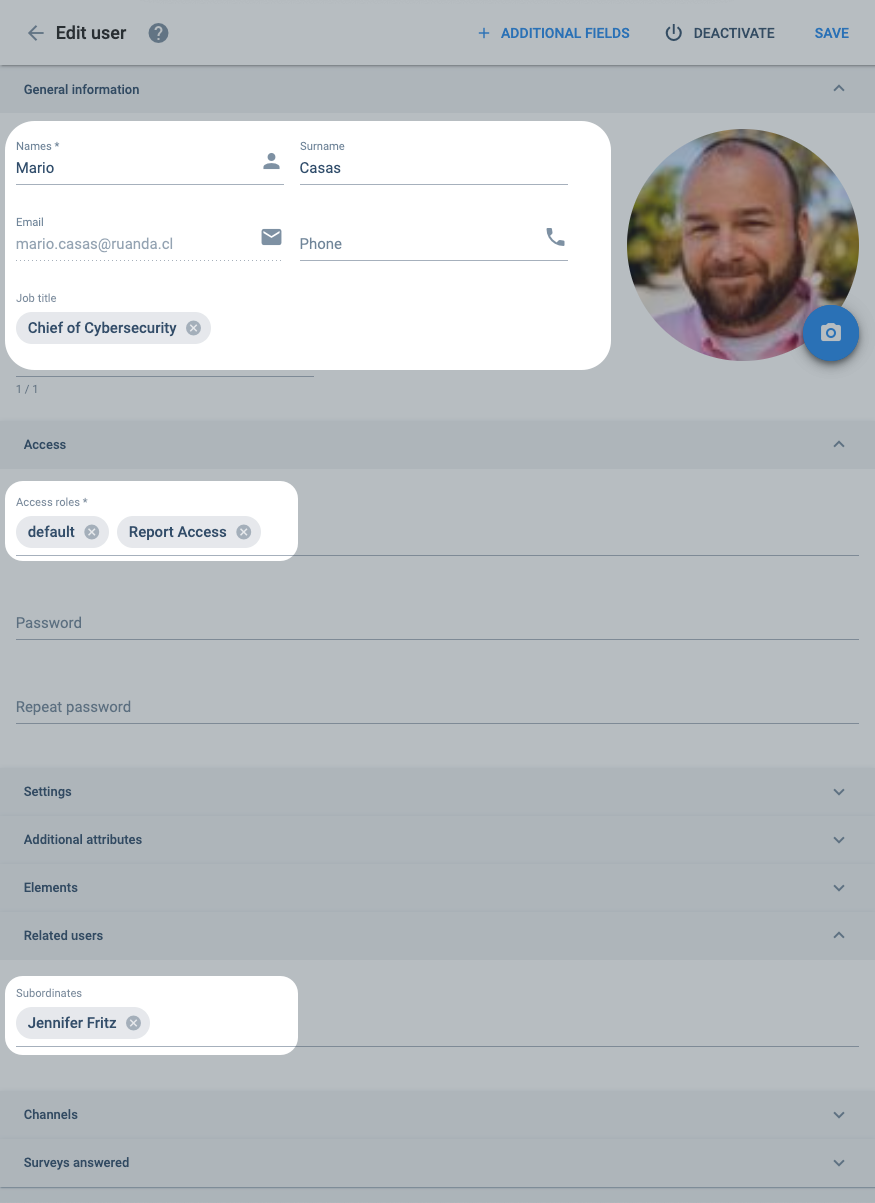
The higer level user's settings should look like this:
Related Topics
- Users section: Administrive Panel documentation
- COTUser: User Data model
- User API Requests: API documentation