Create Group
Tutorial on how to create groups for communicating and sharing information.
Time: 15 minutes
- Groups are different ways to organize, access, and communicate data among users. There are three kinds of groups: workflow (task), link, and regular. Users can access groups through the Main Menu Bar or the group panel.
- Channels existe within regular and workflow groups. From the channel workspace, users can message each other, send images, share files, react with emoticons, answer surveys. Furthermore, on channels belonging to workflow groups, you can view and edit task status and other task details.
Company Requirements
The company wants its employees (users) to be able to communicate and share information. They want to create a group for each area or department. For now, each group will have two types of channels: one, where all company employees can communicate with the department, and another, for the department's internal conversations.
The company also needs to add a direct link to each department's file on Google Drive for one-click access.
- Below are the company areas and their respective links:
- cybersecurity: https://www.ruanda.cl/cybersecurity
- board of directors: https://www.ruanda.cl/board_of_directors
- financial control: https://www.ruanda.cl/finance
- commercial: https://www.ruanda.cl/commercial
- treasury: https://www.ruanda.cl/treasury
- risk management:https://www.ruanda.cl/risk_management
- marketing: https://www.ruanda.cl/marketing
- human resources: https://www.ruanda.cl/human_resources
- IT: https://www.ruanda.cl/it
Note: These are mock URLs for tutorial purposes only.
Tutorial Objectives
Pre-Requisites
Access Role
Your user profile's access role must have at least the following permissions:
admin-access(permission to access the Administrative Panel)admin-group-write(permission to create and edit regular and link groups)admin-channel-write(permission to create and edit channels in a standard group)
Steps
A. Create a Standard Group
I. Go to the Groups sections.
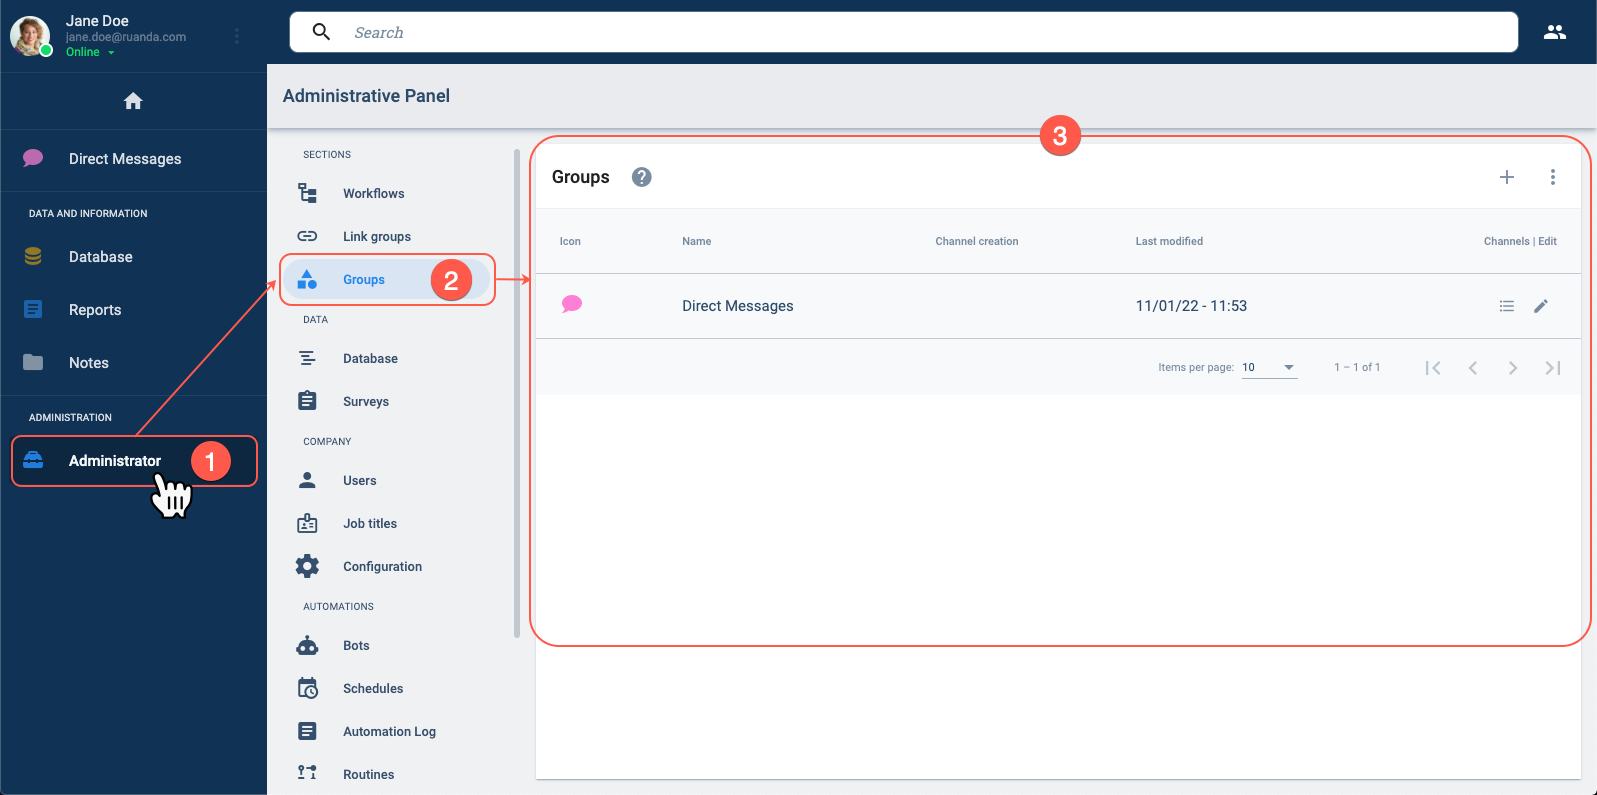
- From the Main Menu Bar, press the Administrator button.
- In the Administrative Panel, select Groups.
- The Groups section opens up.
II. Open the Create Group settings panel.
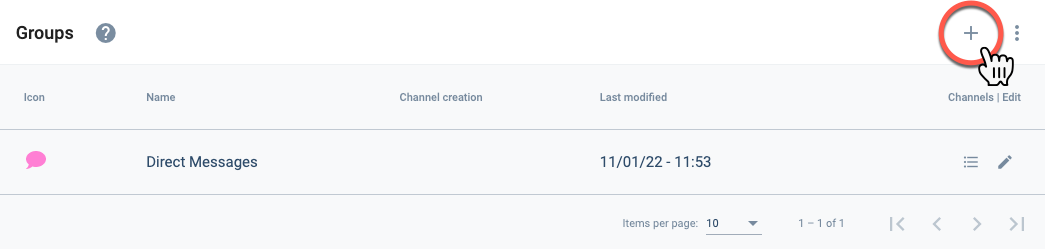
- Press the + icon to open the Create group settings panel.
III. Set up the Group.
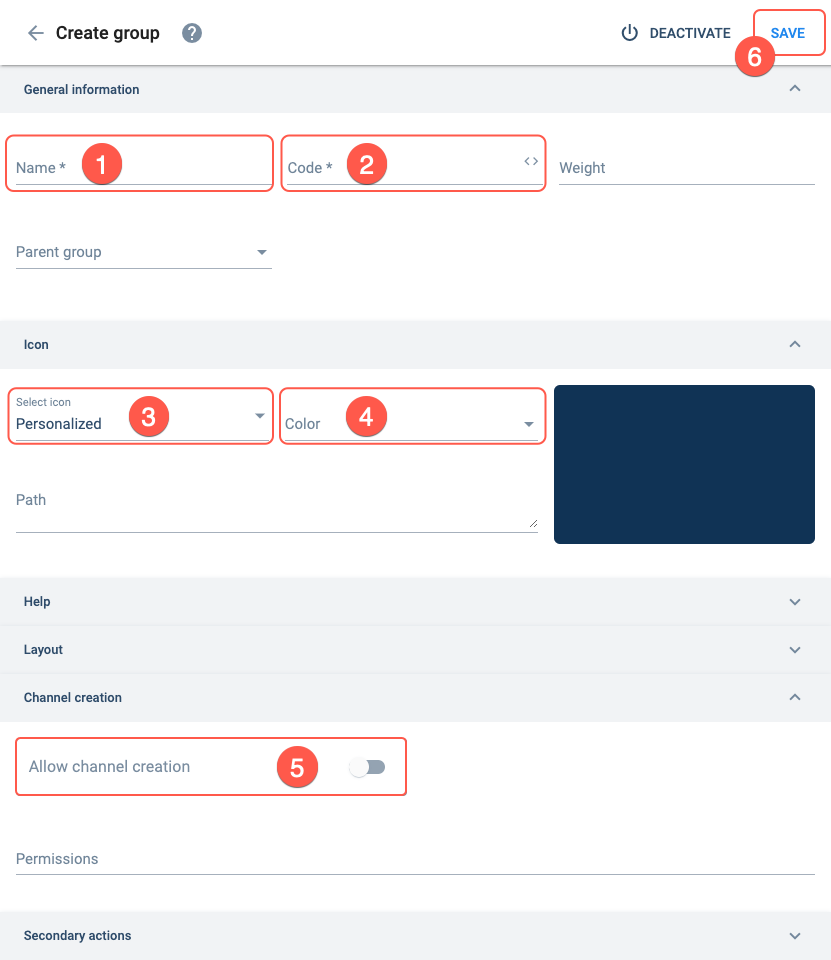
Set up the group according to the following:
- Name: Cybersecurity
- Code: cybersecurity_group
- Select icon: robot
- Color: green
- Allow channel creation: Turn setting on.
- Press the Save. You will be sent back to the Groups section.
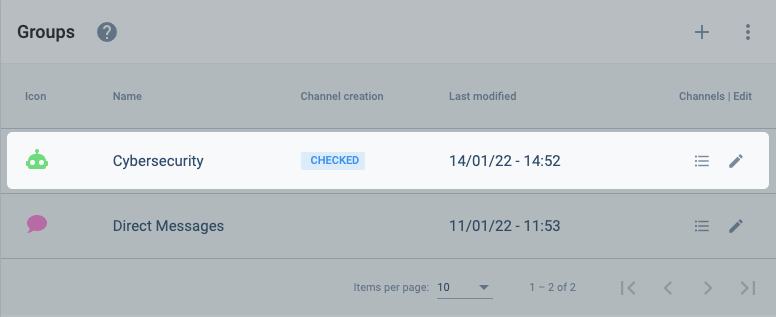
IV. Confirm successful group creation.
Your screen should look something like this after saving:
B. Create Channels
I. Go to the Channels section.

- From within the Groups section, click on list icon corresponding to the Cybersecurity group. The Cybersecurity Channels list opens up.
II. Open the Create Channel settings panel.

- From the Cybersecurity channels list, press the + icon to open the Create channel settings panel.
III. Set up the channel.
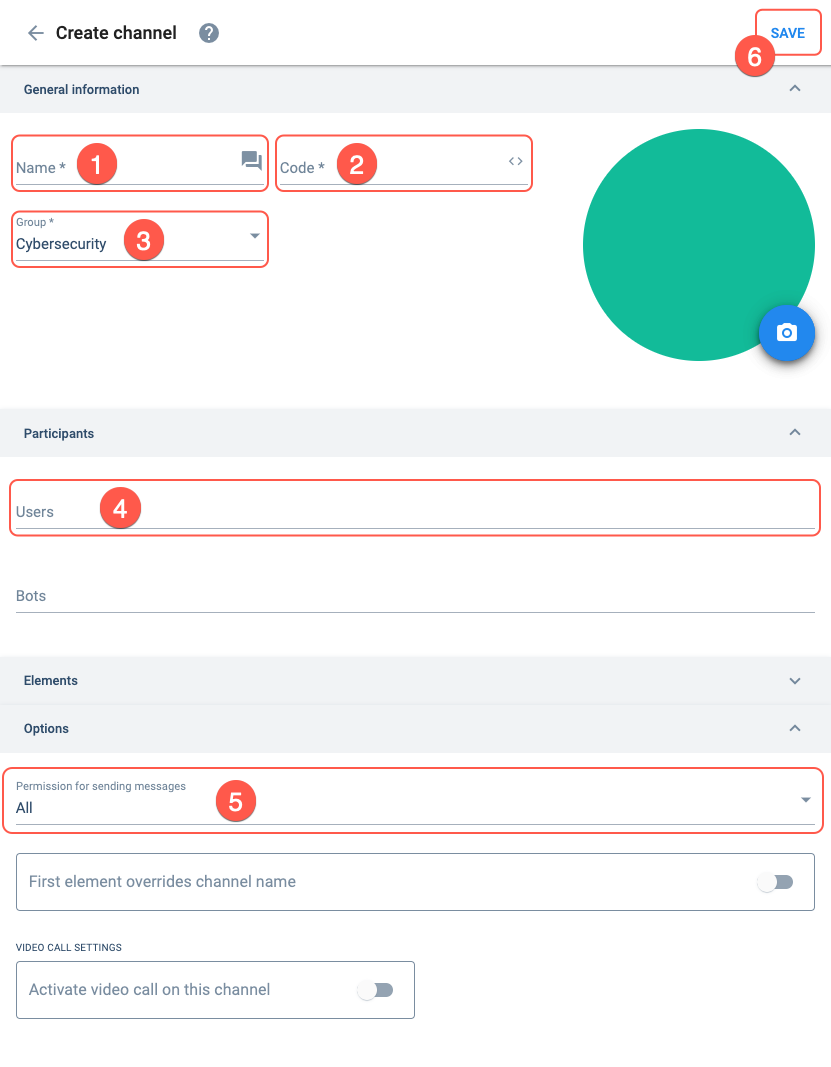
Set up the channel with the following:
- Name: Cybersecurity General Channel
- Code: cybersecurity_gnrlch
- Group: Select the
Cybersecuritygroup from the list. - Users: Type the names of the users to be added to the channel.
- Permissions for sending messages: Set to
All. - Press the Save button. You will be taken back to the Group's channel list.
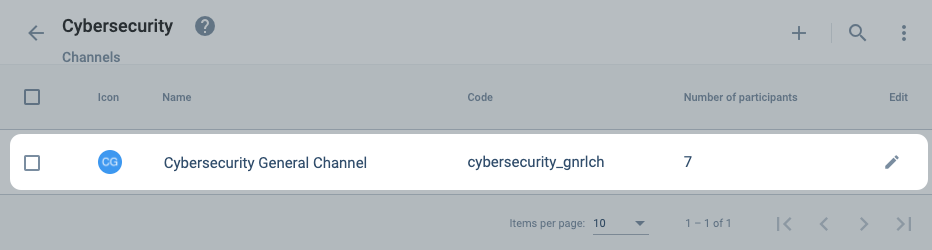
IV. Confirm successful channel creation.
Your screen should look something like this after saving:
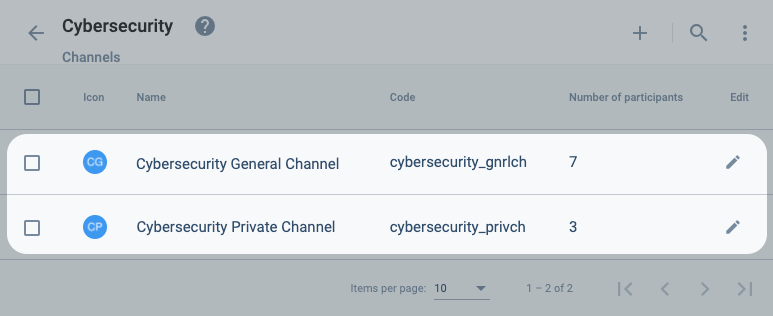
V. Create another Channel.
Remember that the objective of the tutorial is to create a general and private channel for each company area.
Repeat the steps to create a new channel within the same group.
After saving, your new private channel should appear on the channels list as shown in the example below:
If you wish, create more standard groups and channels following the list given in the company requirements. But these are enough for the time being.
C. Create Link Group
I. Go to the Link Groups section.
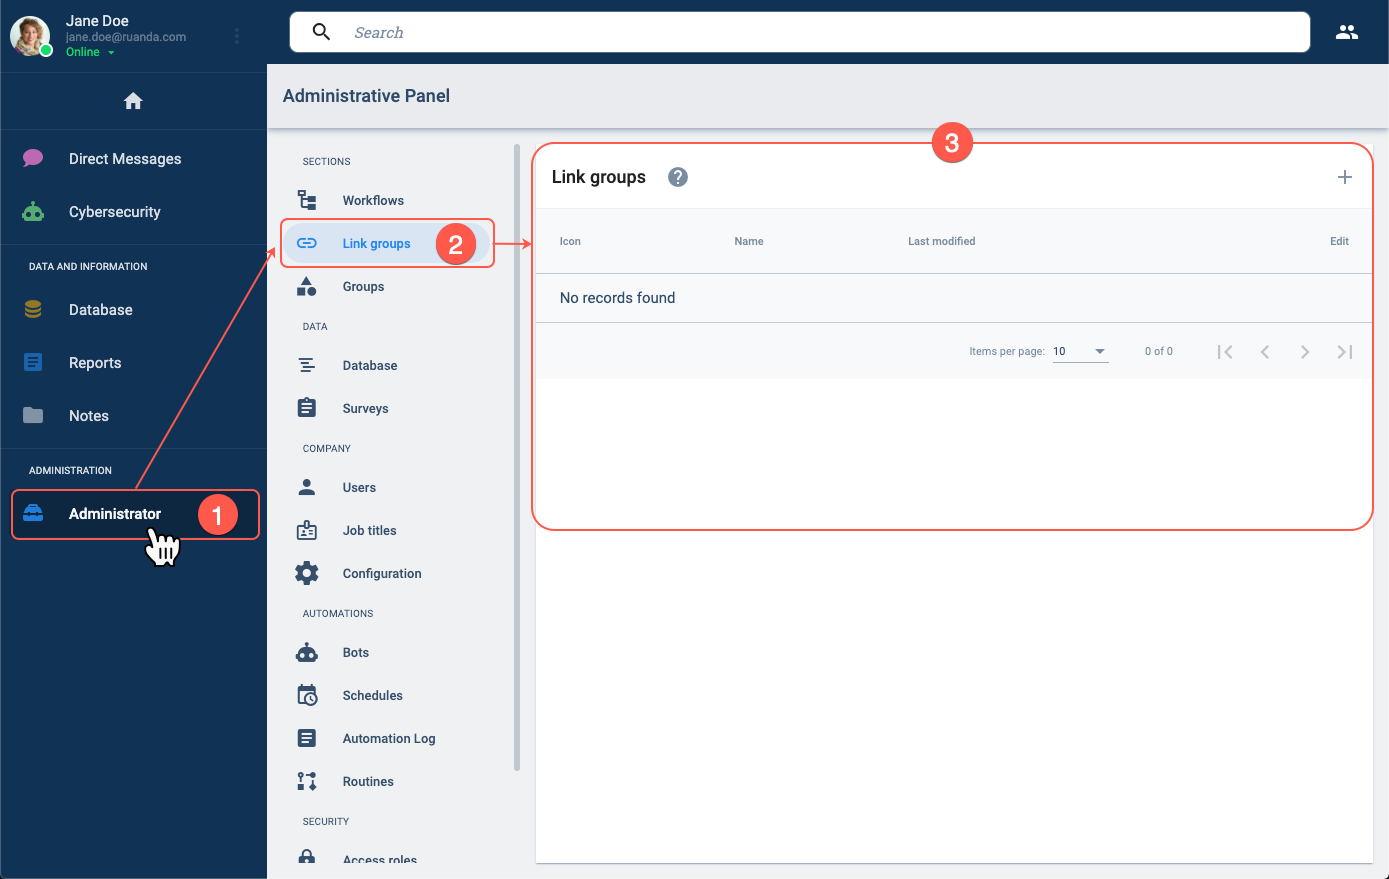
- From the Main Menu Bar, press the Administrator button.
- In the Administrative Panel, select Link groups.
- The Links groups panel will open up.
II. Open the Create Group settings panel.
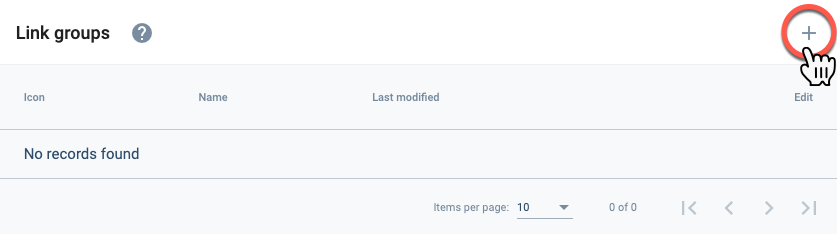
- Press the + icon to open the Create group settings panel.
III. Set up the Link Group.
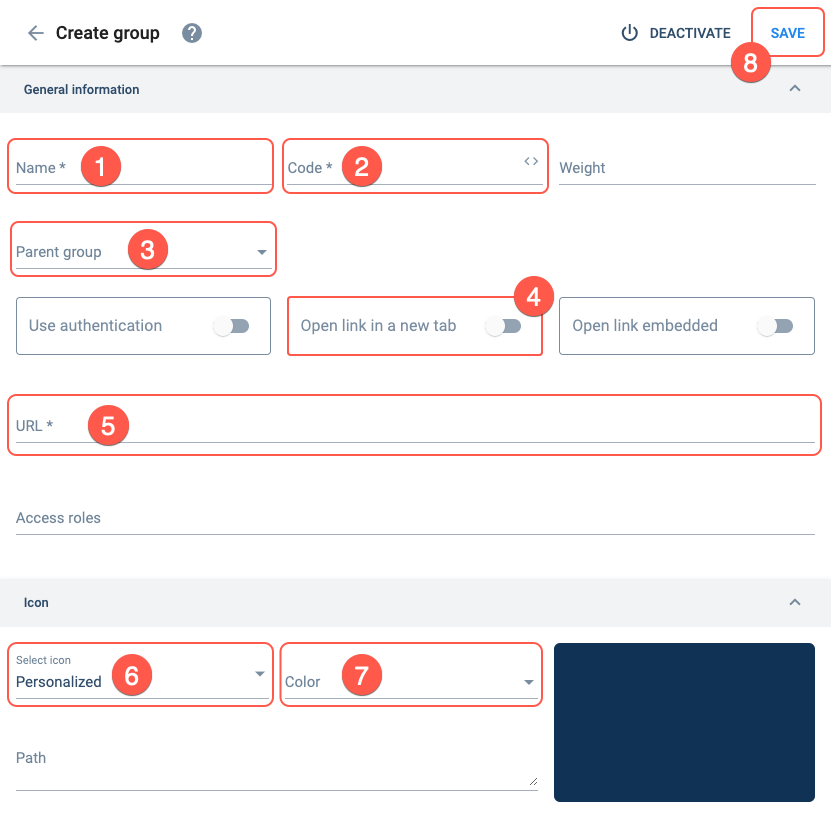
- Name: Cybersecurity Documentation
- Code: cybersec_docs
- Parent Group: Cybersecurity
- Open link in a new tab: Turn toggle bar on.
- URL: https://www.ruanda\.cl/cybersecurity
- Select icon: Book
- Color: Radium
- Press Save.
- The Parent Group hosts the group you are creating in the menu structure. For example, Cybersecurity Documentation is accessed through the Cybersecurity group's group panel.
- The link in the URL field is one of the mock links given in the Company Requirements.
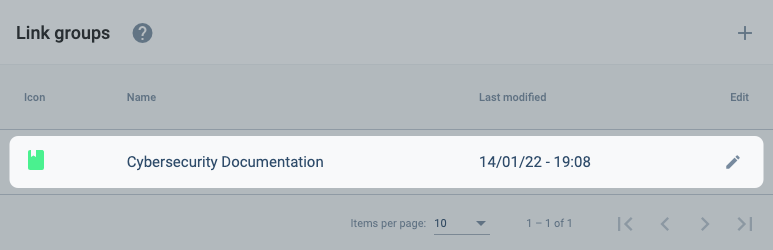
IV. Confirm the link group was successfully created.
After saving, the Links group section should look something like this:
V. Create link groups for the remaining groups. (OPCIONAL)
Repeat the previos steps.
Create as many link groups as you would like, but one more is enough, just to get a hang of things.
Result
The 'Cybersecurity' group with its channels and group link should look something like this:
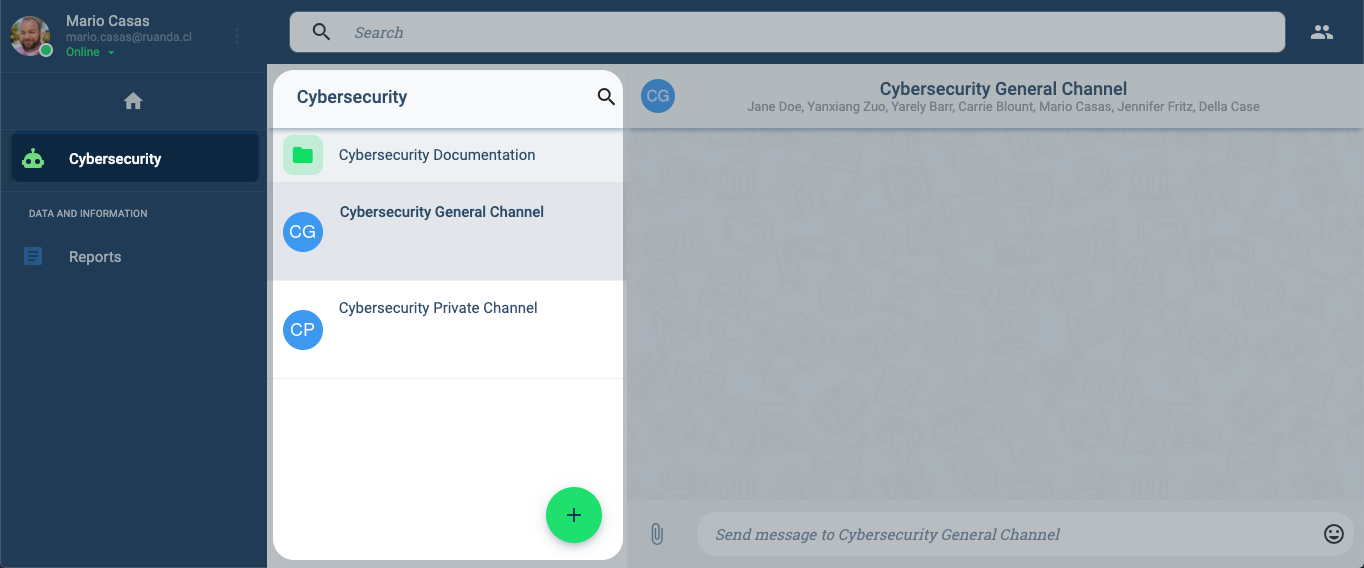
- If you don't see the new group icons in the Main Menu Bar, try refreshing the page.
- Notice that since the group link is set as a subgroup within the group panel, its icon is set by default to a folder icon and not the icon we chose in its settings.
Related Topics
- Link Groups Section: Administrative Panel Documentation
- COTGroup: Group data model
- Group API Requests: REST API Documentation