Configure Company Basics
Tutorial on how to edit company settings and create job titles.
Time: 7 minutes
- In the Administrative Panel, the company subdivision has three sections: Users, Job titles, and Configuration.
- In other parts of the documentation, we refer to a company as a data model that represents the business or organization and unites all other data models.
Company Requirements
As mentioned in the Overview, we will be working with a make-believe company called Ruanda for this tutorial. The company's first requirements are described below:
The company resides in Chile, but they work oversees, so its language preference should be set to English.
They have the following job positions that need to be integrated to the platform:
- CEO
- chief of cybersecurity
- developer
- finance manager
- project manager
- customer success manager
- secretary
- accounting
- marketing analyst
- field service representative
- human resources manager
- IT manager
Tutorial Objectives
Pre-Requisites
Access Role
- For simplicity's sake, use a User account with an access role containing the
admin-*-writepermission.
The admin-*-write permission enables writing in the entire Administrative Panel. Use with caution.
- If you do not have this permission, ask your admin for help.
- Below, you can see (1) an image of a user's settings highlighting their access roles. If you click on the access role in the user settings panel, the (2) access role's settings opens up. There you will see the permissions associated with the access role, i.e., the permissions the user has been granted.

Steps
A. Change Basic Company Settings
I. Go to the Company Settings Panel.
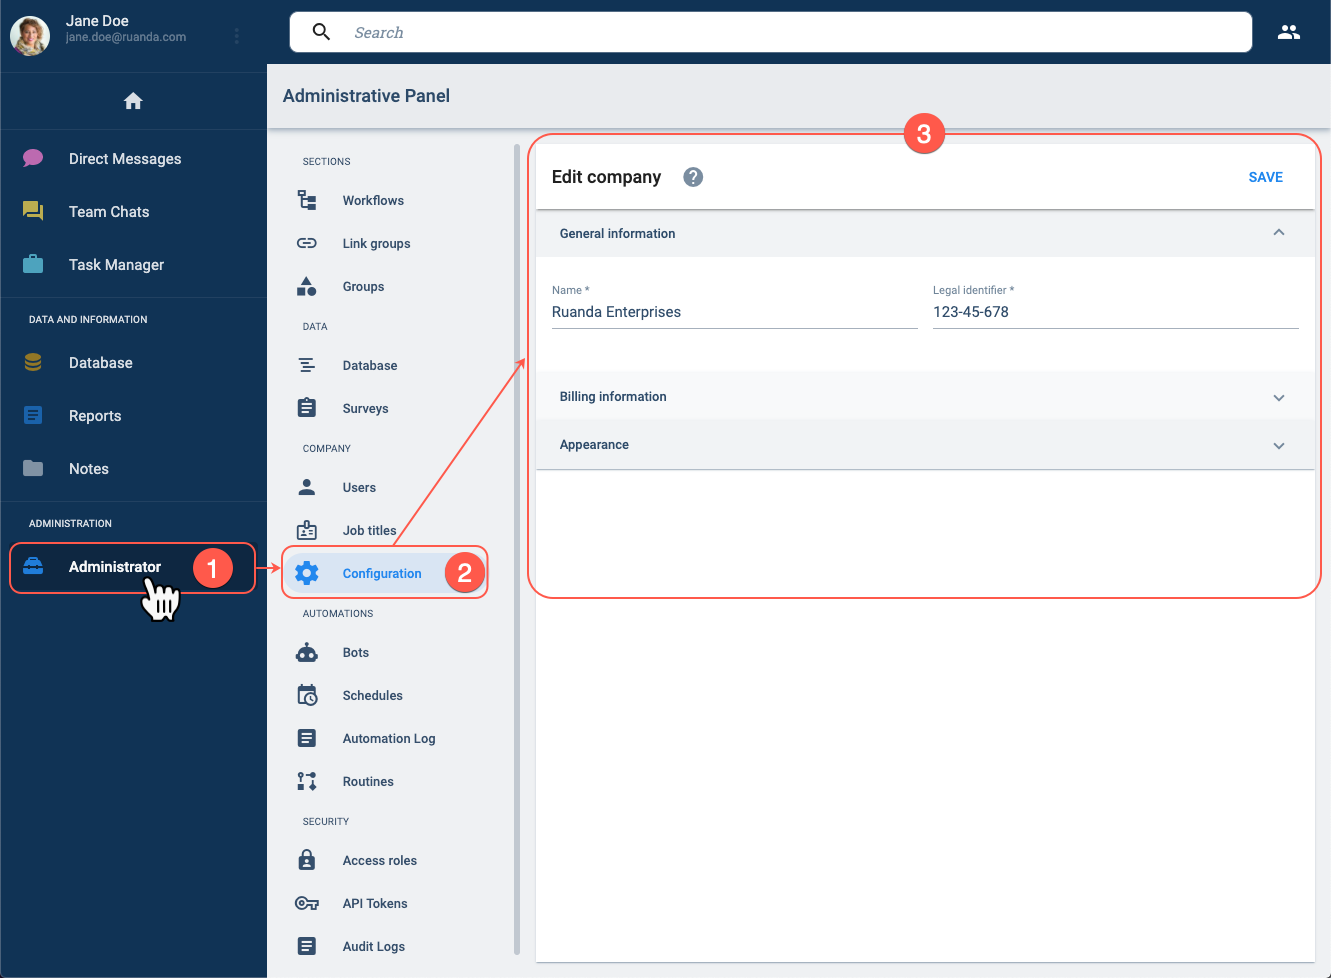
- From the Main Menu Bar, press Administrator button.
- In the Administrative Panel, select Configuration.
- The Company Settings Panel opens up.
The mock company settings could be different in your tutorial session.
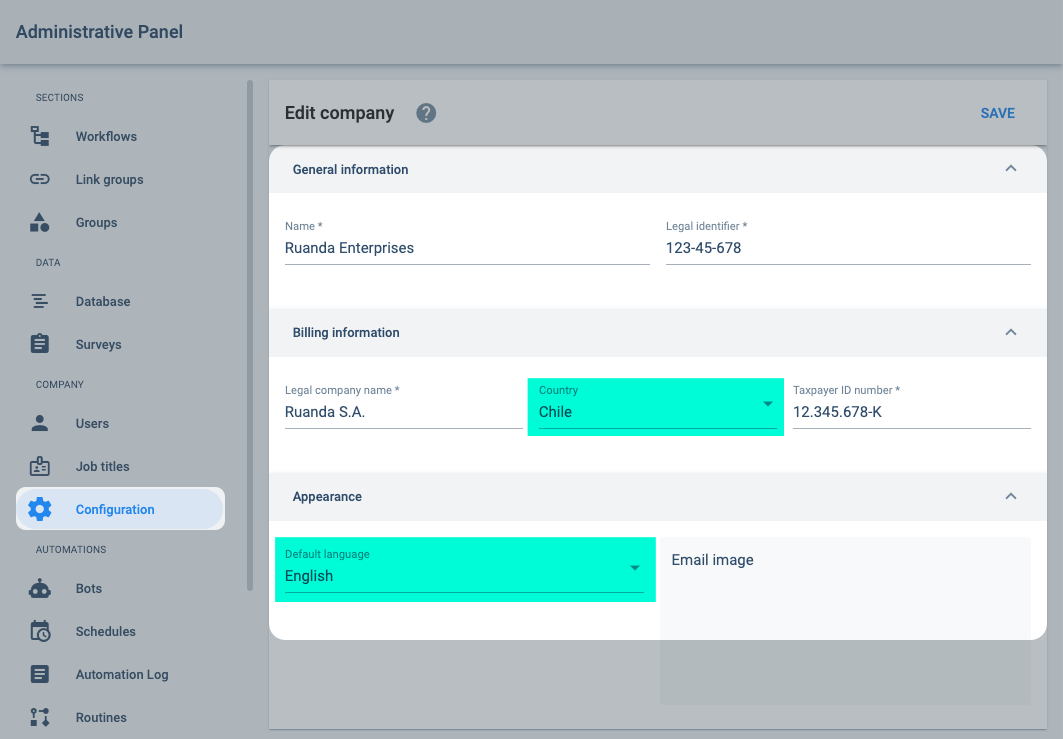
II. Change the company settings.
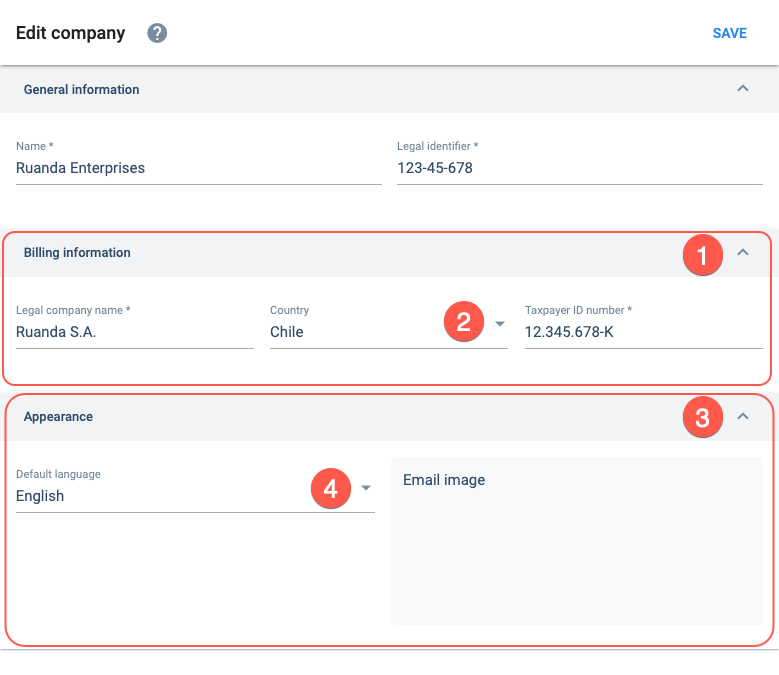
- Open the Billing information tab.
- Set the country to Chile.
- Open the Appearance tab.
- Set the language to English.
In general, the Cotalker platform is displayed in the language of the navegation browser it is being used on. The language option in the company settings sets the language used for certain variables, such as bots.
III. Save the current changes.
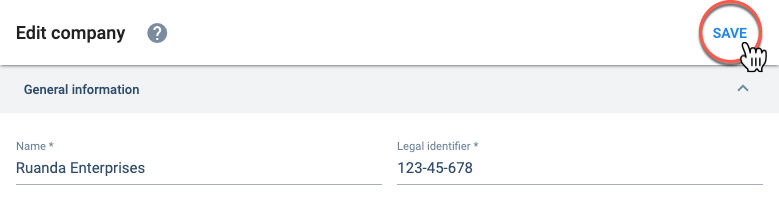
Press the Save button on the upper right-hand corner.
Don't leave the settings panel without saving. All changes will be lost if not saved before leaving.
Feel free to play around with the settings and save a different company configuration.
B. Create Job Titles
I. Go to the Job Titles section.

- From the Main Menu Bar, press Administrator button.
- In the Administrative Panel, select Job titles.
- The Job Titles Sections opens up.
II. Open a Job Titles Settings Panel.
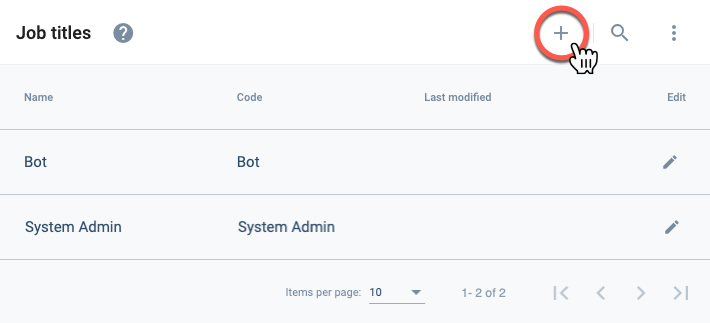
To open the job titles settings panel, press the + icon in the upper right-hand corner.
III. Set up and Save New Job Title.
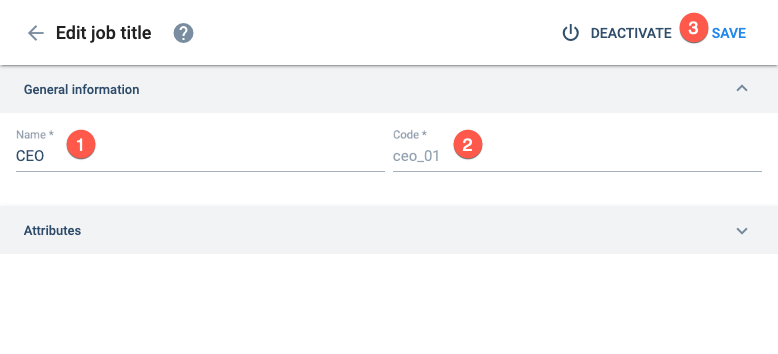
From the Job Titles settings panel,
- Enter the job title's name. This is the name will be viewed by other users.
- Enter the job title's code. This code must be unique and will be used by the system to identify the job title.
- Save when done.
IV. Repeat.
Repeat the procedure with the remaining job titles until done.
Feel free to add more or less job titles than those indicated in the company requirements.
Expected Results
A. When finished, your company configuration should look something like this:
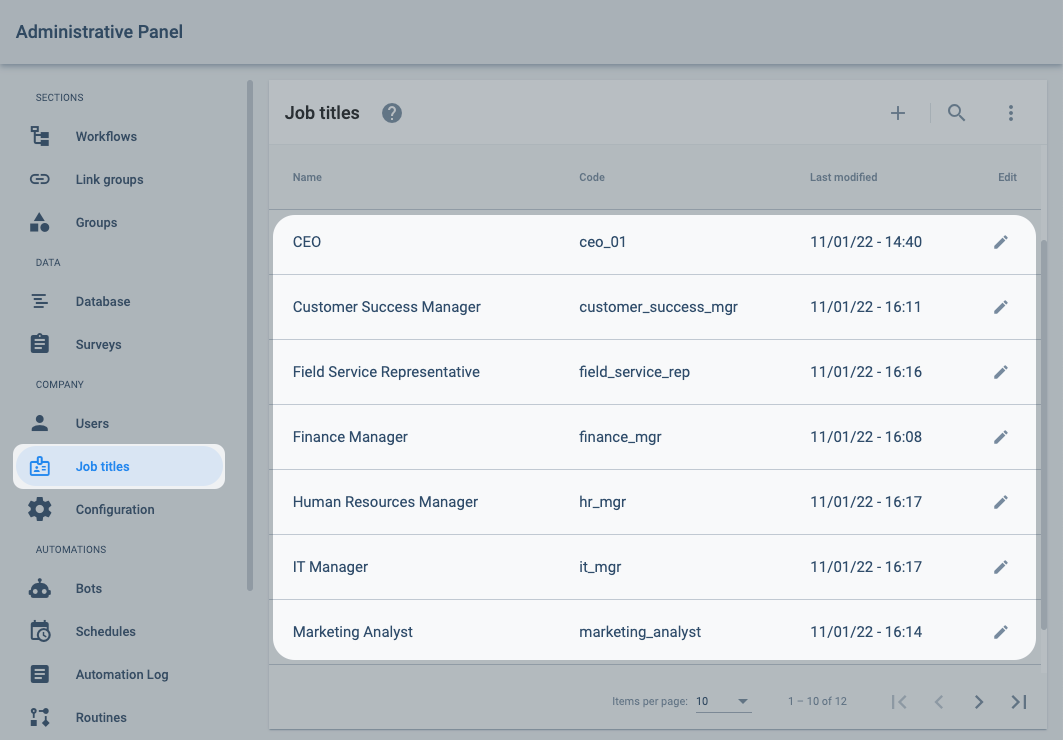
B. Your Job titles section should be similar to the image below.
Related Topics
- Company configuration: Administrative Panel documentation
- Job titles: Administrative Panel documentation