Customizations
Corrective Maintenance
Available on: Professional Plans Enterprise Plans Unlimited Plans
Example: Notification Workflow
Below you will see how to access the administrative panel and edit a workflow's settings.
Example notes
- Below, the Notifications workflow group is set as an example of how Cotalker modules can be easily modified.
- Workflow groups contain one or more workflows within them. Notifications is a workflow group that has one workflow called Notification.
Accessing the Settings Panel
Users with administrative access roles are able to access the Administrative Panel and configure Cotalker settings.
To access the Notifications workflow's settings panel:
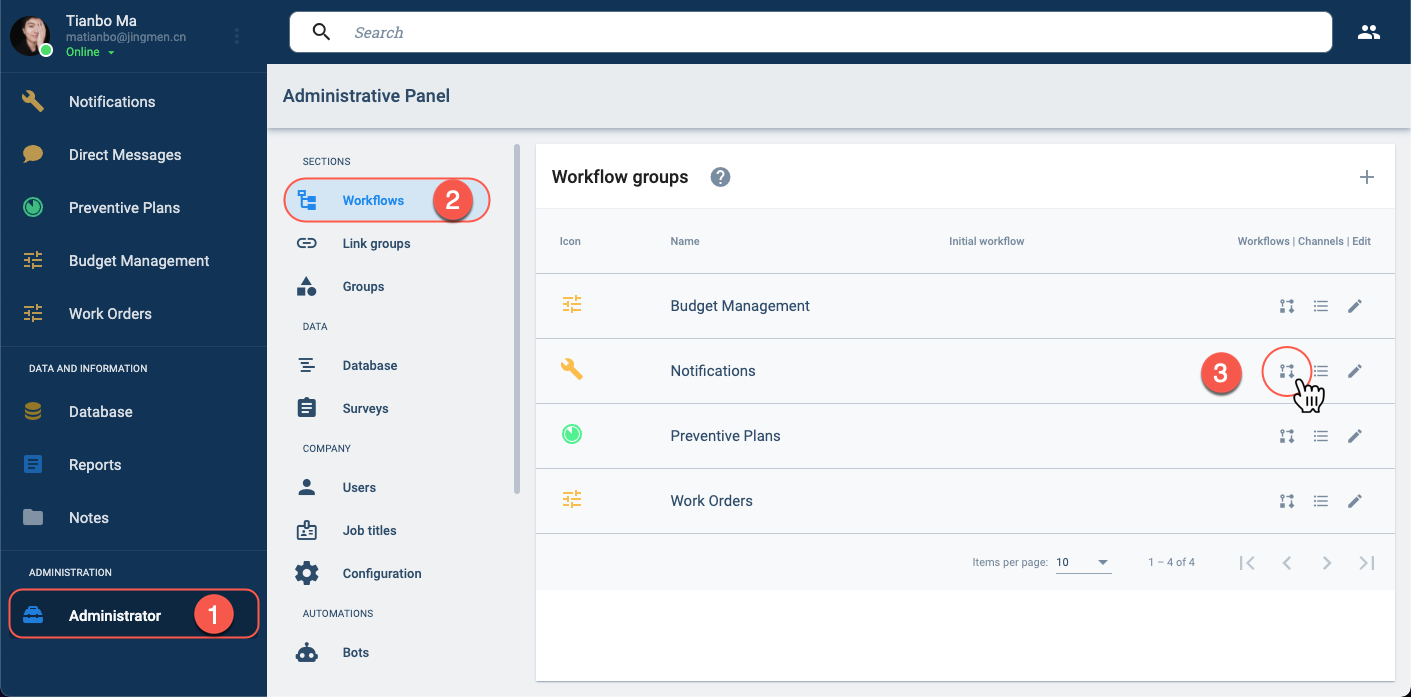
- In the Main Menu, press Administrator to open the Administrative Panel.
- From the Administrative Panel, select Workflow. The Workflows groups panel opens up.
- In the Workflow groups panel, on the Notifications row, select the indicated icon to open up the workflows settings panel.
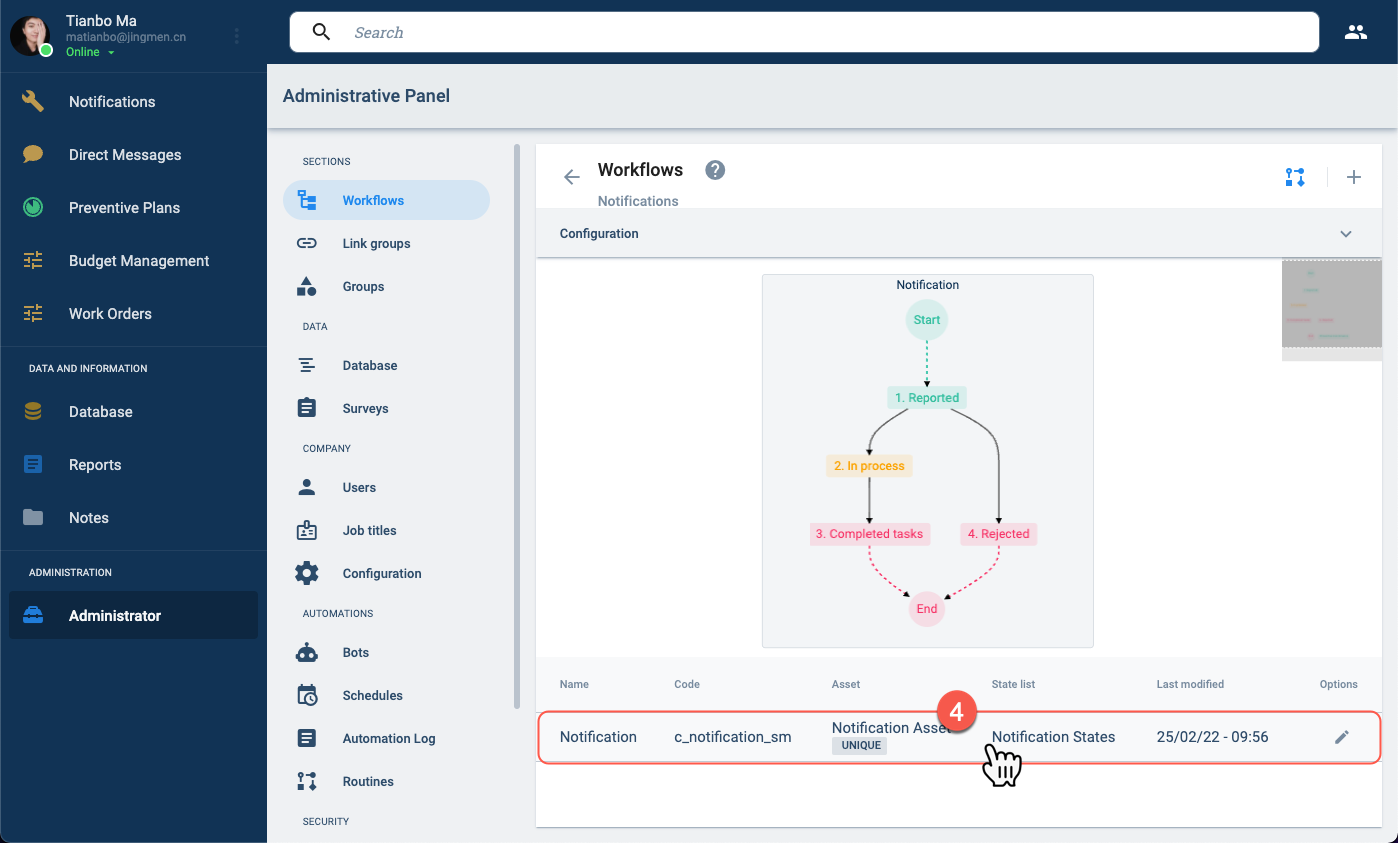
- From the Notifications Workflows, select the row displaying the Notification workflow. The workflow settings panel opens up, as shown below.
Settings Panel Layout
On the settings panel, you can modify the process following each state, add routines, configure SLA routines, and other automations.
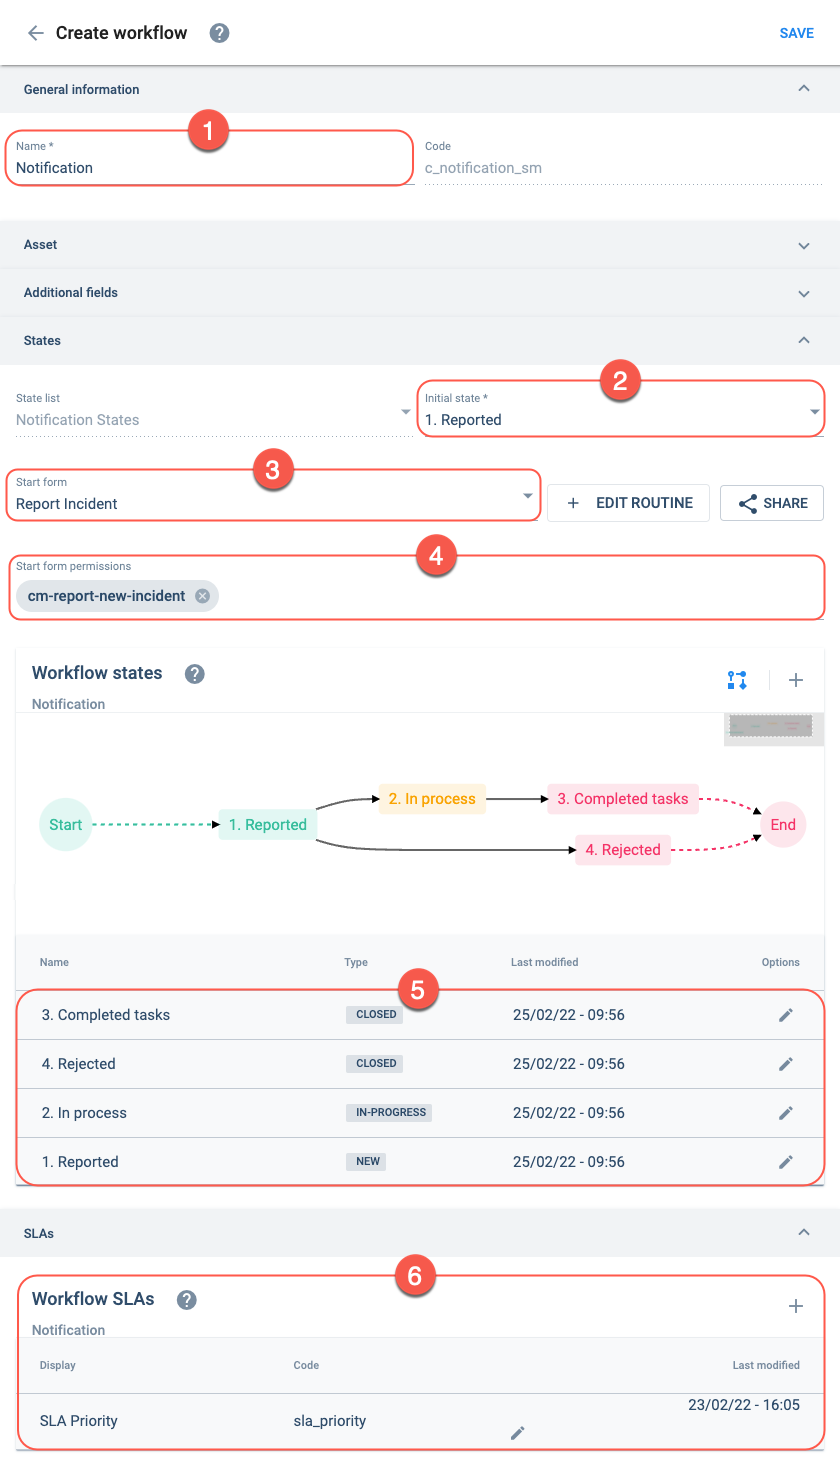
- Name: The workflow's name.
- Initial state: Indicates the state the workflow starts in.
- Start form: Indicates the survey form used to initiate the workflow. In this case, to create a notification.
- Start form permissions: Only users with this permission can use the survey form to create a new notification.
- Workflow states table: The states or steps of the process. Clicking on them permits editing their configuration.
- Workflow SLAs: Displays SLA routines that are triggered to help complete deadlines. SLAs can be created or edited from this table.
Related Topics
- Create/Edit Workflow: Administrative Panel Documentation
- Create a Workflow Tutorial: Tutorial on how to create a workflow that can process tasks through five different states.