Start Forms

Summary
By default, users can create a task or change its state through the tasks view section. However, administrators may require users to complete a survey before creating a new task or before changing the task state. Adding a survey trigger before creating a workflow (Workflow Start Form) or changing a state (State Start Form) allows administrators to:
- control what type of tasks users create,
- ensure that the users provide all necessary information when creating tasks,
- and manage workflow state changes.
Furthermore, configuring a survey to initiate a workflow gives users the ability to use the bulk loader, i.e., submitting multiple surveys at once by gathering data from a spreadsheet provided by the user. Thus, allowing users to initiate multiple instances of a workflow, each one configured accordingly.
Workflow Start Forms can also be shared outside the Cotalker environment, allowing visitors to create new tasks.
Workflow Start Form
Without configuring this feature, administrators will allow users to create any task and create them with incomplete data, such as assignee, deadline, state, and other necessary information.
Once set up, the survey can be accessed through the workflow group's action button.
By setting up a Workflow Start Form, a channel is created within the workflow group to host the newly created task and will display the answered survey used to generate the task.
When using a Workflow Start Form and some input error prevents a task from being created, the channel will be generated but without an assigned task. It will be the implementor's duty to notify this problem adequately in the channel; the user must be told to re-send the survey and make the necessary corrections to create the task appropriately.
Step-by-step configuration:
The following steps are provided as a general example guide. For full, in-depth explanations please refer to the Routine Builder.
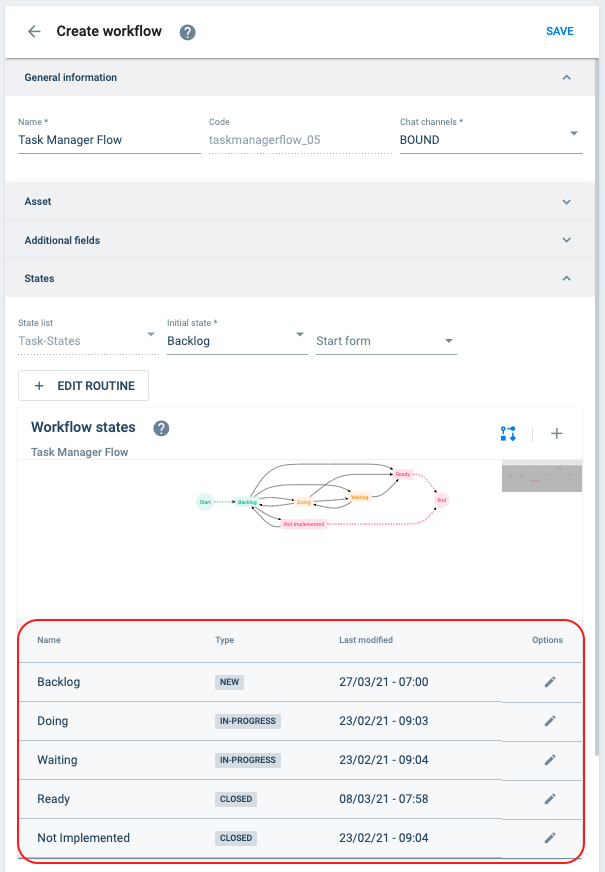
Go to the Workflow section and select a workflow group from the list.

Inside the workflow group select a workflow or create a new one.
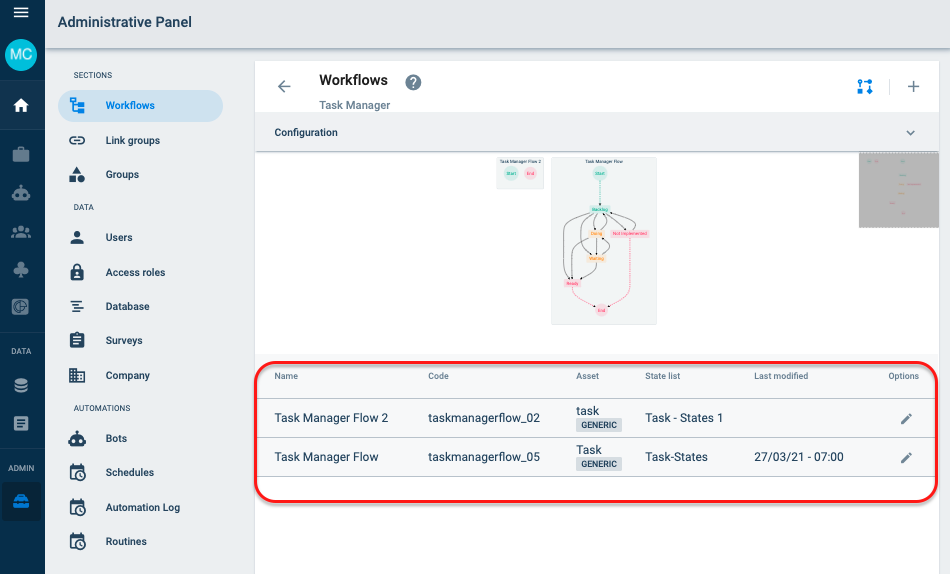
- After choosing the workflow, workflow settings panel will appear. Follow the general procedure for configuring workflows, while also applying the subsequent steps.
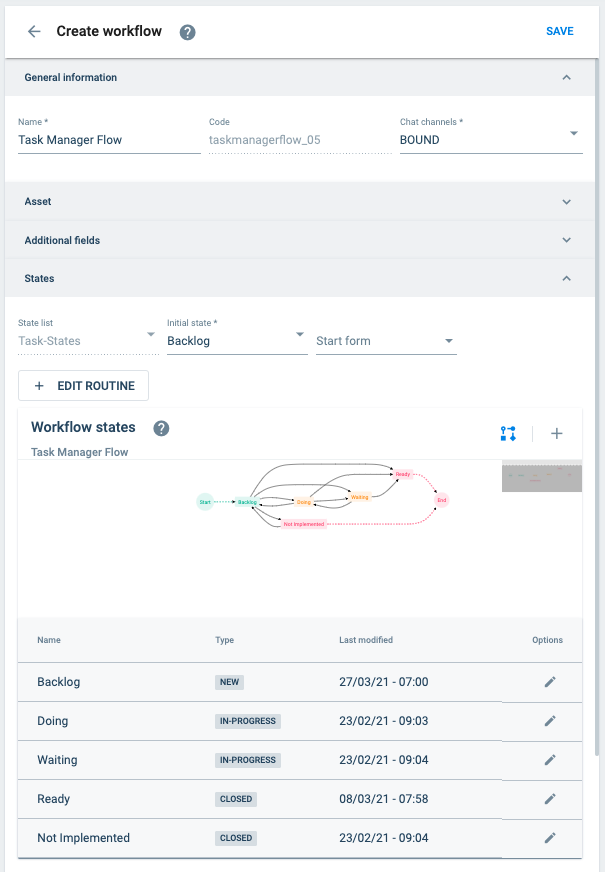
Under General information, ensure that the Chat channels option is set to
BOUND. This will generate the necessary channel for the new task.
Under States, in the Start form field, choose the previously made survey that will guide users in starting new workflows.
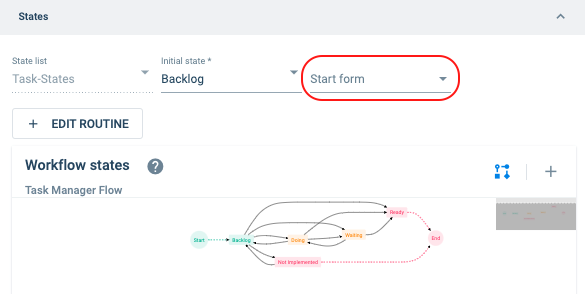 note
noteOnce a survey is selected, the Share button will appear. Go to Public Survey to find out more about sharing Workflow Start Forms with external users.
Next, select the Edit Routine button to create the necessary automation.
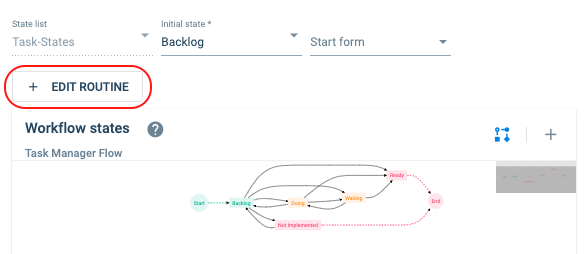
The Routine builder dialog box will appear. Add a stage and set the Type field to
Create Task.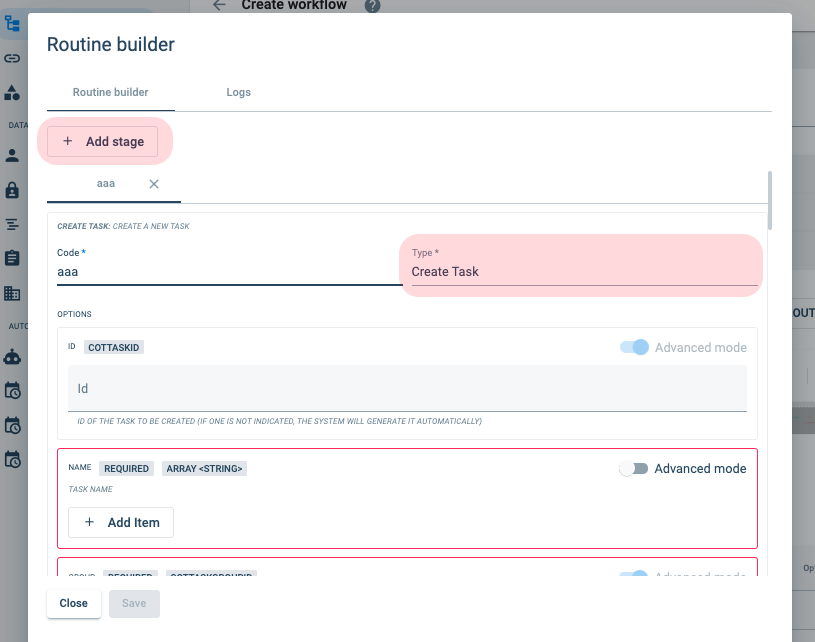
Follow the general procedure for building routines keeping in mind the required configurations mentioned below.
New fields –based on the the Create Task bot– will appear. In the Name field, press the Add item button, and include a COTLang Script command like the following:
$VALUE#answer|data|[find=>identifier=text_input_question_identifier]|process|0
Ensure to add the group from which the task is created. The Group field should look like this:
$VALUE#meta|taskGroup
The User field must have the following:
$VALUE#answer|user
In the Channel field, the corresponding channel must be indicated with the following:
$VALUE#answer|channel
The Workflow Start Form must be associated as an answer to the task. In order to do this, the answer's universally unique identifier (UUID) must be included in the Answers field:
$VALUE#answer|uuid
The assignee value is optional. By default, the user creating the task is set as the assignee, but this value can be changed:
$VALUE#answer|user
(ONLY FOR SUB-TASKS) If the task being created is a sub-task within a parent task, the following must be indicated:
$VALUE#meta|parentTask
State Start Form
Configuring a State Start Form for when users want to modify a workflow's state is a little bit simpler than the previous case. Unlike the Workflow Start Form used for creating a new workflow, it isn't necessary to add a bot or specify a routine to the State Start Form when changing a workflow's state.
This feature makes configuring the State Start Form easier. In case an automatic response –like sending an email to the CEO– is desired after changing the state of a workflow, a bot can be configured through the Edit Routine button.
If a routine is afterwards added, the automatic change of state is disabled and must be then configured manually as a step in the routine.
Step-by-step configuration:
The following steps are provided as a general example guide. For full, in-depth explanations please refer to Predefined Routines.
Go to the Workflow section and select a workflow group from the list.
Inside the workflow group select a workflow or create a new one.
Finally, in the workflow settings panel, find the state list and select the state that is going to be changed.
The create state panel will open up.
Under State changes, go to the state(s) the will require a survey. In their Start form field, choose the survey previously created to process the state change.
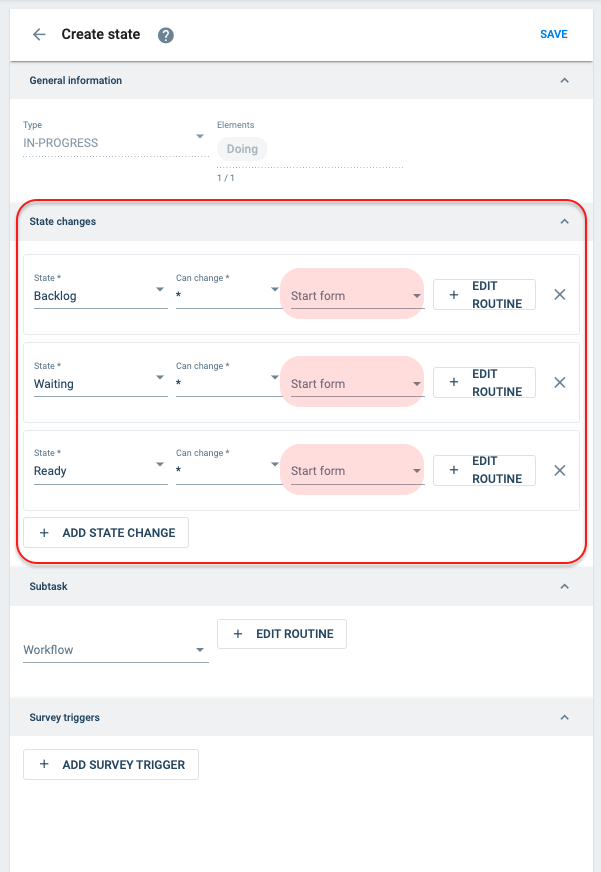
- If administrators desire an automatic response to occur when a state change is made, a routine should be created through the Edit routine button. Otherwise, it is not necessary to go through this step. Click here for more information on routines.